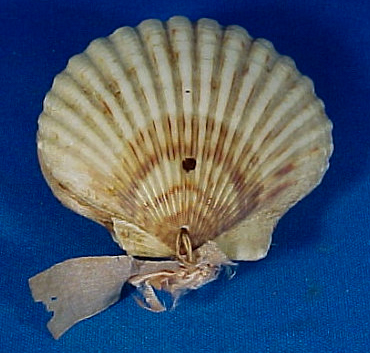
An original Victorian era pin cushion, courtesy of AmericanaAntiques.
Summer will be coming to an end soon, although temperatures here in the south will be summery for many weeks yet. Collecting keepsakes to remind ourselves of happy places is nothing new. Victorians made it into quite an art. Literally!
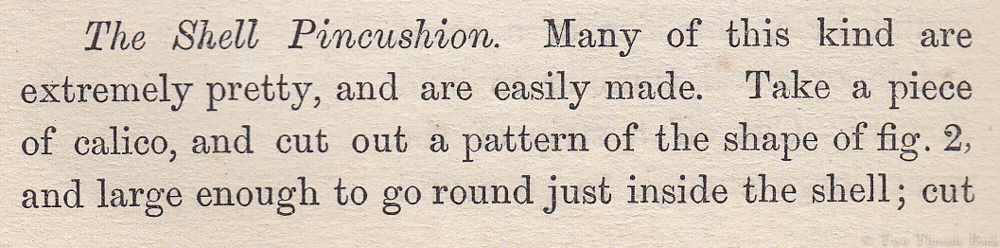
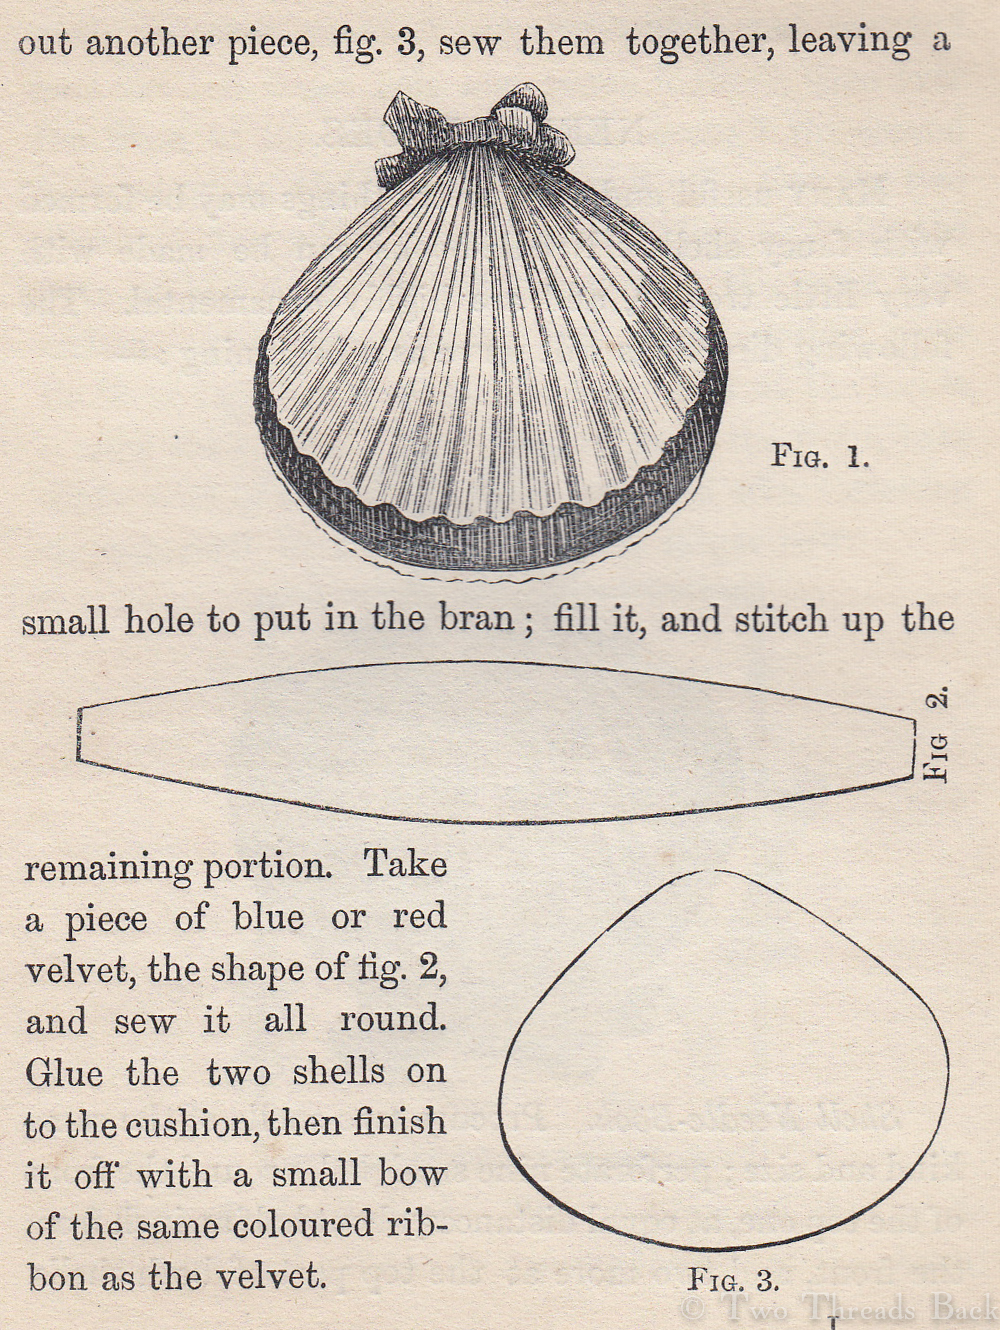
I was browsing an 1860 book of toys for little girls, and came across these directions for a charming pin cushion. Hmm … a new project? Victorian shell art reached heights that defy description, but this little trinket is so simple and sweet that every workbox deserves one!
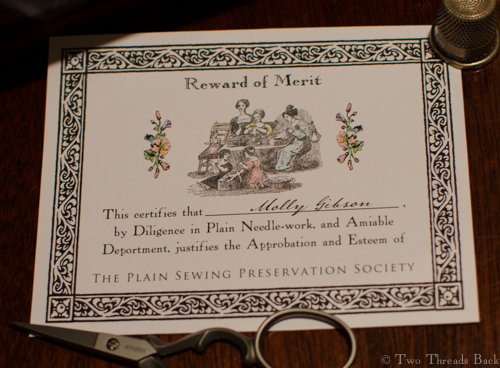
The reward of merit: a token of our appreciation.
P.S. If you make one, please share a picture? You will receive a token of gratitude (inscribed with your name) from the Plain Sewing Preservation Society!
And now back to plain sewing….
A teacher’s sample, dated 1900.
Do you know how to write instructions in such a simple, straightforward, concise manner that anyone can follow them perfectly? I wish I did.
I was working on a project that required an explanation of “felling,” and reached the point where a little testing of the prototype was in order. I found a Reluctant Victim, and with mild apprehension, gave her the draft to read and check for clarity. She read, pondered, frowned, sighed.
Fail.
The work prepared for running or backstitching.
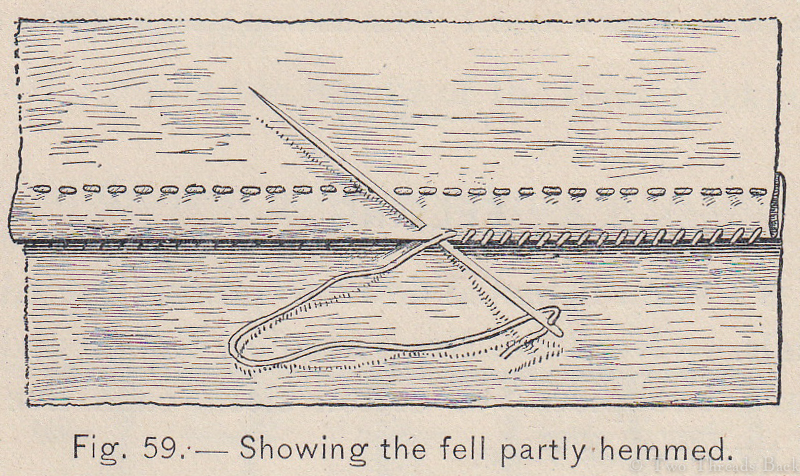
The fabric after it has been sewn together, and the fell is being hemmed down.
After some discussion, I realized that there was more to this little bit of plain sewing than could be covered in my one-sentence description. Why? Because there are a couple of variations, as well as some similar stitches that our g-g-grandmothers used (e.g., French seam, counter-hem, German hem, mantua-maker’s hem) to confuse things. Too much info for a sound bite project.
Sure, felling is just a method of joining two pieces of fabric so that the raw edges are enclosed and hemmed down. But there wasn’t only one way to fell a seam: it was that first line of sewing that made the difference.
The first line of sewing joins the two pieces of fabric. The second one (it was always almost always hemming in hand work) fastens down the folded edge. So for the first line,
You could use a running stitch. You could use a backstitch (called stitching in early English texts). You could use a half-backstitch (variation of the above). You could use a very shallow overcasting stitch (called sewing -common earlier, or seaming – common later, in 19th century English texts).
This difference in the first line of stitching made all the difference in understanding period instructions on how to fold it and how to hold it. (Sorry, Kenny.) That’s what gave me real problems when trying to condense my instructions.
Methods that use a running stitch or a backstitch are easier to explain, and they’re the ones most people use today when hand sewing. You place the pieces right sides together and sew. Then spread the work open, fold one edge over to cover the other, and hem it down.
Seaming
It’s the last method that gets a little tricky, the one that uses seaming (I’ll use that term since that’s what I called it in Plain Needlework and to use “sewing” can be confusing!) for the first line of … sewing. (See what I mean about confusing terms?)
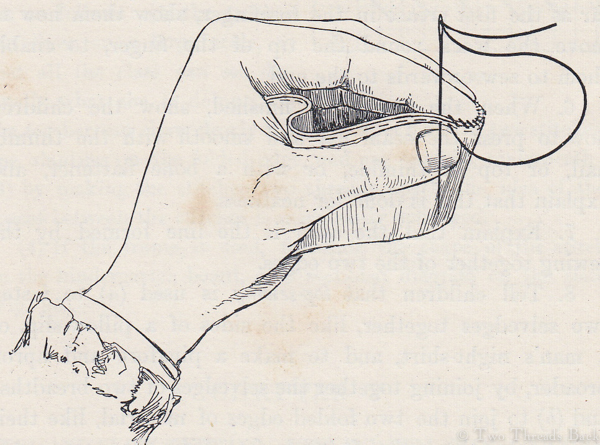
The work held properly for seaming, from a period manual.
Seaming was a sturdy method of joining two pieces that utilized every inch of fabric. When you spread the seam open, the edges look butted together.
Linen used for underclothing early in the century had nice selvages that could be joined this way. Therefore, it’s easy to see how a seamstress would be inclined to use the same stitch if she had to join two “cut” (non-selvage) edges. Because you should never use selvages that have unsightly little holes!
An excerpt, dated 1821:
SECOND CLASS.
Q. How should you fix a seam? – A. I turn one paper down once, and the other once on the right side, and turn it back again the same width to form the fell.
Q. What do you do next? – A. I pin the two pieces together.
Q. What should you do before you fix two selvages together? – A. Examine them, to see if there are any little holes in them.
Q. If there are, should you sew them together? A. No, cut them off, and fix a fell seam.
How do you prepare and hold the fabric if you want to use seaming? Most of the old manuals say the fabric is held wrong sides together and worked on the right side. And that’s how all the illustrations show it. After all, if you’re turning down the edges before you seam them, you don’t want those pesky folded parts in the way while you work, right?
But there are a few sources that say otherwise. A Sewing Course for Teachers advises placing right sides together for seaming, because the slanted bits of thread will then be inside, and the straight bits will be hidden in the grain of the fabric on the right. (See the pics in the Flower Patch post for an example.)
And in that venerable text, The Workwoman’s Guide, A Lady states
The work for sewing is thus prepared: the two selvages are placed together, or if there are no selvages, the raw edge of one piece is turned down once, and the edge of the other piece is turned down double the width, and then half the width is turned back again for the fell. The two pieces are pinned or basted together, with the parts turned down face to face and held firmly between the finger and the thumb…
At first I assumed she meant to place both whole pieces of fabric face to face. But after considering a century’s worth of other sources, I think “A Lady” meant that only the folded down parts are face to face. The two pieces of fabric are actually wrong sides together.
So what was “the rule” back then? I believe that seaming without felling was done either on the right or wrong side of the fabric – assuming there was a difference in the right and wrong sides! And I think seaming for felling was usually done on the right side with the little folds tucked inside. But does it really matter? Maybe I’m the only soul on earth who finds it interesting?
Folding for Felling, the old-fashioned way:
If, however, you also like picayune sewing trivia, below are some images showing the method of folding for felling. I’m really surprised that such consistent, detailed instructions and examples have survived. And very, very grateful!
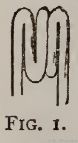
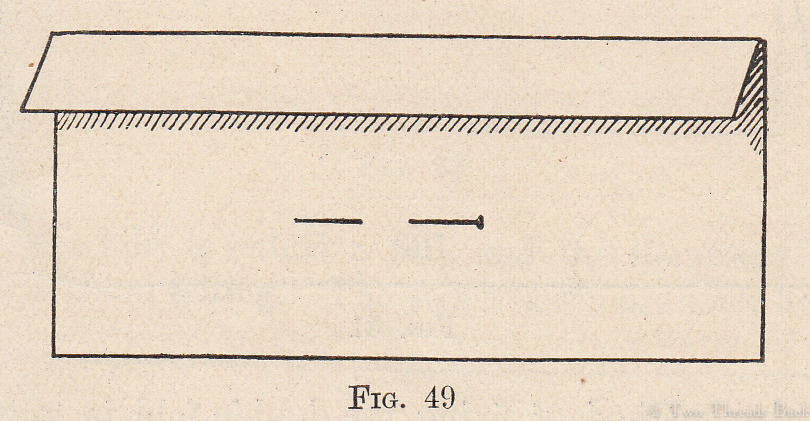
Children learned by first folding paper in preparation for felling. Plain sewing manual, 1821.
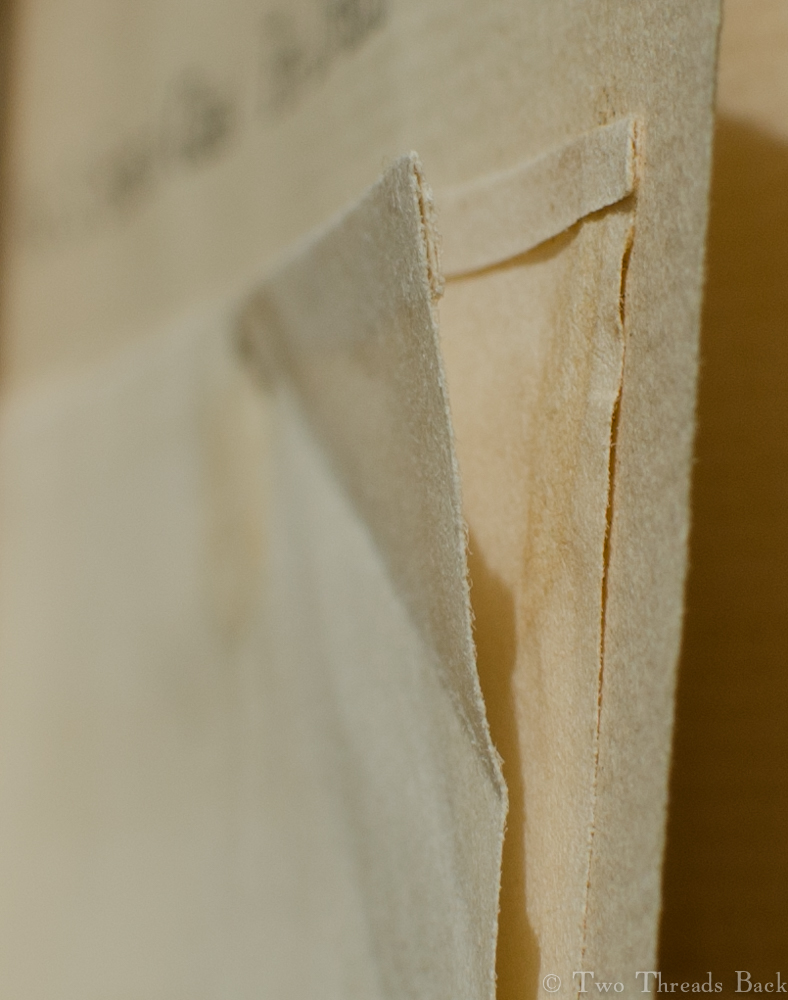
A close-up of the folded paper that has come unglued.
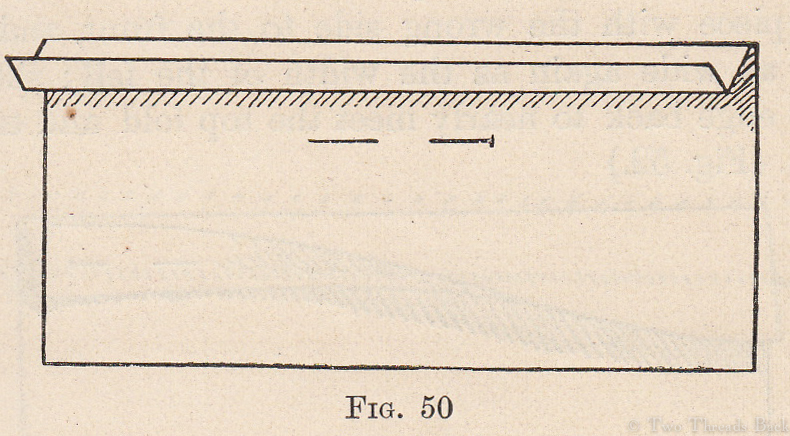
Even closer-up! You can just barely see the double fold in the top paper.This 1890s manual illustrates the fold on the first piece.The fold on the second piece.
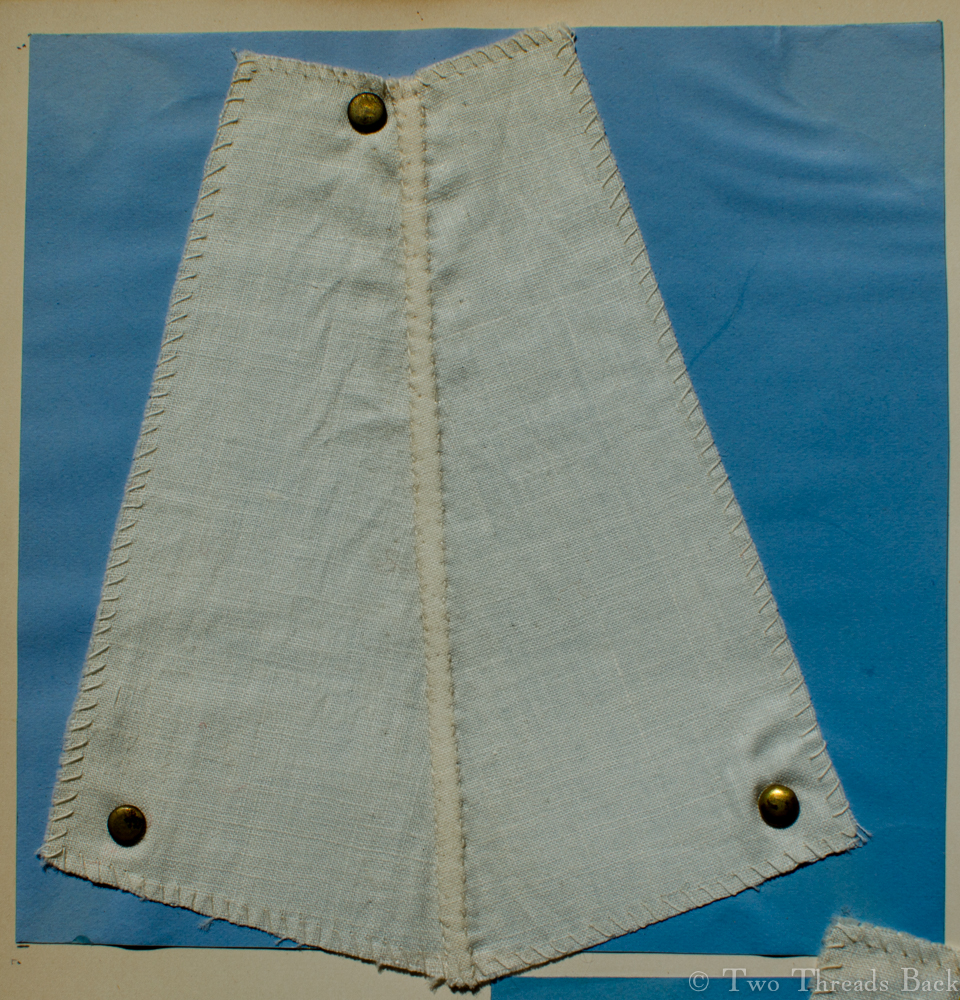
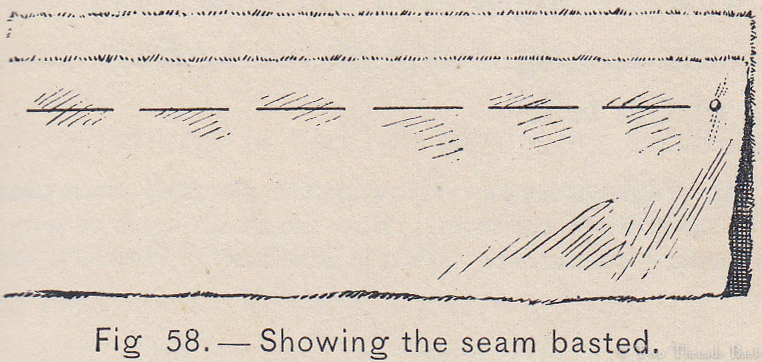
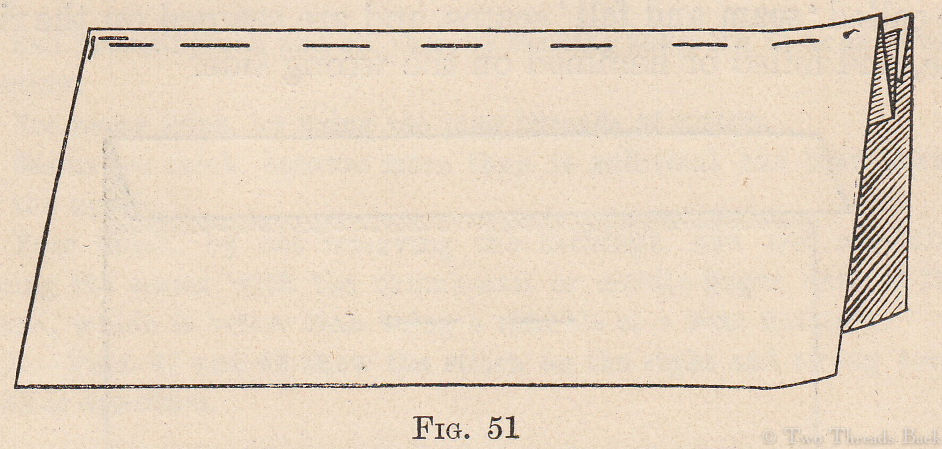
The pieces aligned and basted together for seaming.
Now, what method do I use? Mostly run-and-fell. But sometimes I use seaming because it’s my favorite stitch to work. I recommend doing what suits your project or suits your fancy. Anyone who sews two left sleeves on a blouse, twice!!, can’t be too snooty about setting standards.
Although some 19th century sewing teachers were! Writing in 1884, Miss Jones insists,
“Run-and-fell is not allowable in plain needlework. It must be called ‘scamp-work.’ If properly done, it takes as long as the seaming and even then is not very secure….”
Tackling this topic helped my muddled mind, and made me decide to simplify that project. Run-and-fell only for that one. I guess that makes me a shameless promoter of scamp-work!


