“About 1849.” Except for the owner’s name, that’s really all I know about the history of this particular little sewing album. It’s bound with marbled paper card stock, edged with silk ribbon, and the colorful pages have the feel (and unfortunately the quality!) of children’s construction paper. Written inside the front cover is “made about 1849 by Mary M. Quiston, later Mrs. Reid, later Mrs. Porter.” (The “M. Quiston” might be “McQuiston.”)
Samplers of cross stitch (marking), embroidery, or darning skills have a long history in Britain, America, and Europe, but the popularity of books containing specimens of plain sewing stitches began in England in the 1810s. They were developed as part of the “monitorial” education system where pupils who had mastered a skill instructed the ones who were just learning it.
This system of “mutual education” was originally applied to basic reading, writing, and arithmetic, then to plain needlework since it was an essential part of female education. Understanding sewing instruction techniques was much easier if you had a small sample to see. Books with samples of hemming, stitching, seaming, marking, etc., were originally intended to help a teacher follow “the system” in her classroom, but also developed into treasured collections preserved by the girls who had worked them in order to demonstrate their accomplishments.
This is one of two caps included in the 1816 British and Foreign School Society manual, a book intended as a guide for educators who were using their monitorial system. It’s attached to the page so I can’t fold it out to show it well, but there’s a tiny number “1” marked in red cotton barely visible on the left. The other cap is marked (surprise!) “2.”
The earliest books might include a miniature shirt, cap, or apron, but it wasn’t long before they added other items like stockings, sleeves, dresses, trims, etc. to the classes. Educators appreciated the savings in time and expense that using small samples offered (and heaven knows charity schools needed to economize!) but maybe they had another reason as well: it was fun making tiny garments that were just like doll clothes! Here are some of my favorite pages from Mary’s book.
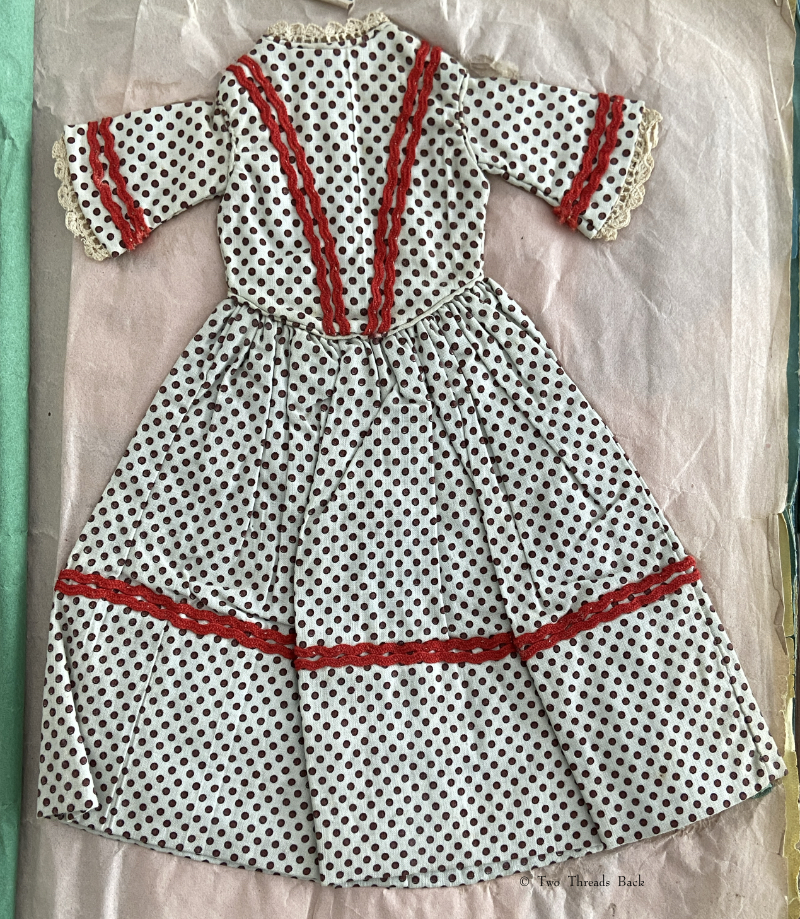
This dress is a simpler style than the sheer one above and it’s made of printed cotton.
Mary sewed this child’s dress with nine tucks in the skirt, gauged gathers, and trim she (probably) made herself.
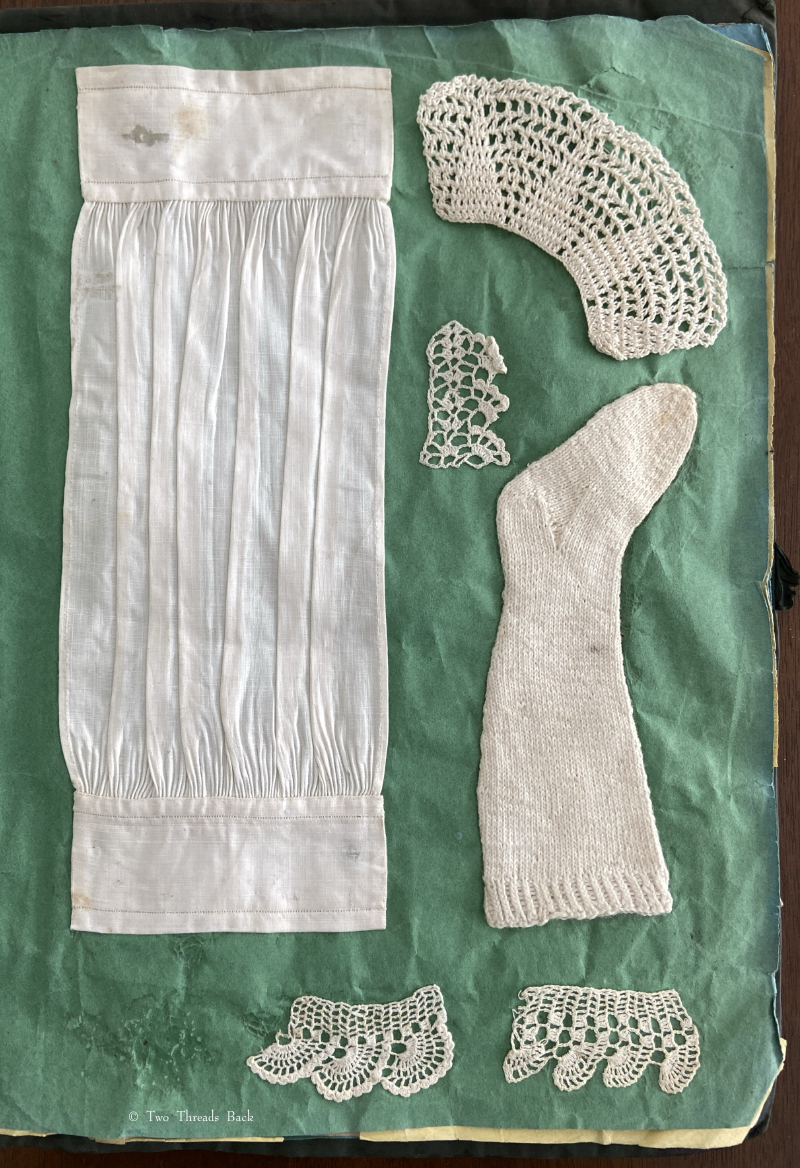
We can’t forget the MOST important garment in the Plain Sewing repertoire: The Shirt. No course in plain sewing was complete without this accomplishment!
Here’s an example of the practice cuffs or wristbands that would have been worked before she advanced to making the above shirt. Knitting was also an essential needlework skill for women, and most 19th C sample albums included examples. There was a single full-sized stocking tucked into the book also.
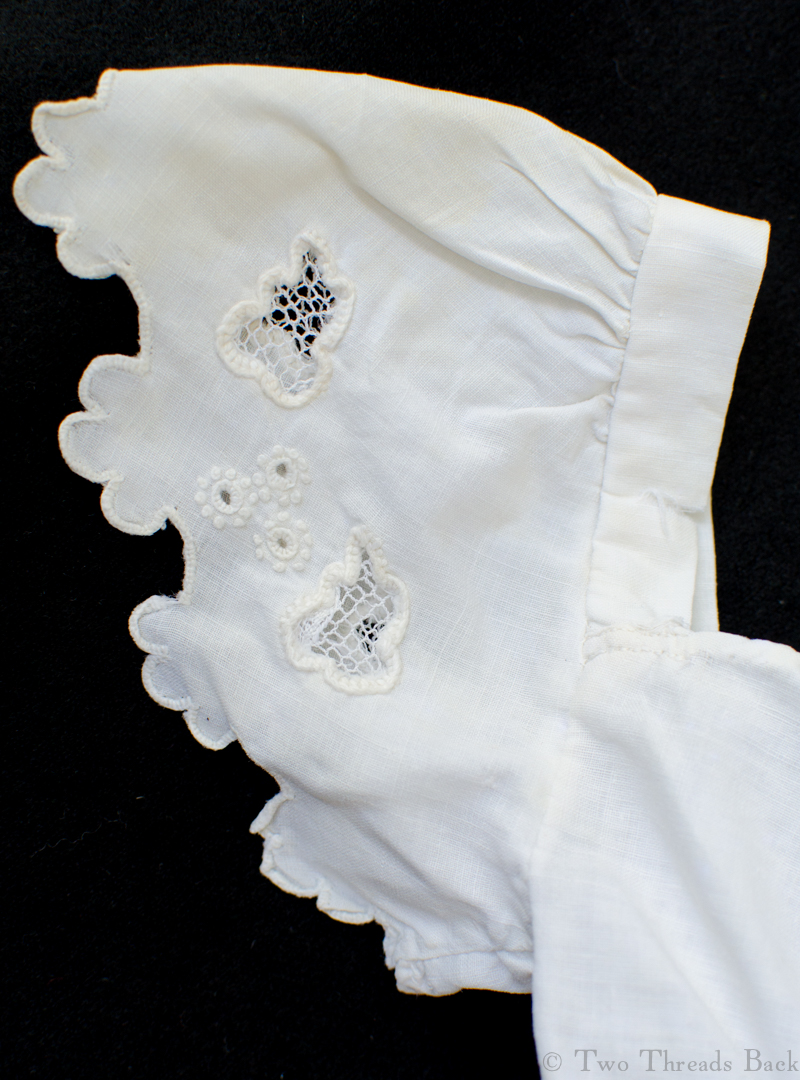
Plain and fancy! Mary did all the hemming, seaming, and making buttonholes in her earliest lessons, but she obviously got to learn some fancywork as well. If you get a thrill looking at daguerreotypes of that time (Pinterest is sooo addictive) you might recognize the vandyke collar pattern that was so popular then.
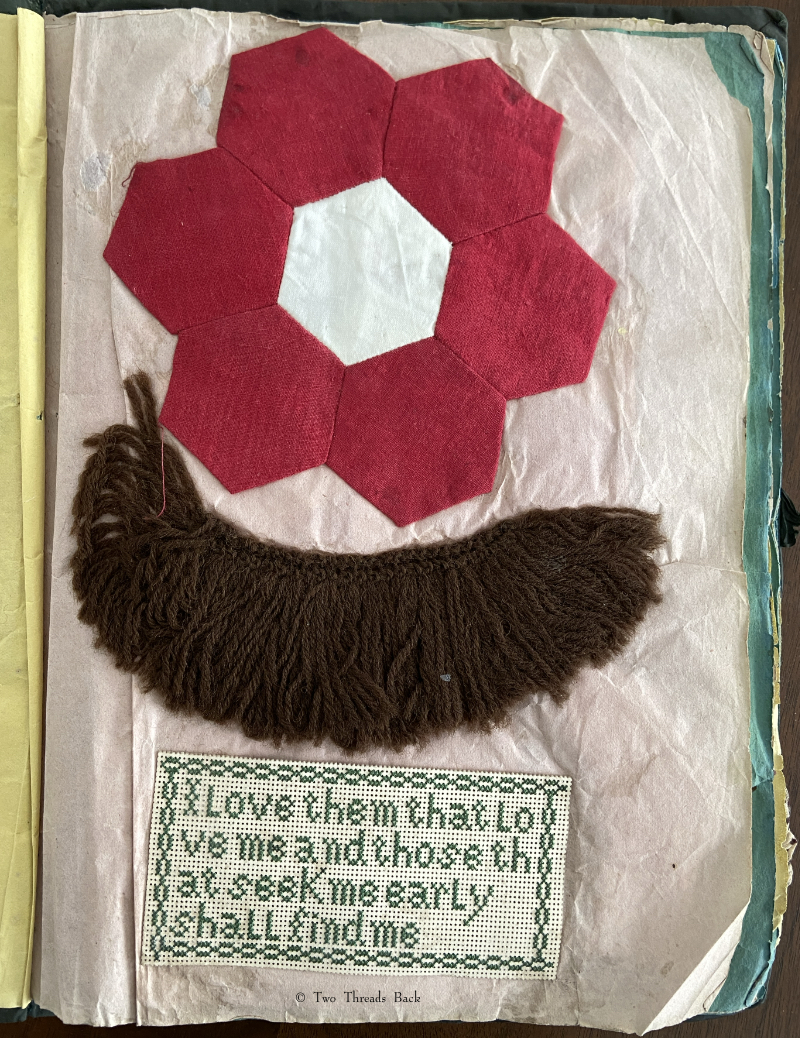
Nope, it’s not a walrus mustache. It’s some pretty (or not!) wool trim, useful for Victorians who didn’t know the meaning of restraint in decor. Mary also made a hexagon quilt patch and worked a scripture verse on punched paper. I don’t understand why 19th C needle workers seem so untroubled by words that run out of roo– m. Why???
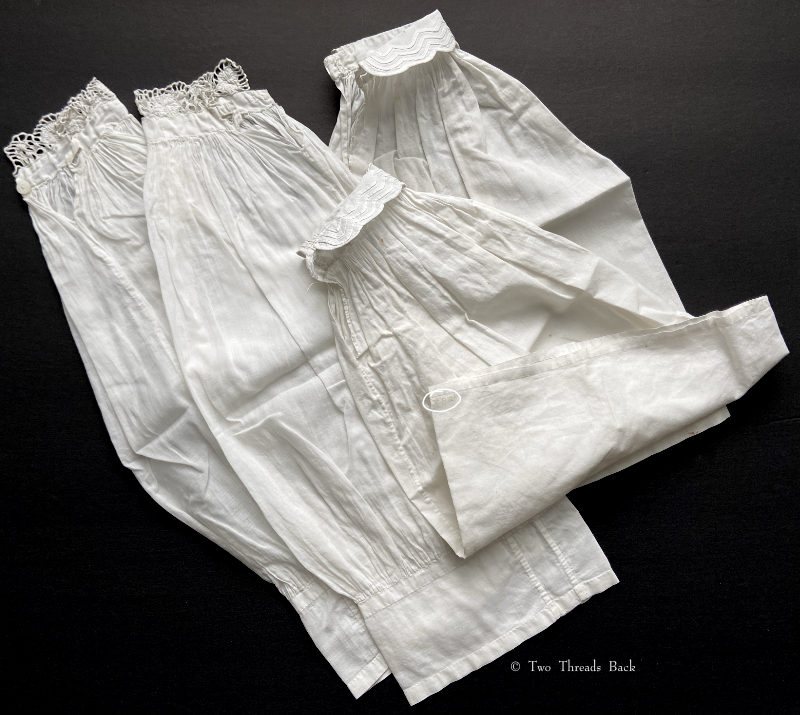
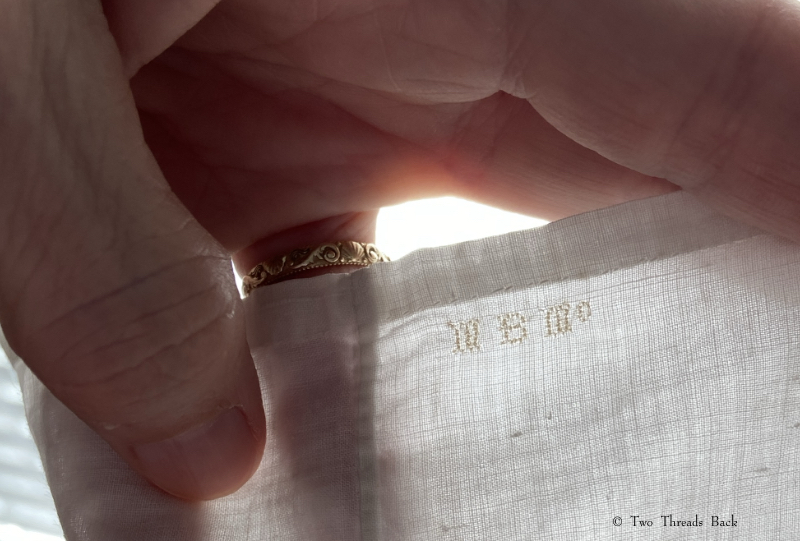
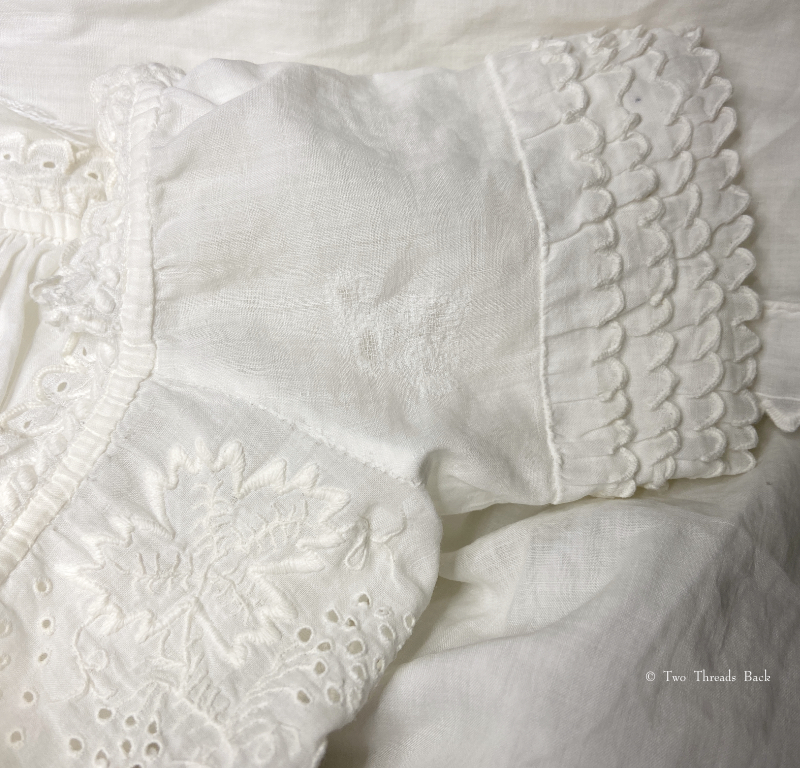
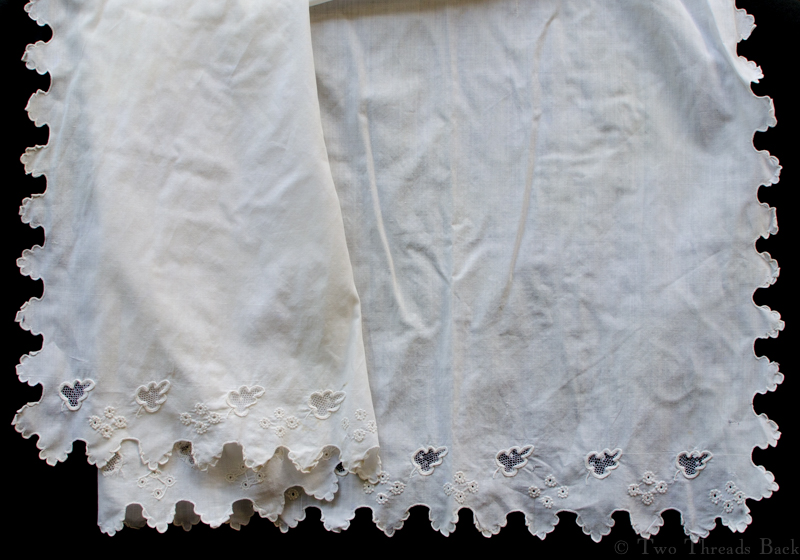
Two pairs of undersleeves were kept with the book. I assume they were Mary’s work because they have her initials marked in cross stitch. I’ve circled them in the photo to show how small they are. The sleeves show wear, so I don’t know if they were part of her sewing instruction or later work that stayed with her album.
The marked initials are less than 4mm tall. I never cease to be amazed at the tiny stitches they could make. The letters look like M B Mc to me. McQuiston?
I wish I knew more about Mary. How old was she when she learned to sew? Did she have daughters who wanted to take the dresses for their dolls? I would have! Did she use her skills for the rest of her life, or pack them away, back “around 1849”?
I’ve heard the old adage “a stitch in time saves nine” since I was a child, but I think I was an adult before the light clicked on. It made no sense to me: saves nine what? My ten year-old self thought it was silly. My grown-up self got the point, but still thought it was silly.
A few decades later, I can almost appreciate it ‘as written’. According to Thomas Fuller in 1732,
Because Verses are easier got by heart, and stick faster in the Memory than Prose; and because the ordinary People use to be much taken, with the clinking of Syllables; many of our Proverbs are so form’d, and very often put into false Rhymes; as, A Stitch in time, may save nine…. This little Artifice, I imagine, was contriv’d purposely to make the Sense abide the longer in the Memory, by reason of its Oddness and Archness.
Of course it means that attending to a problem now will save you many times the work later. When clothing or linens need mending, it’s better to do it before the damage gets worse. In the 19th century, mending and darning could take as much time as making and were an important part of plain sewing since the pile of work never diminished. Period fiction rang true, as in this excerpt from The Christian World Magazine, 1869:
I have so much to do – there are so many little ones, and mamma is so very often poorly. And the fact is, we are not rich. I have to make and to mend, and to turn, and to return, and so we never come to an end of the sewing. I sometimes speculate on the foot of a stocking, and wonder whether there is half an inch of the original fabric left in it! One darns it first quite neatly, and then one darns the darns, not quite so neatly, of course; and lastly, one cobbles as well as one can the darned darns, till it becomes quite a work of art, I assure you.”
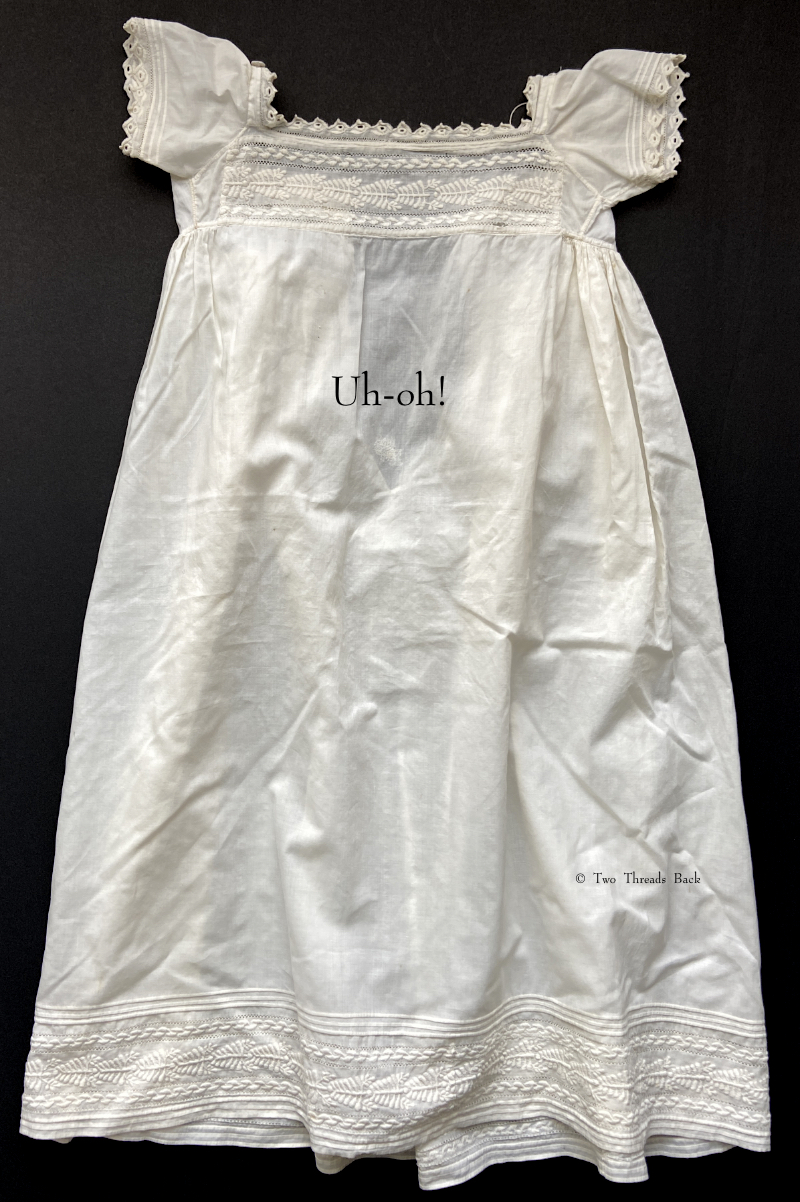
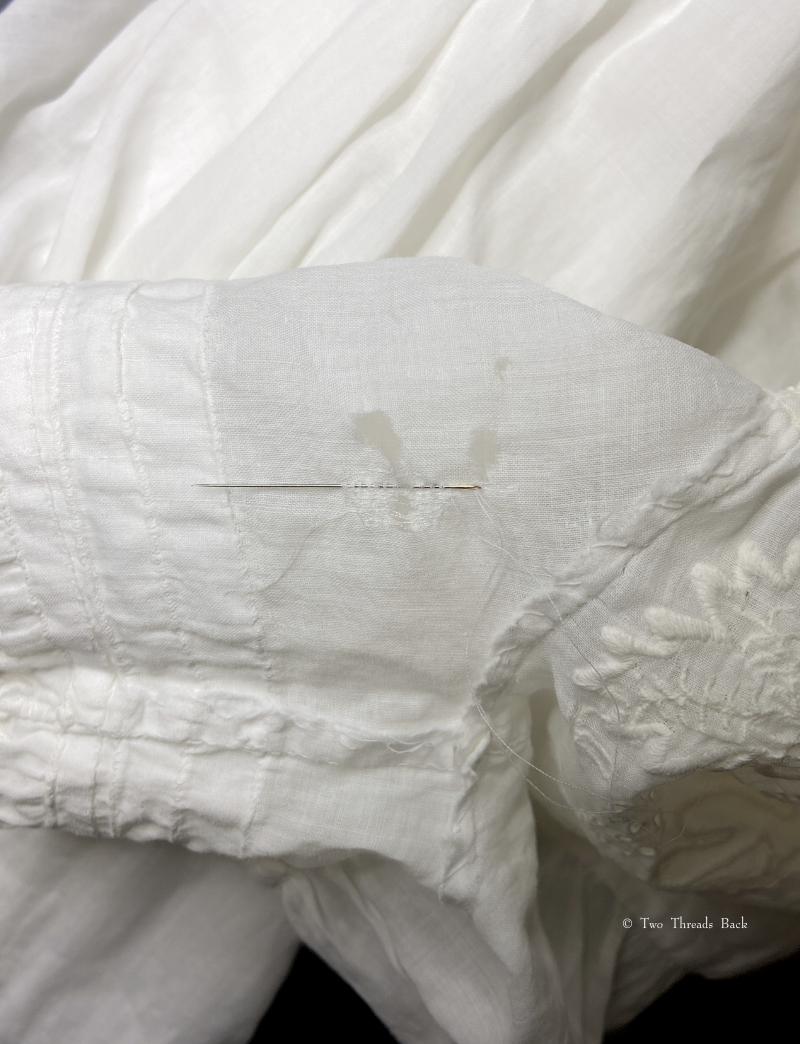
Lots of quick and clumsy patching abounded (by necessity I’m sure!), but I’m amazed at the delicate repairs you can find in finer clothing (examples here, here, and here). One day last summer, I temporarily lost my mind and decided to try it myself on a baby gown in need of repair. Before starting, I looked at a similar gown with a neat mend to see how they’d accomplished it. It had a 3/4″ darn right in the center front.
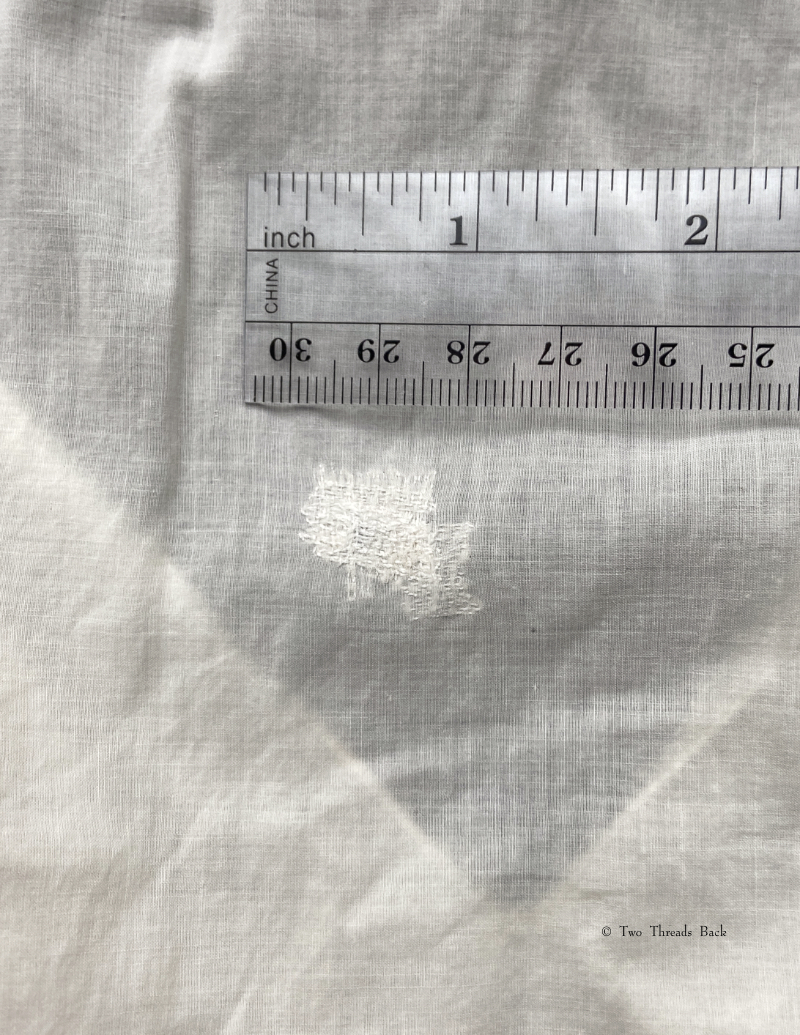
Can you spot the period mend on this c. 1810 infant gown? Front and center. It’s right below the “Uh-oh!”
Here’s a closer view of the darning.
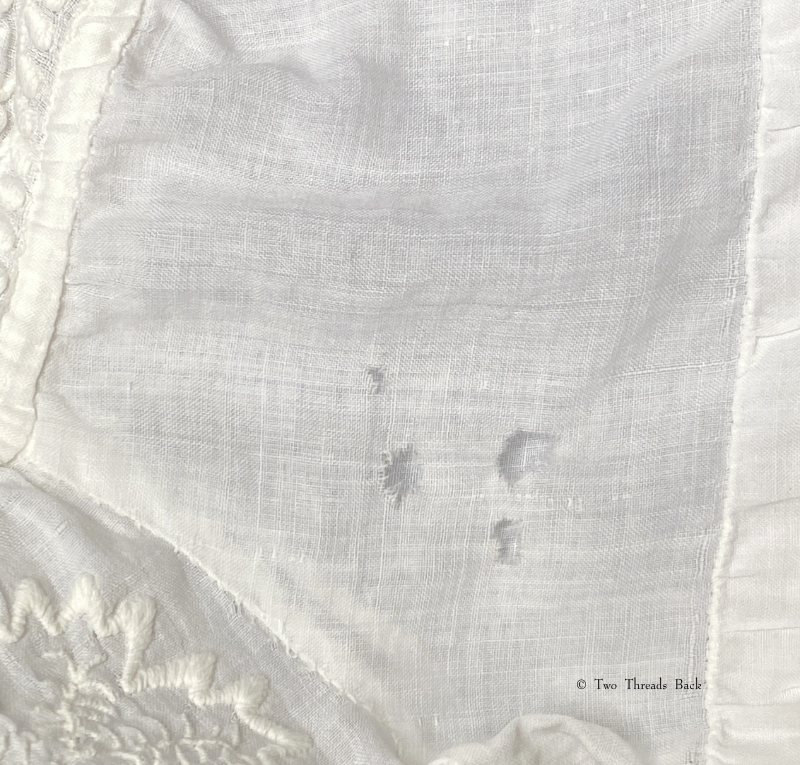
The one I wanted to repair had eraser-tip size holes on one sleeve and a tear at the back opening. My first problem was finding thread to darn with. Even the finest cotton thread I had looked wrong – too white, too glossy, too thick. So I raided a bag of “damaged beyond saving” muslin scraps and used the closest color and weight match, pulling threads from the fabric itself, trying to get strands long enough to use. I reviewed old sewing manuals for directions, but since I was being adventurous anyway, decided “Never mind manoeuvres, always go at them!”
Here you can see the holes on the front of the left sleeve. It was a daunting task for a first try. But how could I make it any worse?
I worked from the inside to keep it less visible on the outside.
No more holes!
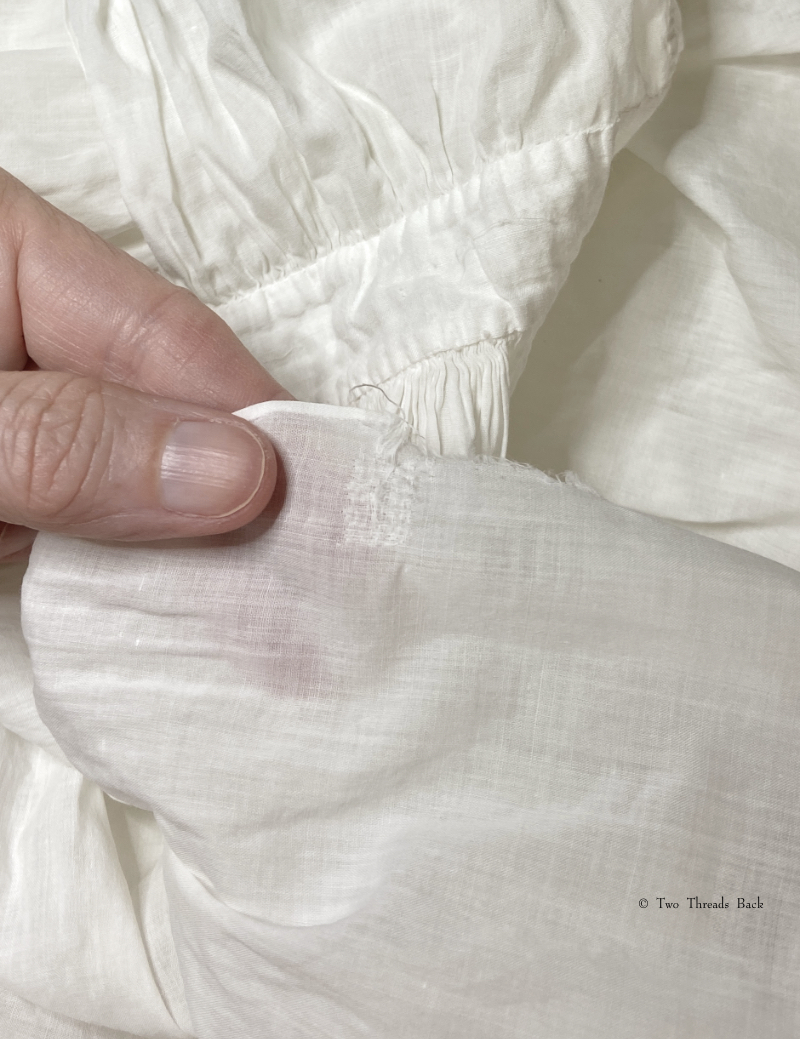
The tear on the back was a little easier because it was straight along the weft. And I’d had a little practice by then!
By this time I was actually having fun with these tedious tiny stitches and went looking for more. I found a couple of pin sized holes and Saved Nine again!
The gown did have one period repair: a three-cornered or “hedge” tear. (At least that’s what it’s called in late 19th century manuals. I only found one earlier reference to hedge tear, 1850s.) I can’t take credit for this darn, darn it. It was neatly done, and I didn’t even discover it until I was part way through my own mending!
A nicely darned tear, done in the gown’s younger days.
All in all, I was pretty satisfied with the results. They wouldn’t stand professional scrutiny, but they work for my purpose and were way more fun than I expected. I’d like to do more. But wait. Does that mean I do or don’t want to Save Nine?
Who doesn’t love to watch a magic trick? I think they can be a lot of fun, at least as long as I’m not the volunteer from the audience. Especially for this trick!
1784
To pull off any Perfon’s Shirt without undreffing him or having Occafion for a Confederate.
This trick requires only dexterity, and nevertheless when I performed it at the Theater-Royal in the Hay-Market everybody imagined that the person whom I had tricked out of his shirt was in a confederacy with me.
The means of performing this trick are the following, only observing that the cloaths of the person whose shirt is to be pulled off be wide and easy.
Begin by making him pull off his stock, and unbuttoning his shirt at the neck and sleeves, afterwards tye a little string in the button-hole of the left sleeve; then, passing your hand behind his back, pull the shirt out of his breaches, and slip it over his head, then pulling it out before in the same manner, you will leave it on his stomach; after that go to the right hand, and pull the sleeve down so as to have it all out of the arm; the shirt being then all of a heap, as well in the right sleeve as before the stomach, you are to make use of the little string fastened to the button-hole of the left sleeve, to get back the sleeve that must have slipped up, and to pull the whole shirt out that way.
To hide your way of operating from the person whom you unshirt and from the assembly, you may cover his head with a lady’s cloak, holding a corner of it in your teeth.
In order to be more at your ease, you may mount on a chair, and do the whole operation under the cloak. Such are the means I used when I performed publicly this trick.
–PHYSICAL AMUSEMENTS and DIVERTING EXPERIMENTS, 1784
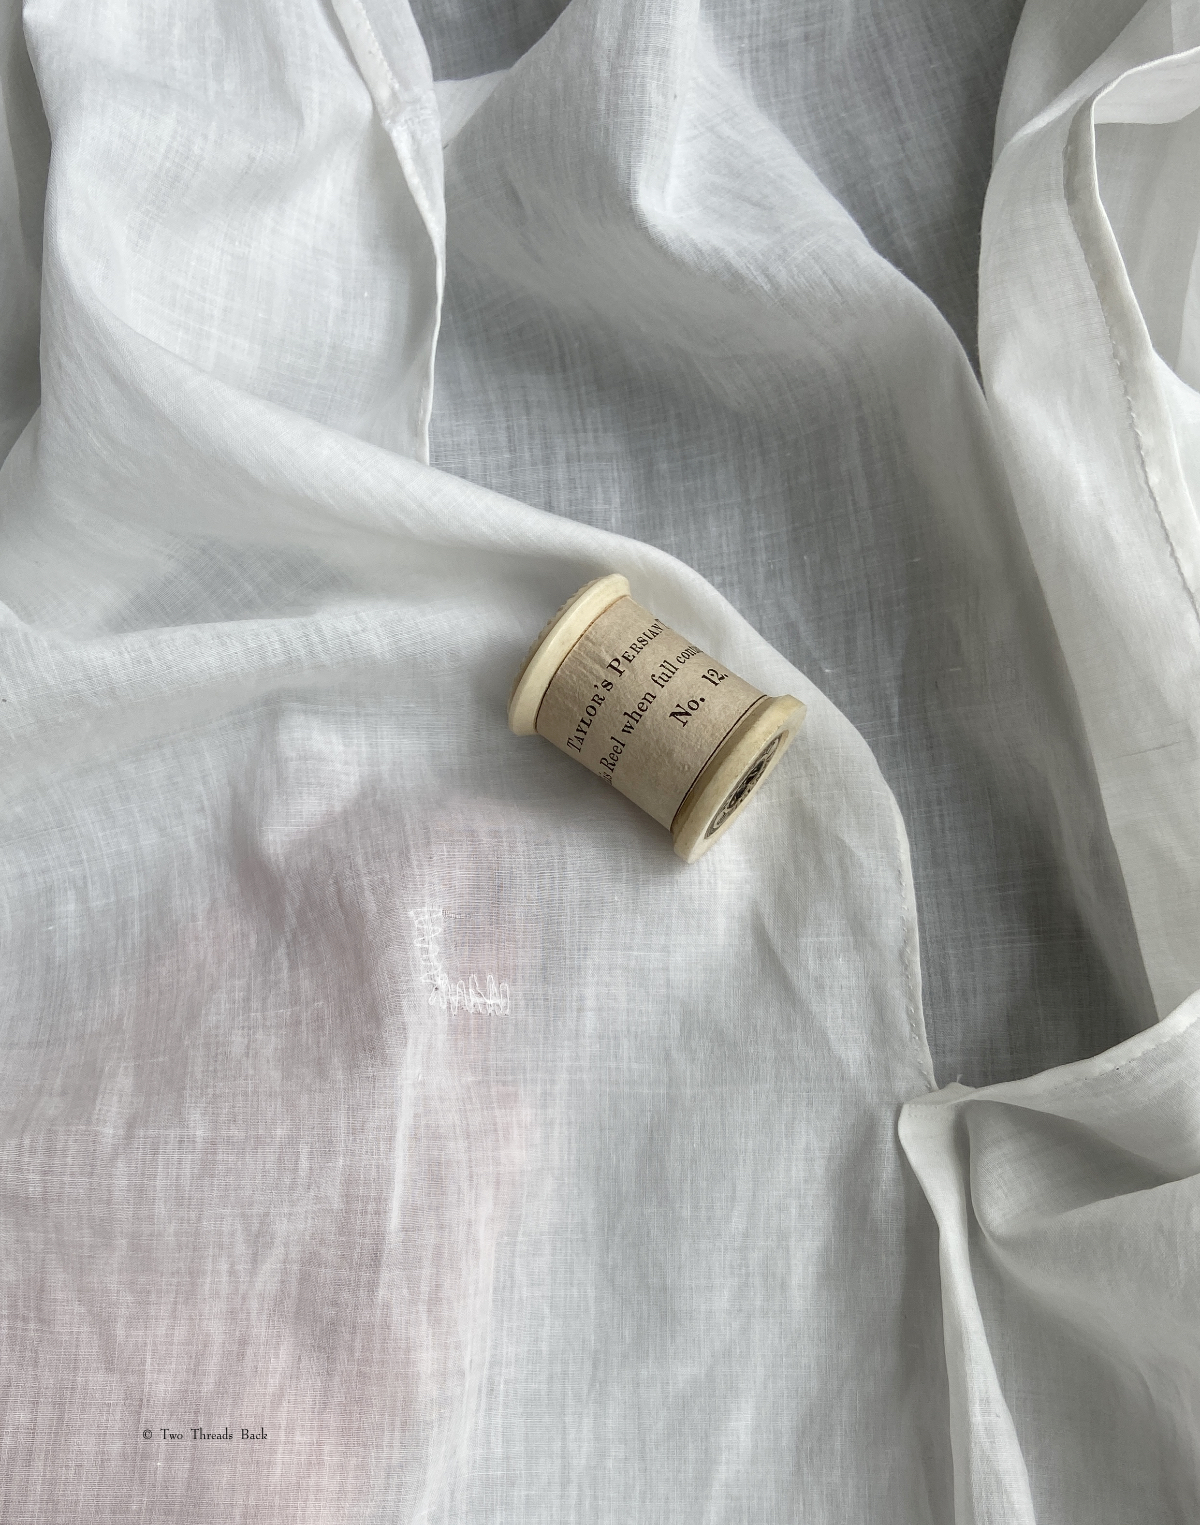
That kind of describes what it feels like when I’ve tried to change clothes in the car. Actually, I think this trick would require a good bit of dexterity, as well as a few practice runs. But still not as much as was required to make this little boy’s shirt. A lot of stitches went into it; decorative backstitching on the collar and cuffs measures about 32 per inch. The simple hemming was 12-14 stitches per inch and seaming (like shallow overcasting) was up to 20 per inch!
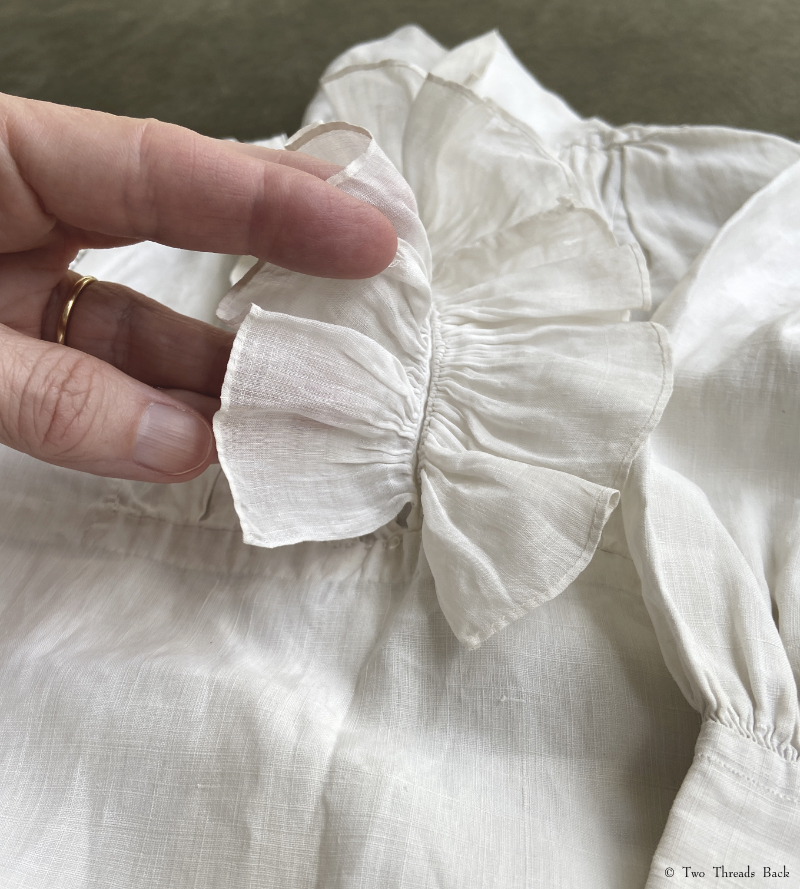
A small boy’s shirt, early 19th century. The fineness of all the plain sewing I try to photograph is hard to convey, since close-up shots make the materials seem coarser. But in a more scaled shot, it’s hard to see the dainty stitching. Maybe this one where I’m holding it adds perspective. It would fit a 4 or 5 year old.
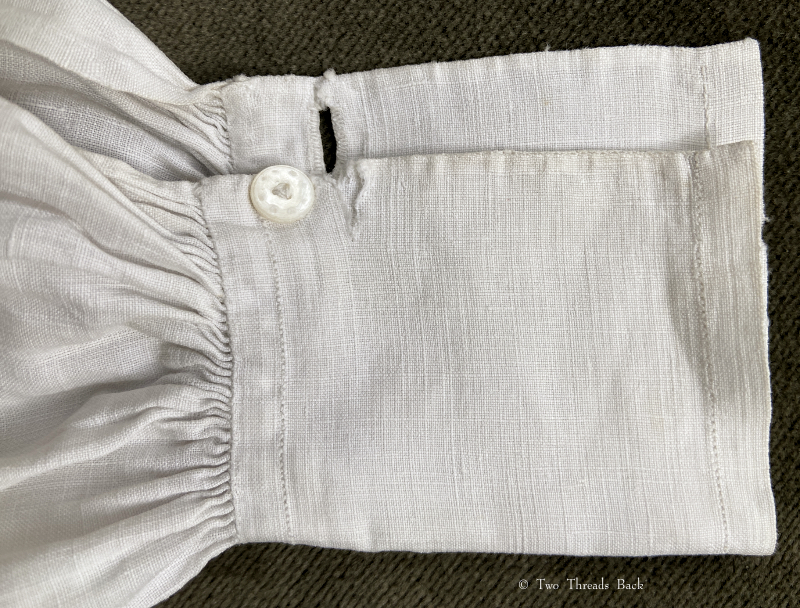
He did get some wear out of it! There are several mends and worn spots, like on the wristband here. So this buttonhole is where the conjurer would attach the string!
The boy’s shirt is made like a man’s shirt. There were 20 parts in a “gentleman’s” shirt:
The body, two sleeves, two wristbands, two binders, two shoulder-straps, one collar, two sleeve-gussets, two neck gussets, two side-gussets, two wrist gussets, one for the bosom, and the frill.
This one, however, was made with without the shoulder straps (a strip of linen along each shoulder), binders (lining next to the armscye), wrist gussets, or a “bosom gusset.” It did have a frill and an inserted pleated front made out of finer linen
It was interesting to see that the two separate ruffles were both sewn to the wearer’s left side, and hemmed folded in the same direction, making them look correctly worn when both are folded over toward the right and exposing the pearl buttons. On all the other shirts I have or have seen, the ruffles are hemmed with each side’s hem folded inward toward the front opening.
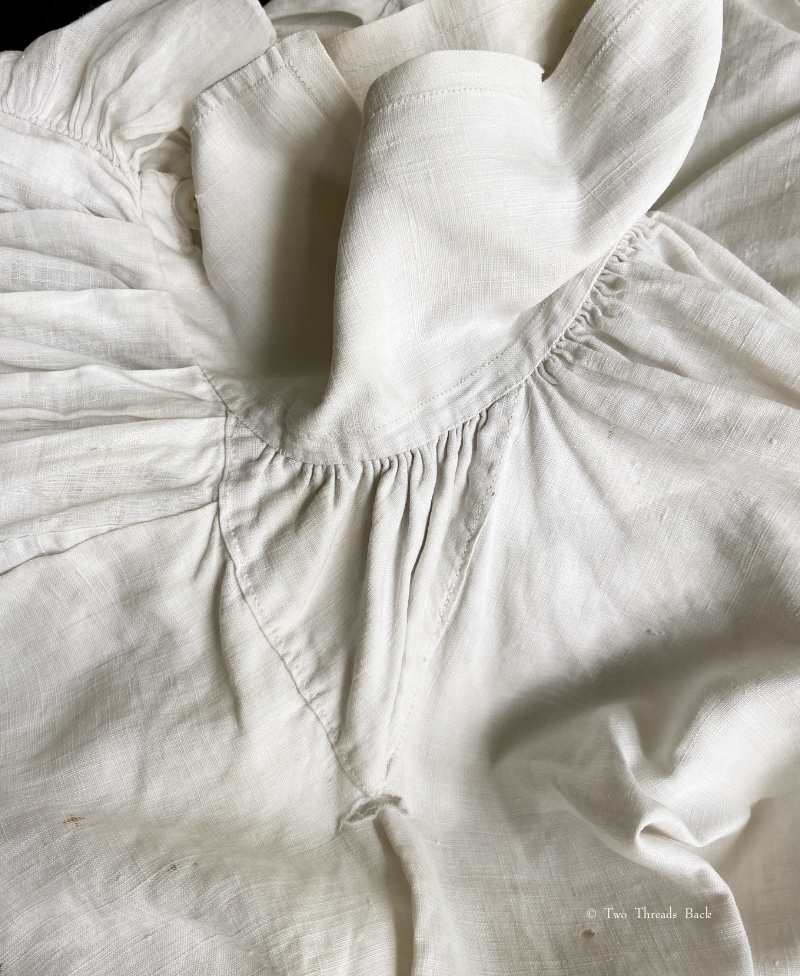
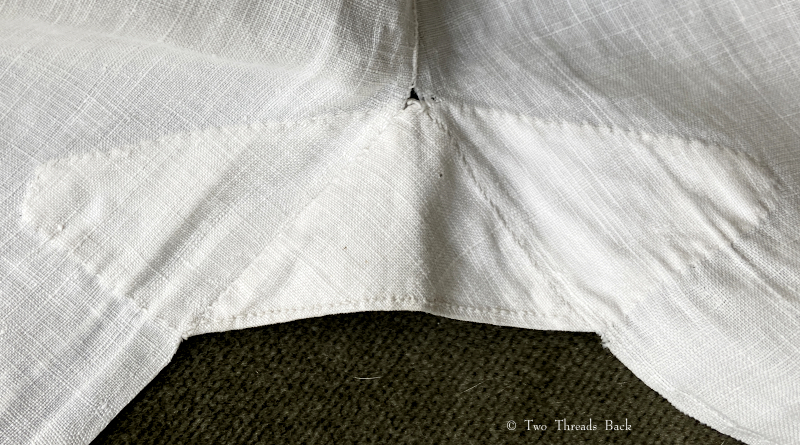
This is the neck gusset next to the collar, and the tear at the point along the shoulder gives a hint why most shirts needed the reinforcement of “shoulder straps.” Perhaps more for strength when tugged than for abrasion!
Bet the little guy couldn’t wait to unbutton his collar – it measures barely over 10 inches when buttoned!
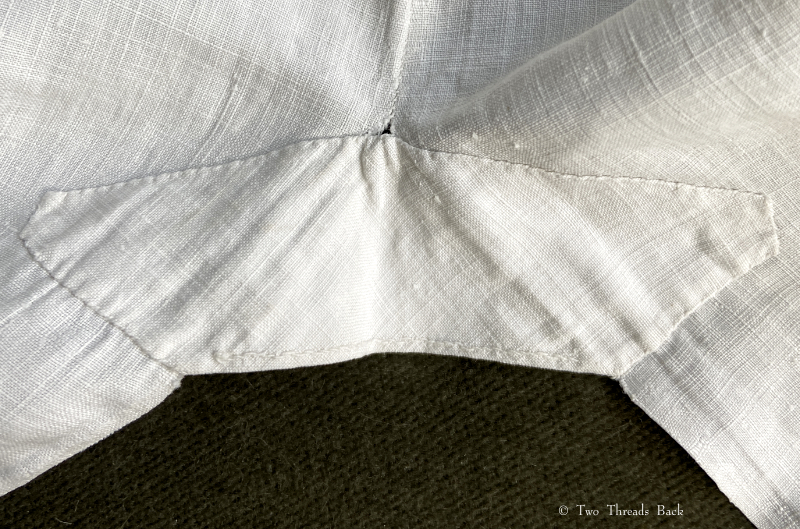
The neatly sewn underarm gusset.
Inside view of the sleeve gathers at the shoulder. These aren’t usually visible in surviving shirts, because they are hidden inside “binders” which weren’t used on this one. The other shoulder has two coarsely-mended vertical tears, one at the same point on the gusset.
Side gusset exterior.
Side gusset interior.
A peek inside the the shirt front, which had 4 pleats on each side of the front opening. A narrow strip of linen covers the bottom edge.
The SHIRT TRICK was republished in other books over the following decades. It even showed up as late as 1870, but by that time the cut of a man’s shirt was more fitted and complex, and I doubt the stunt would work as easily. Maybe the little fellow who wore this had a copy of the The Boy’s Own Book (1828) and had a go at it? I can’t imagine the maker would have appreciated seeing her work handled so roughly and the “person who was unshirted” might have had to conjure up an explanation!
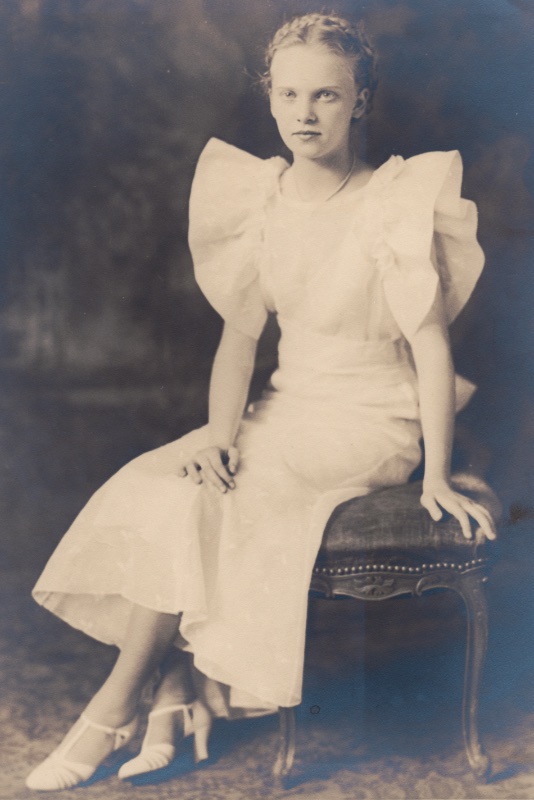
Anna’s graduation photograph, 1934. Isn’t she lovely?
It’s a delight to follow the evolution of hand sewing instruction from its earliest days up to more modern times – at least if you consider the 1930s modern!
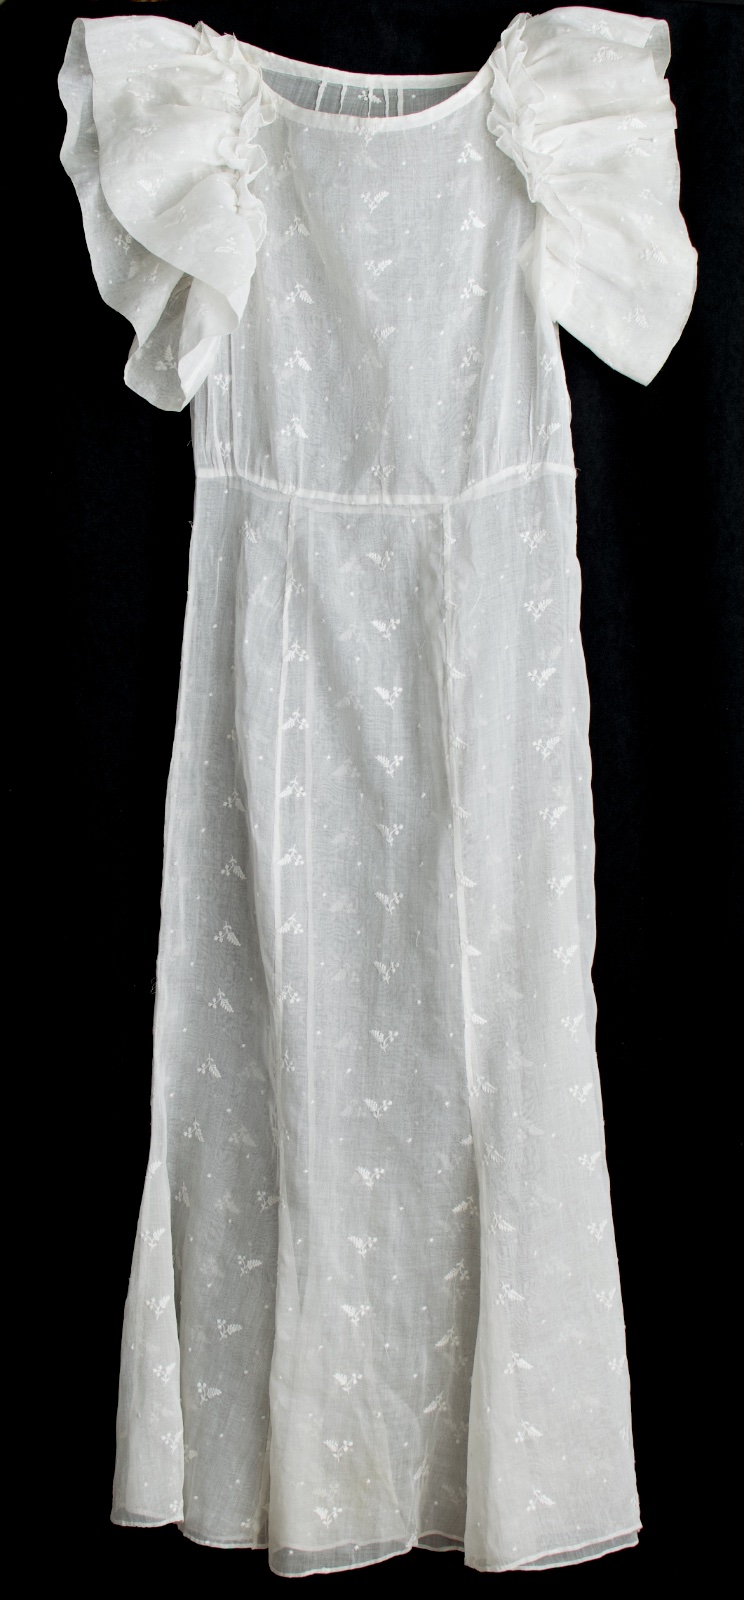
Thanks to a friend who wanted to share her mother’s dress, I’ve had another chance to peek into a Domestic Economy class, this time in Brooklyn, New York, in 1934. The teacher was Miss Gimbel, and she must have been a wonderful sewing teacher – she was certainly very good at understanding what kind of project would please a girl of 13. Fluffy ruffles in dainty white, in a lesson she could wear to her graduation!
The dress needed a little TLC before it could show off. Although in excellent condition for its age, a bath was in order.
A good soak works wonders.
I’ve laundered a lot of cotton and linen over the years, and was hopeful that Anna’s dress could be restored. It was made of embroidered organdy and (of course) had been starched. Starch does not age well, in case you haven’t noticed! But a few days of soaking and a lot of water changes, and the frilly frock was refreshed.
Restored to glory!
Once again I was surprised to see how simple it could be to sew a garment by hand. I’m so accustomed to modern clothing with all the double-stitched and felled seams, finished inside and out, that anything else is startling. I’ve got sportswear so heavily reinforced that the stitches could stand alone if all the fabric were to melt away!
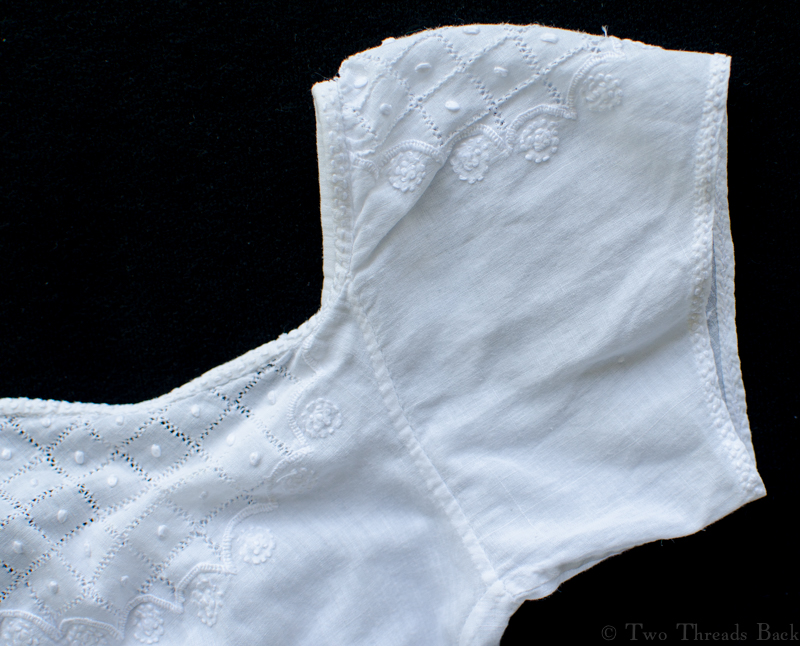
But not here. Anna used very simple basting, running, hemming, and gathering on plain and French seams. The ruffle edge was overcast.
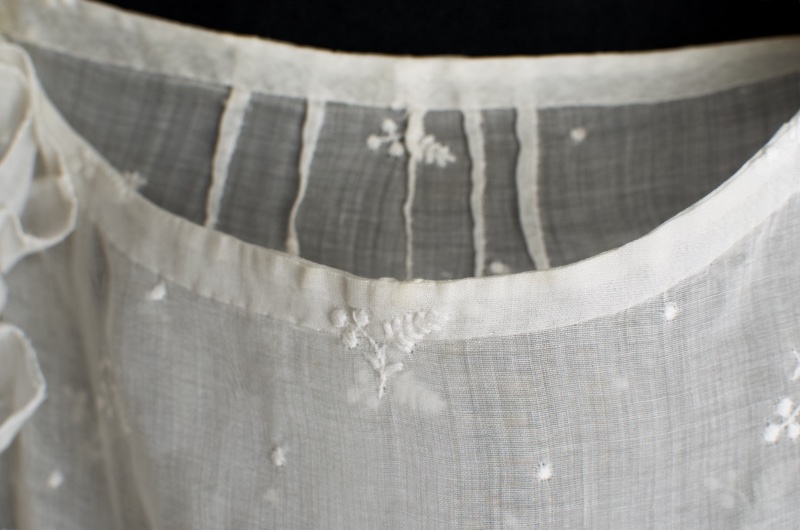
You can see the neatly turned hem, and where she took greater pains with the collar binding than the much longer narrow hem, which I’ve folded up to show.
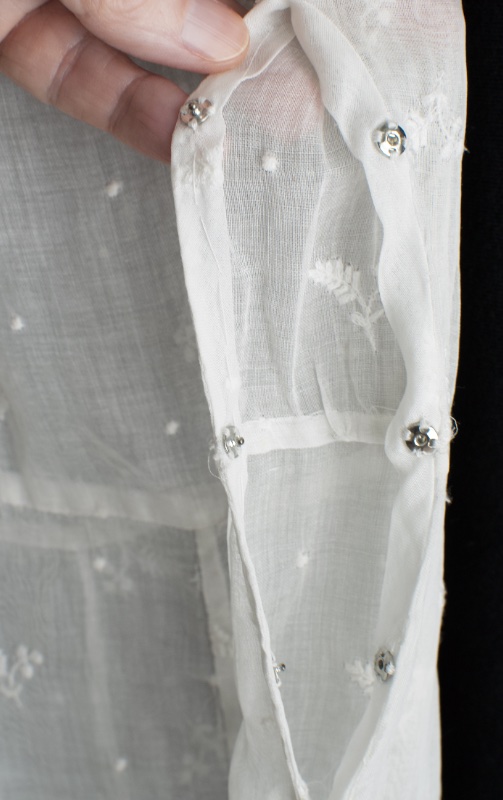
The armholes have a self-fabric binding, and the dress closes on one side with snaps. The basting thread is still present, perhaps serving to hold the placket in place.
Weekly sewing lessons from the first through the eighth grade were part of a public school education for Anna. Her work was neat and elegant, a skill to be proud of. I think she learned well and wore her reward for a very special occasion!
You’ve probably heard of “writer’s block” before, but I wonder if there’s such a thing as “sewer’s block”? Perhaps for a designer or pattern maker, running out of ideas is not an unfamiliar experience.
Edwardian era lingerie dresses came in numberless variations and played large a part in enticing me into sewing history; my plain sewing passion started out as a fancy for fancy work. The snow-flake variety of designs, using only white fabric, lace, and embroidery, is mind-boggling. No surprise then that an English seamstress of 1900 was troubled by a dearth of ideas as she tried to earn her bread with her needle:
“In ladies’ dress the blouse has become a prominent feature, and it is one that lends itself to home industry…. Recently I visited a maker of blouses who was concocting with much taste and skill blouses of white muslin trimmed with embroidery. These would probably sell in shops for but a few shillings, yet the labour involved was not insignificant, for there was much tucking and trimming. The blouse-maker was a young married woman, and, having a small child to look after, could not perhaps easily go out as a dressmaker. Yet her occupation was fully as laborious. During the months before Christmas, she was obliged by her employer to make none but pattern blouses, that is to say, bodices of her own designing, no two being alike. She told me that she found this business of designing was most trying, and that she often lost her rest at night trying to think of some new style… She could make from three to six blouses a day.”*
Bless her heart, only three to six? When I made a simple one – with a commercial pattern – it took several days to do it! She was using a machine by that date, but those faster stitches meant more elaborate work was expected.
Ladies’ accessories (like collars and cuffs) and baby dresses also showed amazing creativity and variety. The surviving specimens are often the fine work that was done by professionals, but someone had to think up those designs, too!
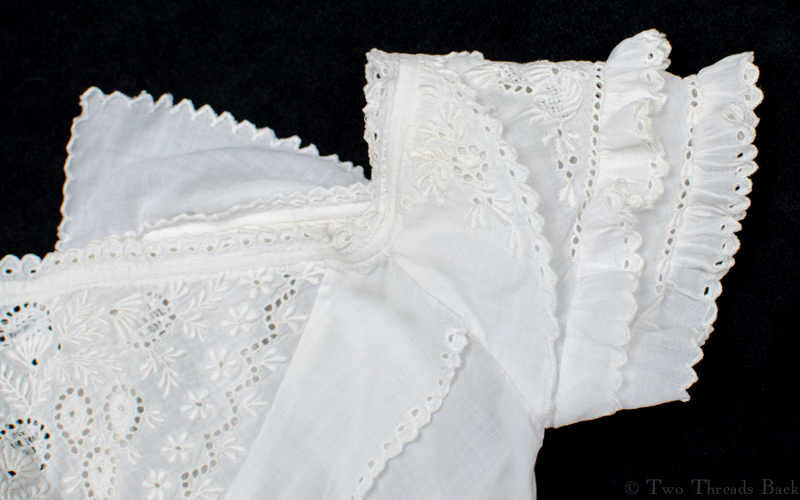
I thought a sampling of sleeve patterns from infants’ gowns would be fun to compare. They tended to reflect current styles in women’s fashions, but perhaps you’ll notice that, even with a palette of white fabric, white lace, and white thread embroidery, the artists must have been losing some serious sleep.
N.B. The many shades of white are due to differences between the gowns (and how they were laundered), and in the fickleness of the camera, sunlight, and shade while I was trying to photograph them. I’ve tried to order them chronologically using one of my favorite books, Heather Toomer’s fabulous Baby wore white, and my (imperfect) guesses.
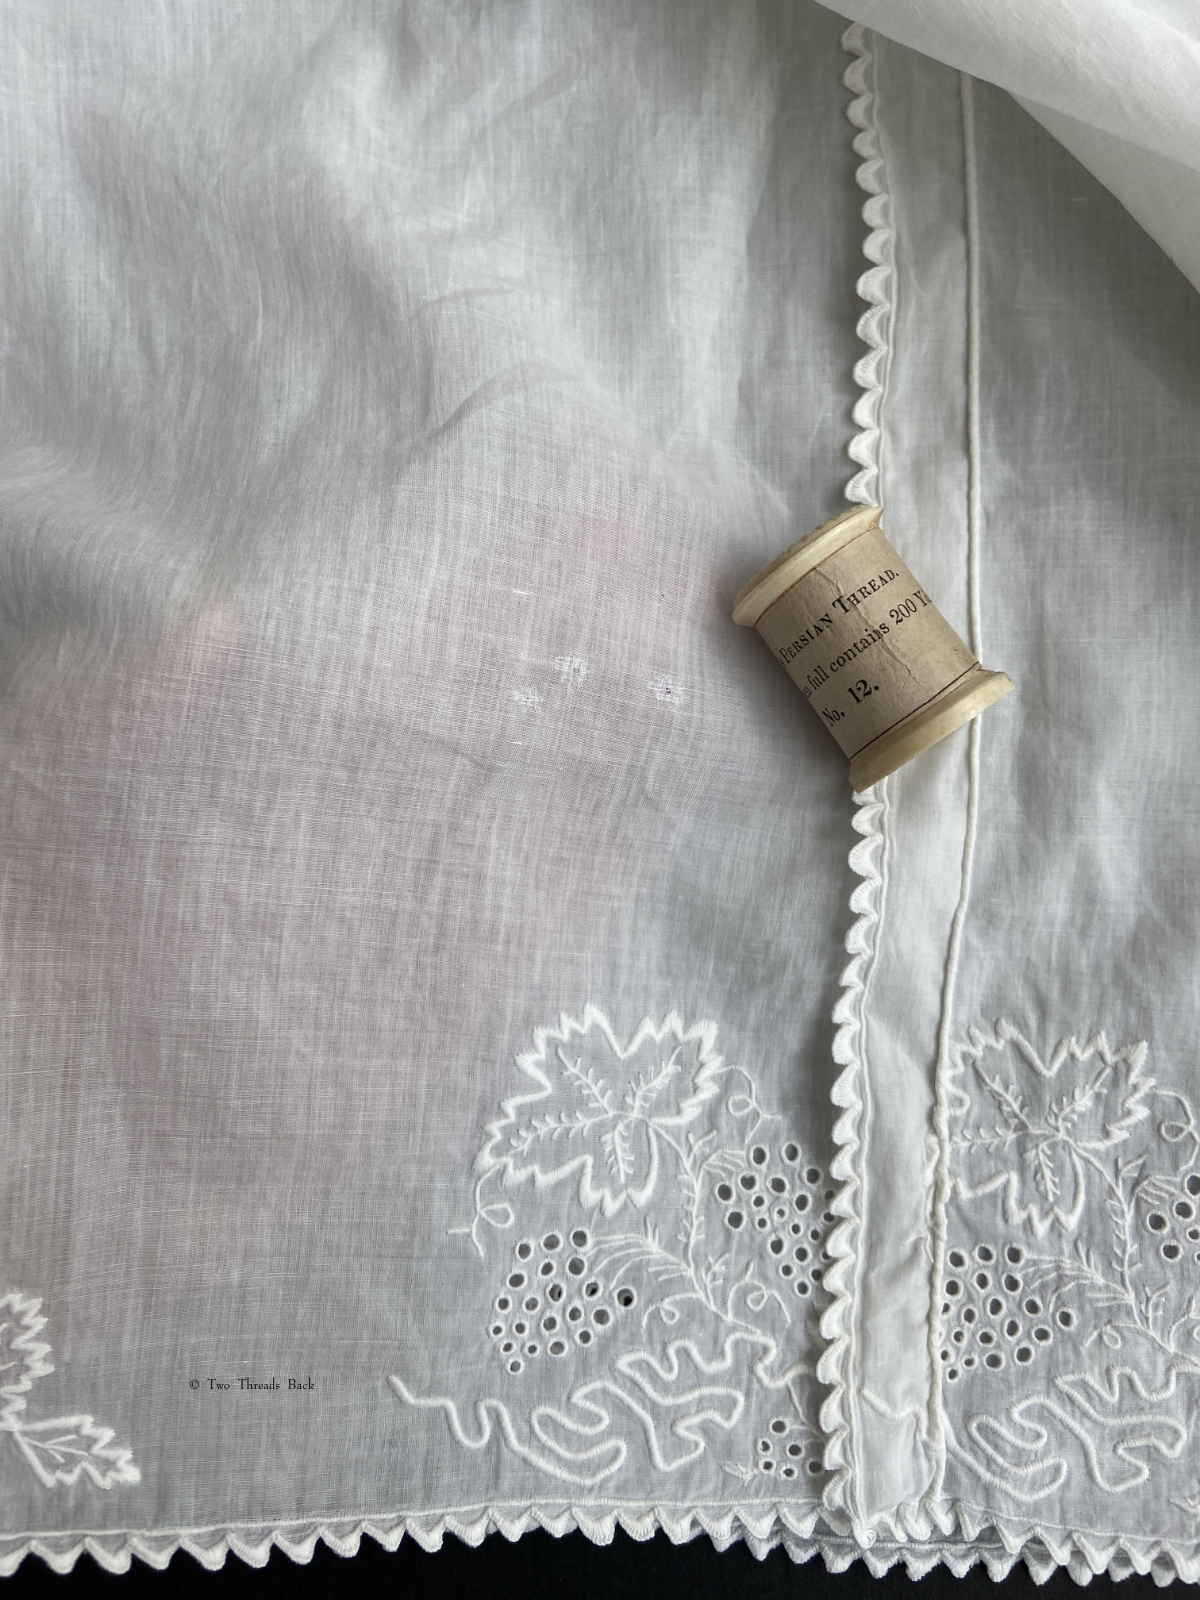
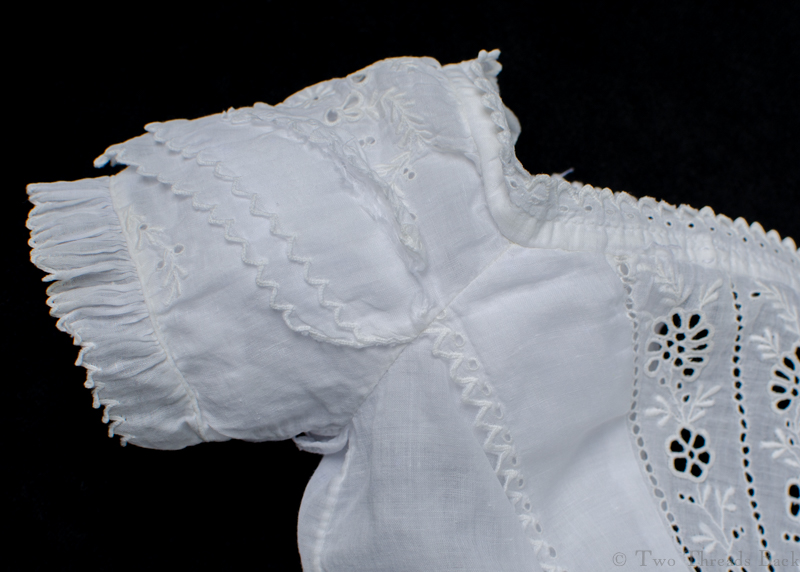
This gown is fairly early, perhaps 1810s? and actually my favorite. The sleeve is cut on the bias, sort of, to suit the drawn thread pattern.
You can just see the pretty – and simple! – stitches along the hem of the sleeve and the neckline. A variation of this is fairly common on later baby gowns, used along the waistband.
This gown was probably not worked professionally. Why do I suspect that? Because it came with a sister! The next gown has the same trim, just a slightly different use of the pattern. It also has a secret….
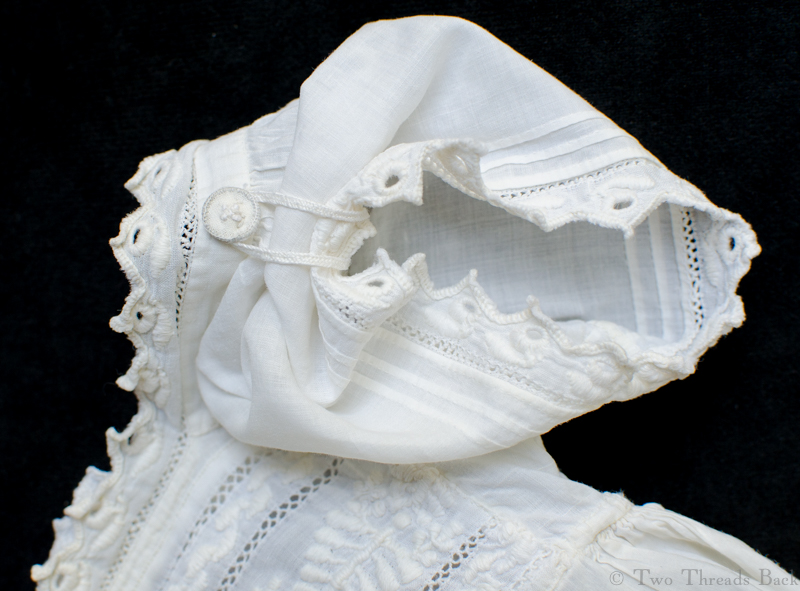
Secret revealed: a button! Looping up children’s sleeves was quite fashionable for many decades.
Meet the sibling! Also very early and very simple, this little sleeve has tucks and the embroidery is placed differently on the gown itself.
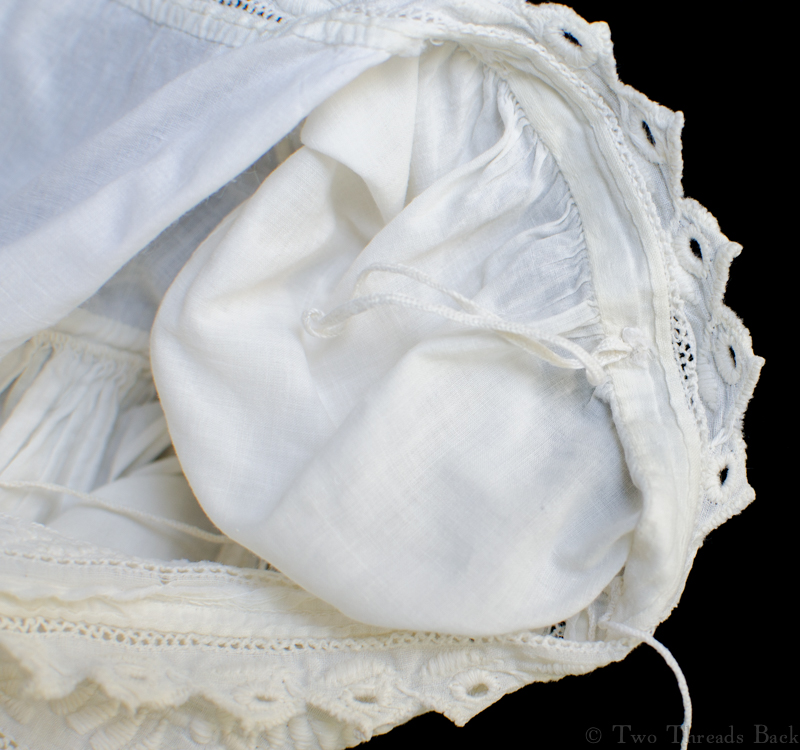
And this one also came with buttons and loops.
Just in case you wanted to see how the loop was attached inside.
Disappointingly simple? Flaws? Yes, it has a bit of damage, and the embroidery centers are only net, not needle lace. But oh my goodness! Look at the photo below of the skirt!
Here’s a shot of skirt itself, in all its homemade, but elegant, glory! Even with the damage, this one is worth preserving.
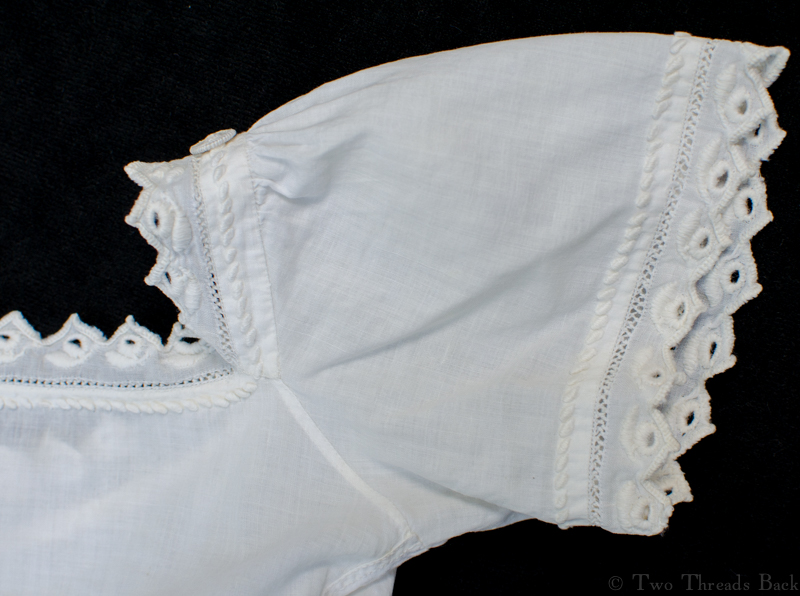
This early gown has points (Vandykes) on the sleeves and several rows on the hem. It comes reeeeally close to my favorite, above. And it’s a dimity stripe, rather than a fine muslin.
Once again, buttons on the sleeve. Would you believe I didn’t notice the inside loops for ages? That’s why I never play those “observation/concentration” games. Fail.
Here’s a peek at the inside. It’s also a good shot for seeing how the points are made.
The loop wrapped around the Dorset button. I think it looks better undone.
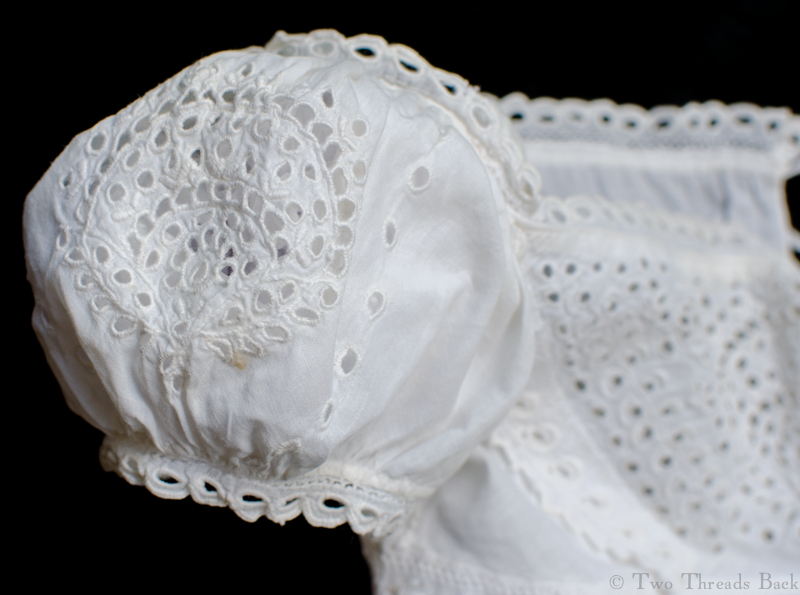
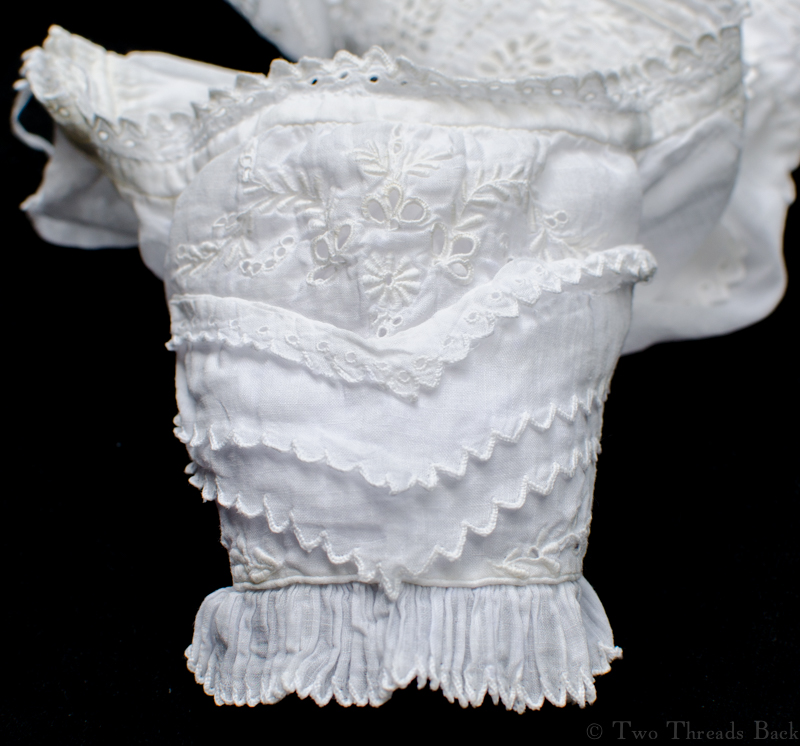
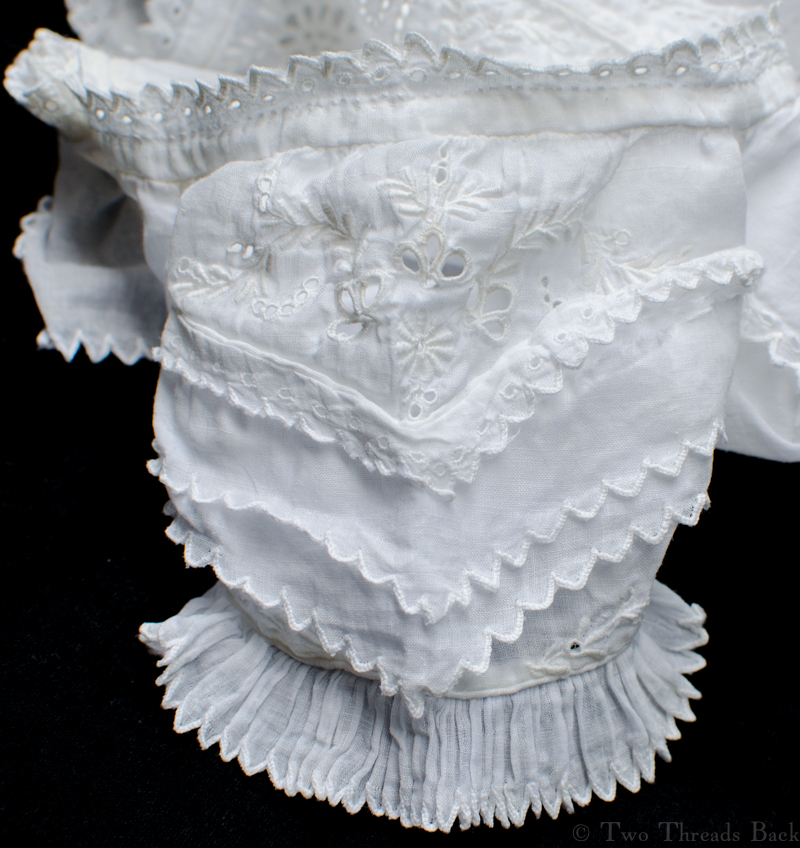
Now for some broderie anglaise! I know it didn’t reach the height of popularity until later, but something about this gown seems to suggest late 20s, early 30s. The sleeves just want to stretch out in that wiiiiide horizontal fashion.
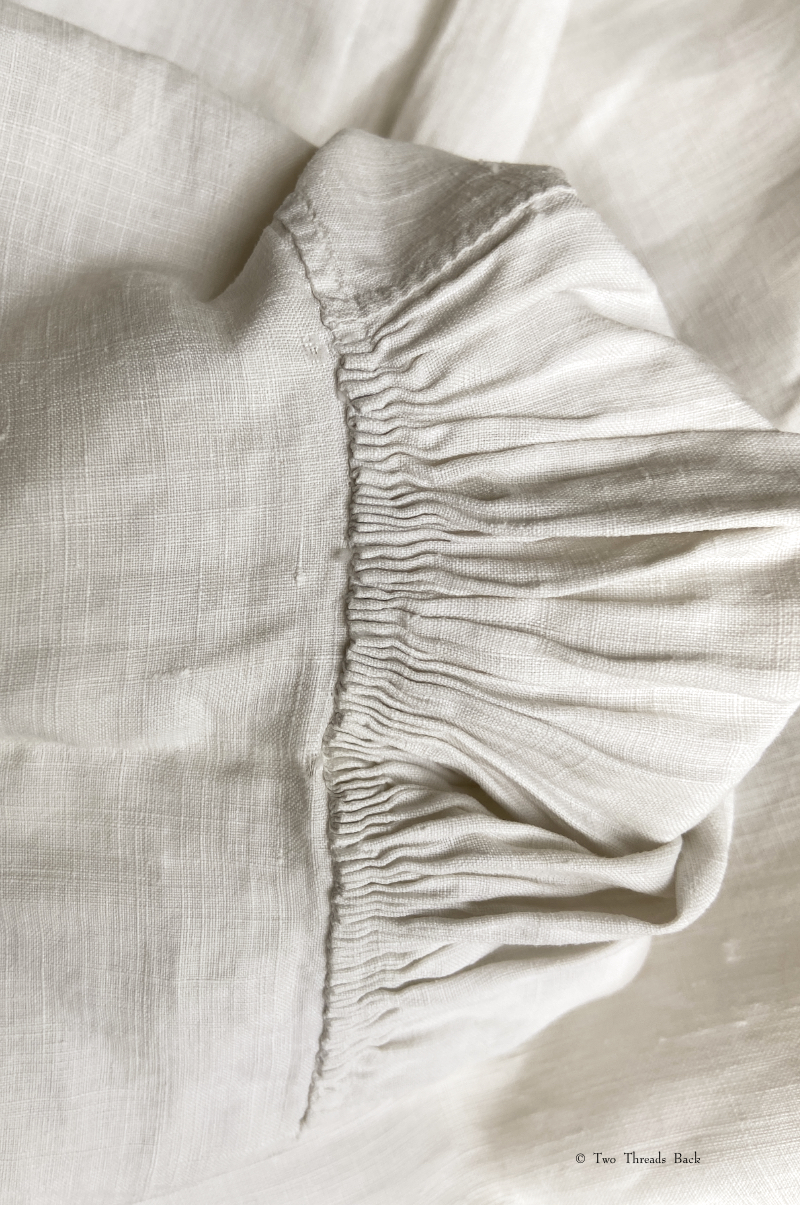
Could this be… romantic era? You think? It has enough floof for two babies.
A view from above the extravagance. This is the sleeve at the top of the blog post.
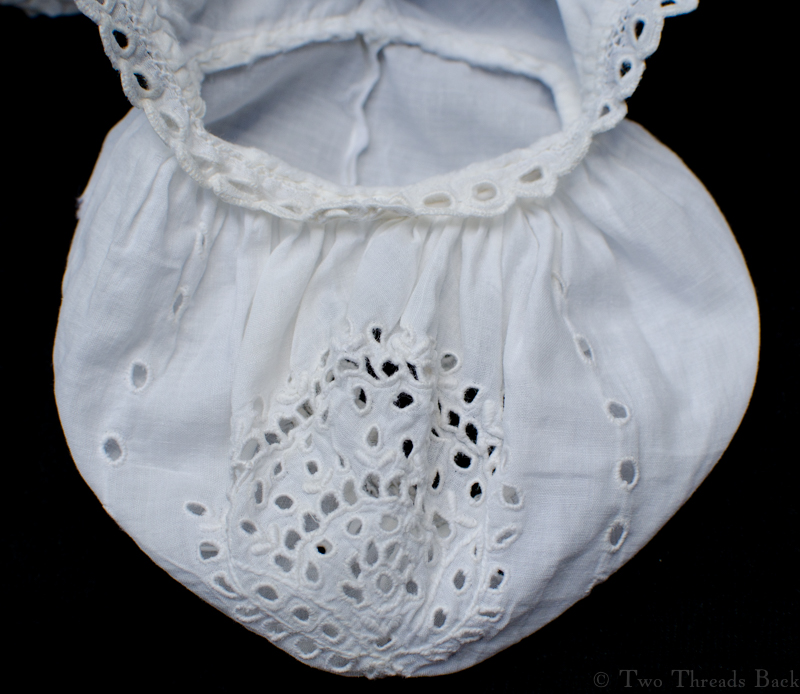
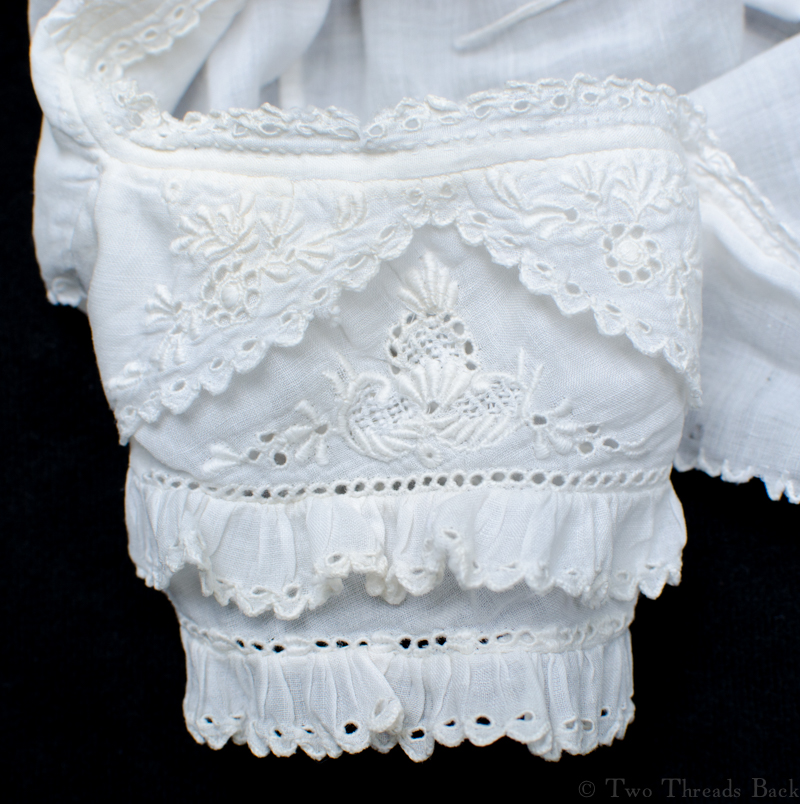
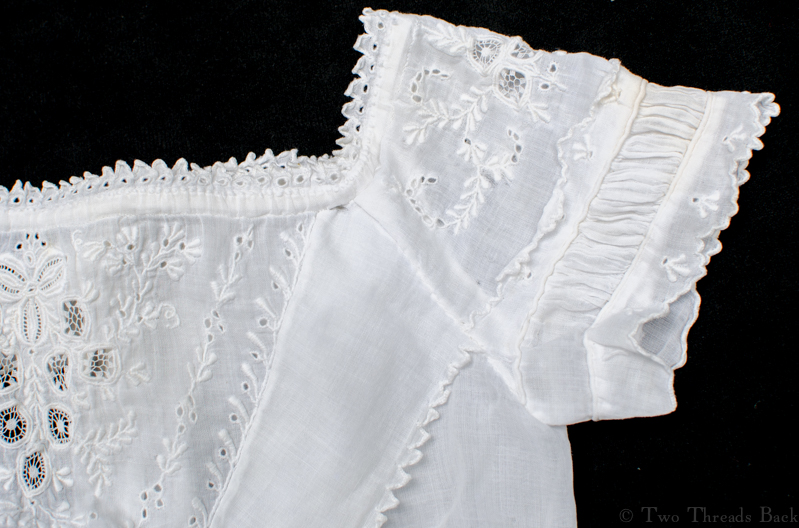
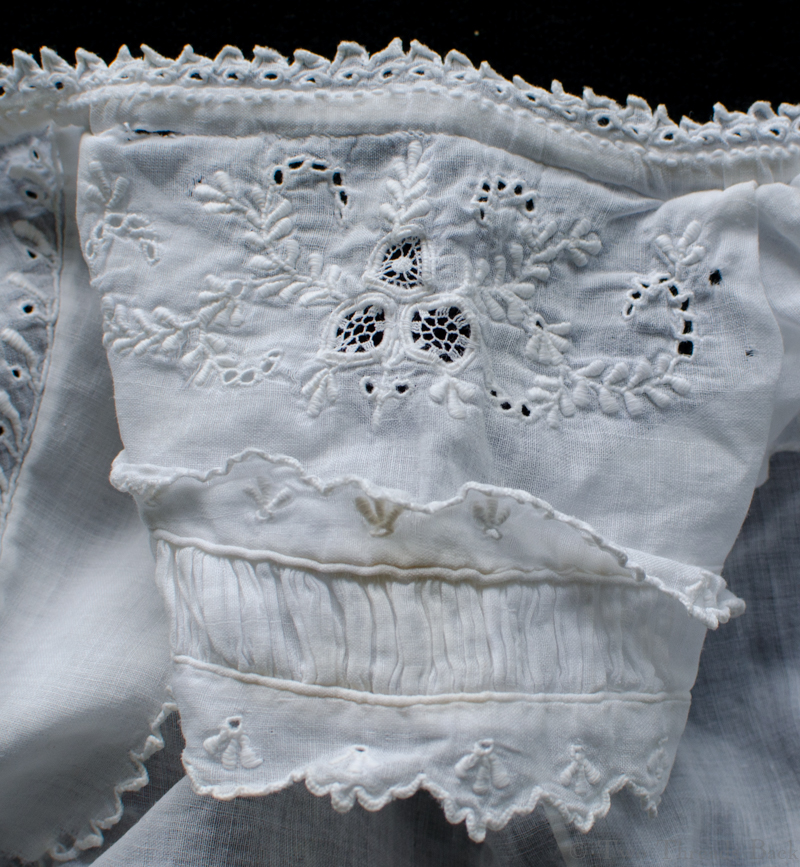
The collapse of romance; now moving into gothic restraint. Is that an oxymoron?
I love this. Like a little window valance and ruffled curtains below!
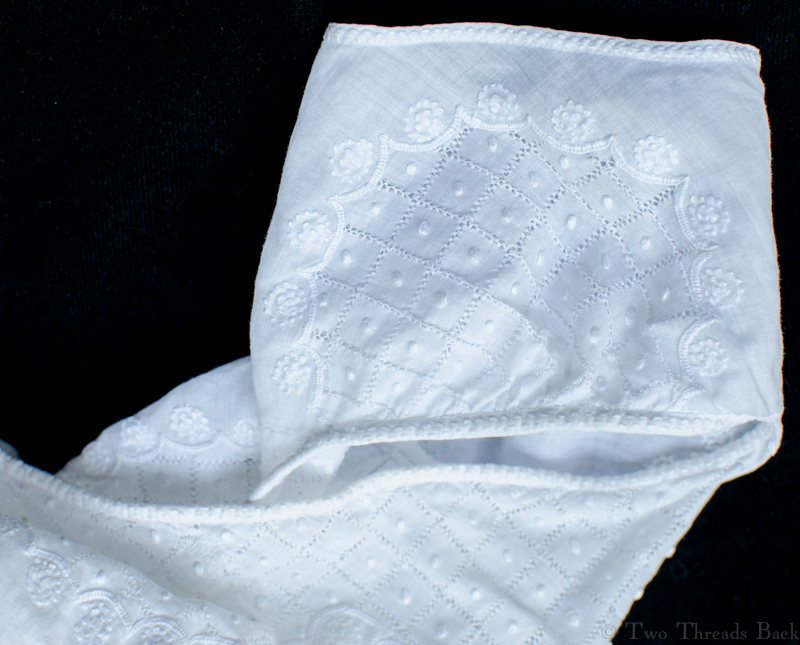
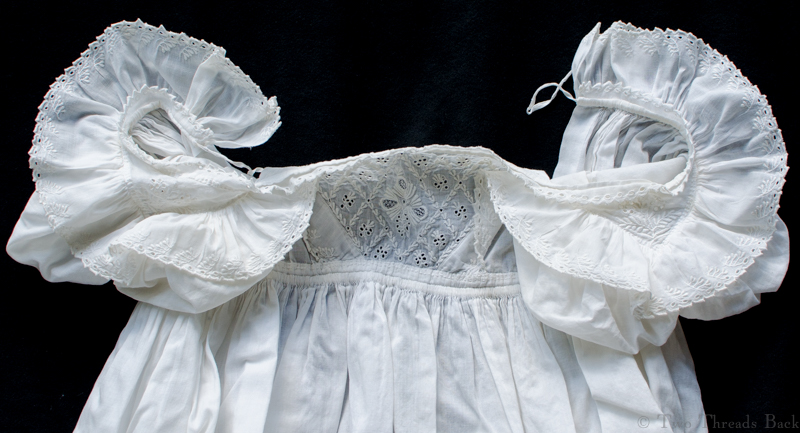
I’m not sure what to make of this one. Like the one above, it has the narrower sleeve and tight ruffles of 1840s. But the embroidery pattern looks earlier.
Yes, 4 rows of ruffles. Gothic restraint my eye!
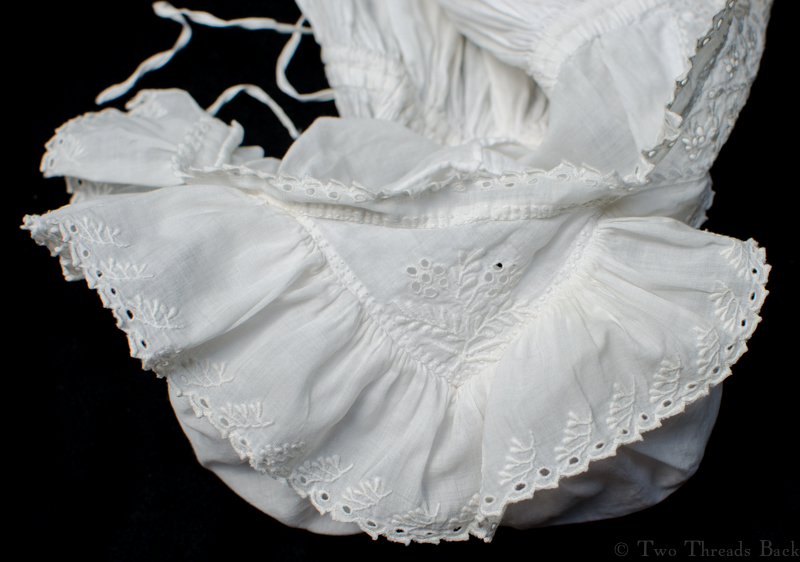
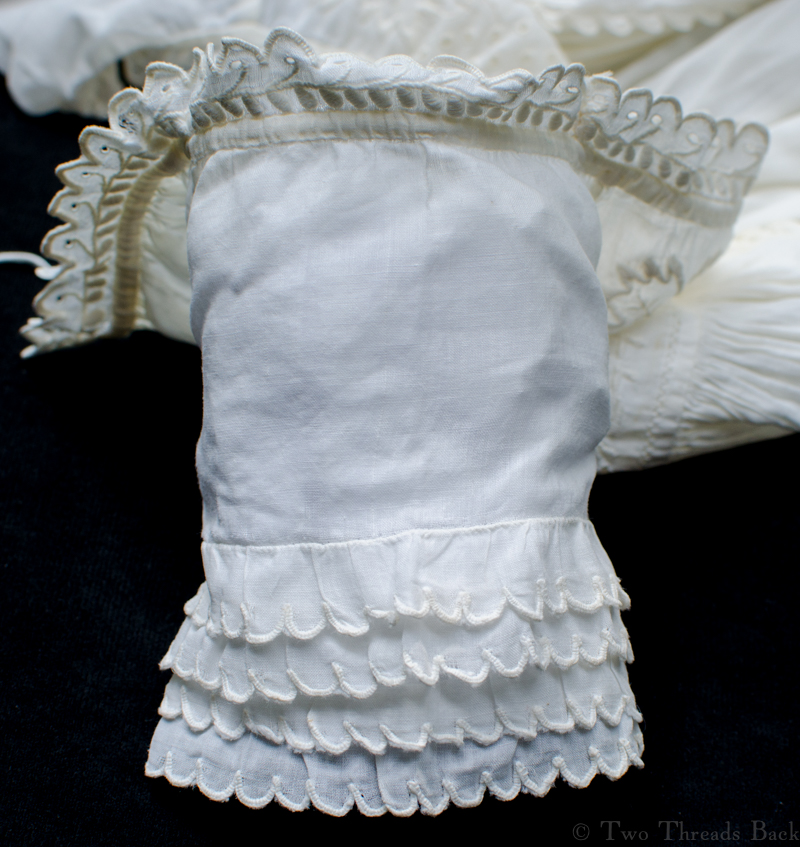
This sleeve reminds me of the 2 above, but the rest of the gown seems to hint at a later date.
I love all the elaborate work on this. And especially how the ruffles seem to be pleated (they’re not).
Ruffles pressed out to flaunt their stuff!
And now the last sleeve offering. It’s a pretty Ayrshire gown, made before they began to get a little coarser and machine sewn. Well, of course some baby gowns have always been hand sewn, but from the 1860s there were a lot more machine-made.
1820s baby gown pattern – from a Dutch magazine? Or sold separately? It has the early classical simplicity of that time.
Many embroidery patterns were available early in the 19th century, but they weren’t usually specific to baby gowns. The one above is rather rare for c. 1820. Later, as women’s magazines proliferated, designs appeared frequently for gowns which could be ordered or copied for home sewing.
An illustration from Godey’s Lady’s Book, 1857. So very mid-Victorian!
I’m in awe of the prodigious creativity that these designers and needleworkers display on such on tiny bits of cloth. And to think that the babies were oblivious to their splendor! It was left to their mothers, and other adoring fans, to appreciate the art on their sleeves.
*Bateson, Margaret. “Bread-Winning at Home.” The Girl’s Own Paper, 1900.
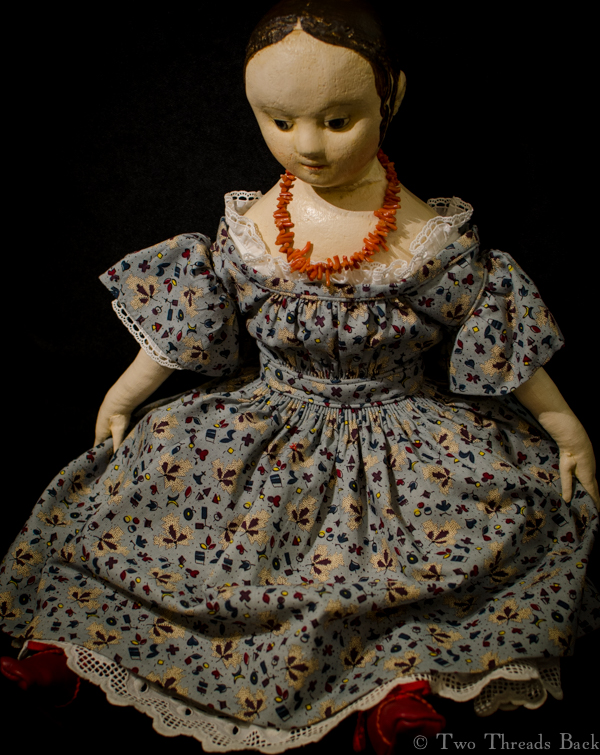
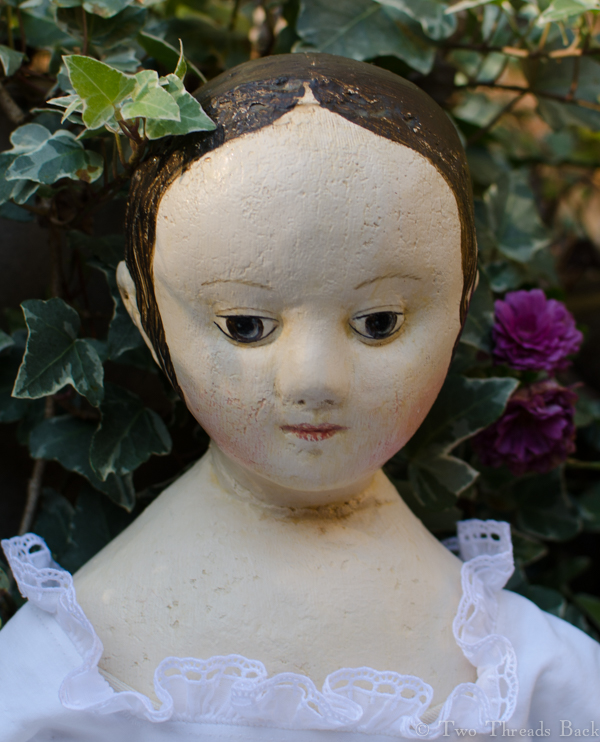
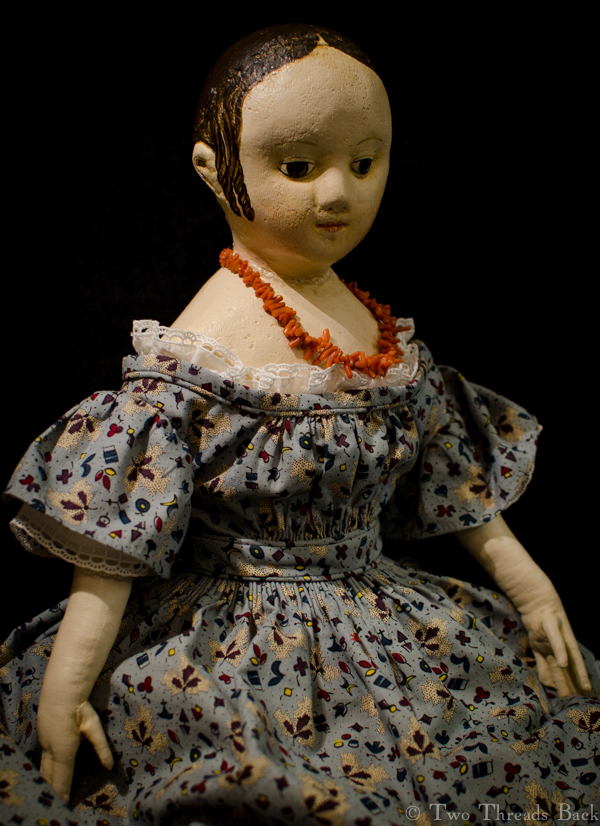
You’re never too old for dolls at Christmas! At least I’m not. I’d like to introduce Jessamine, a lovely doll made in the style of Izannah Walker, by the incomparably brilliant artist Paula Walton.
I’ve always longed for a doll like this lovely girl, and waited years before I was able to bring her home. I’ve had her for a while now, but that practice waiting has served me well – because it’s taken over a year to dress Jessamine in her first (hand sewn by me) outfit! But Christmas is here and she is ready.
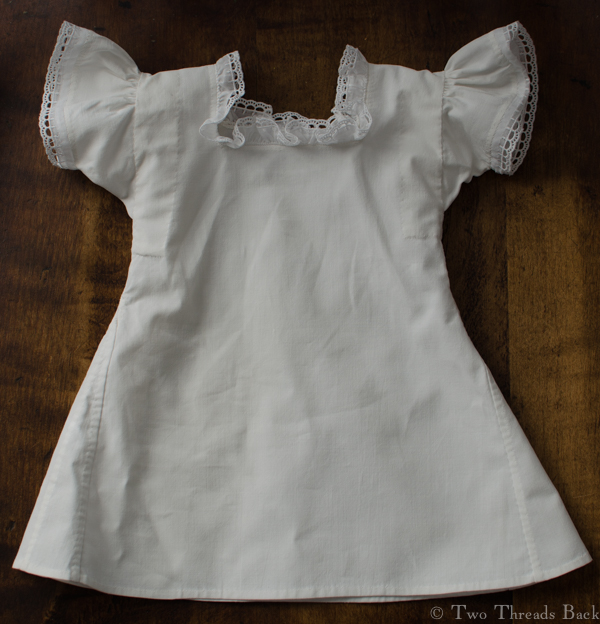
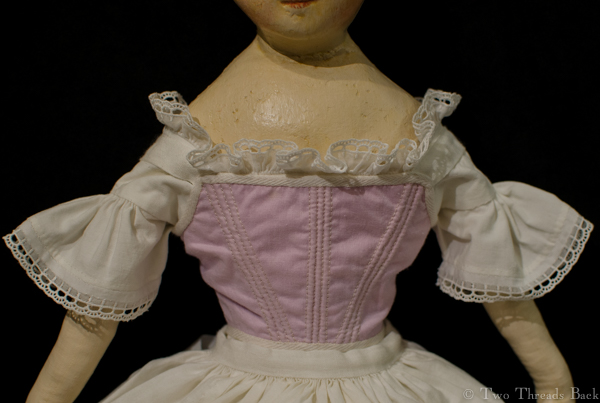
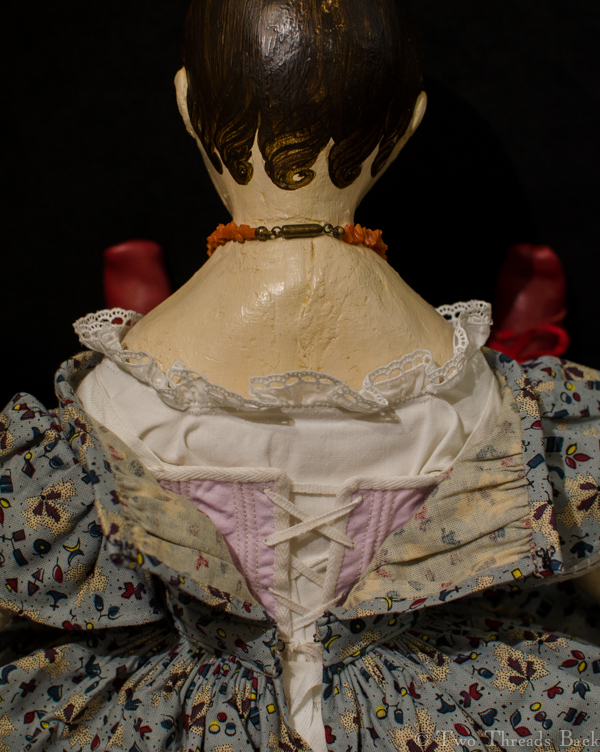
The chemise came first, and I tried to make it with the same details that a real mid-19th century young lady’s might have had: gussets, gores, and binders. I know, unless you’re used to period costume terms, they sound like instruments of torture. I guess they were, actually, for me! It would have been a lot easier to make a simple doll chemise, and from now on any others will be quite plain. They’ll have to be; this one is so bulky that a dress has to be specially cut to fit over it. Live and learn.
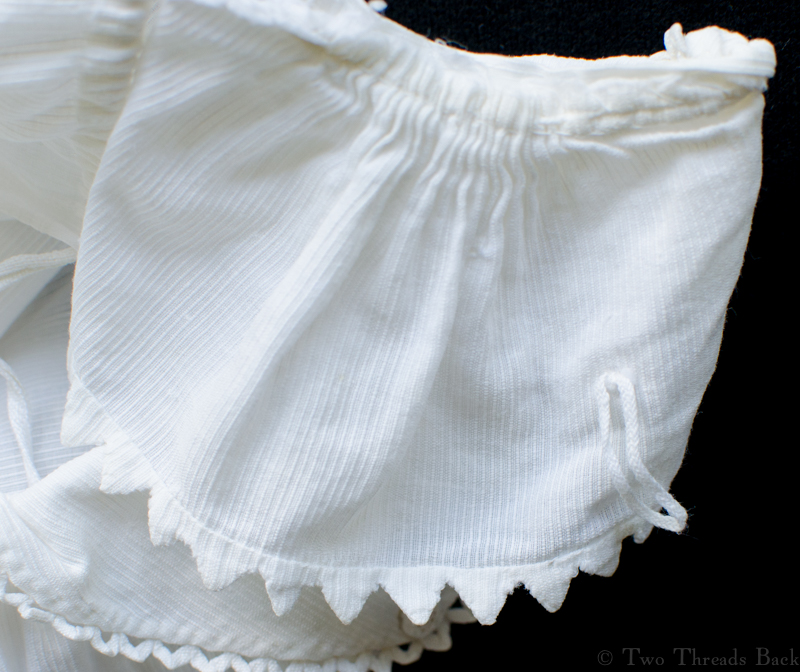
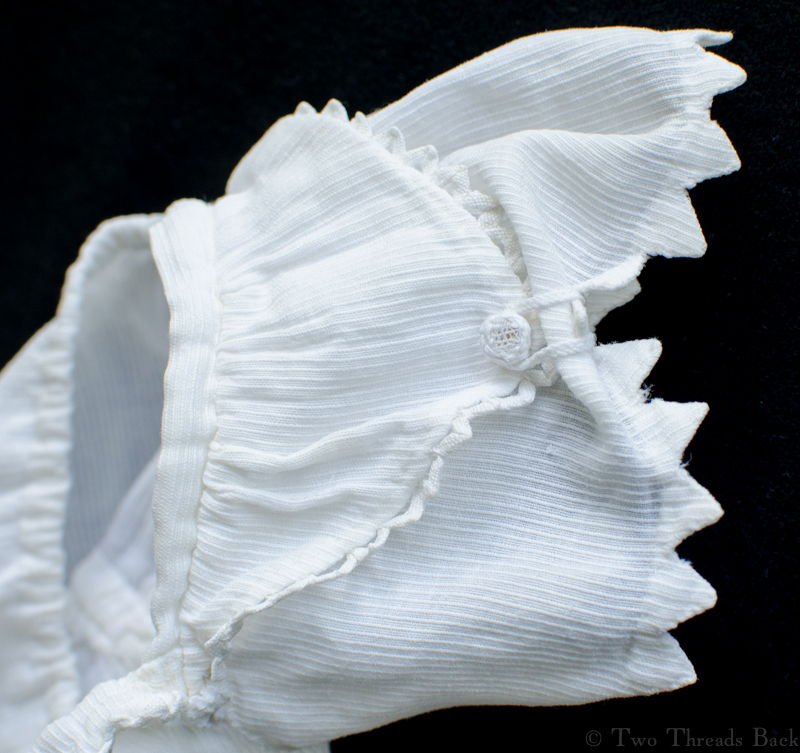
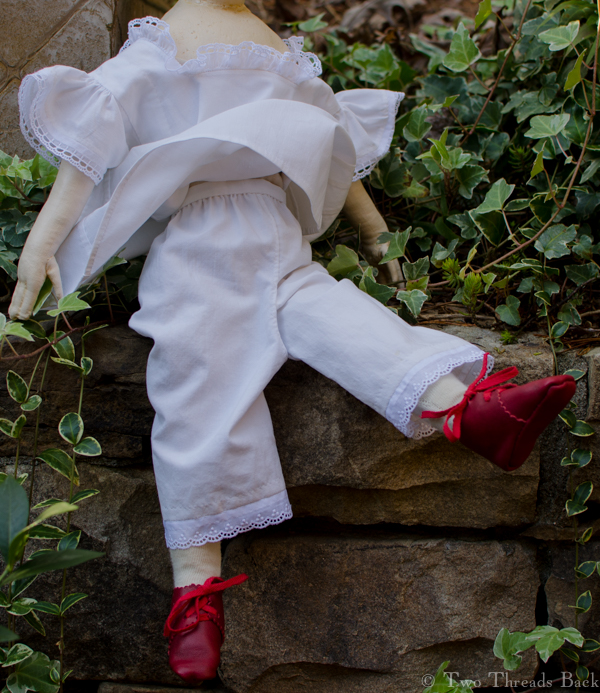
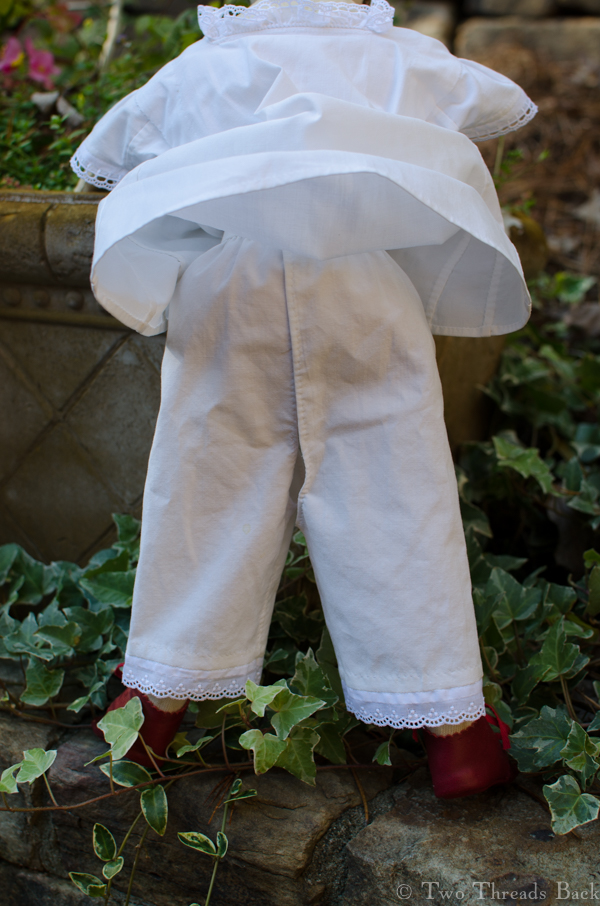
Next came the drawers. Since Jessamine is an older girl, I decided she would have split rather than closed ones. Well, really I just wanted to make them that way. Of course that means it’s trickier for her to pose with them while retaining her modesty. But we managed. I suppose you can tell from the photo that this wasn’t taken in December? And surprise – it wasn’t this year, either!
A petticoat was essential, and this one is so full that she wouldn’t need another. It was made from the embroidered ruffle of an early 20th century, mass-produced, low quality, damaged piece. The elderly lady I purchased it from was apologetic over its condition, saying she was told that her great aunt had stood too close to the fire. While it’s sad to take apart anything, thereby tearing it from its history, some things wouldn’t survive at all otherwise. (I’m sounding rather apologetic myself, hmm?) But now this scorched phoenix has a future and a past!
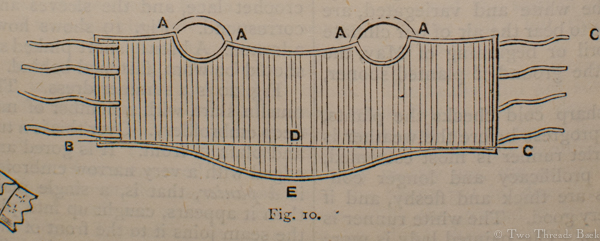
Every young lady would need a corset, or if she wasn’t quite ready for that, a corded waist or stay-waist (or some other term for the same garment). Even though there are a zillion doll corsets out there for inspiration, I went exploring Cassell’s for a likely pattern.
I adapted it to Jessamine’s age (@150 or so) and used the fabric from a c1900 scrapped doll corset. What girl wouldn’t love lilac stays? There was a lapse of time between the modeling session below and the actual completion of the corset. Months, maybe? But I eventually finished the eyelets and added the straps.
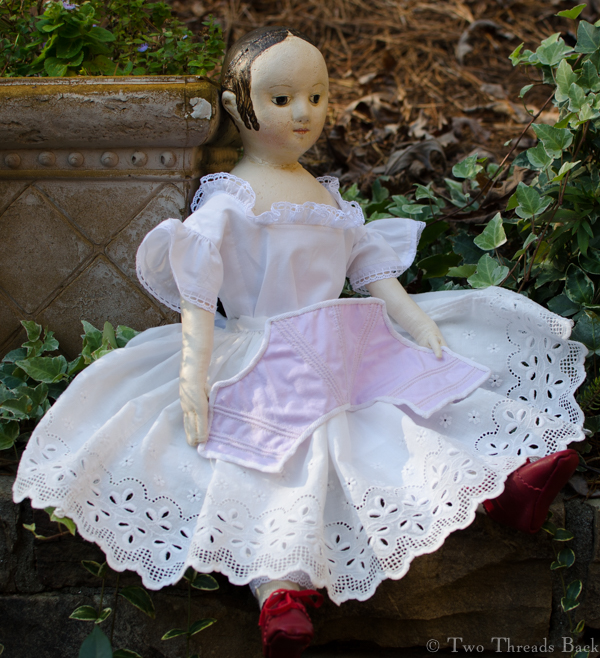
After many more months (Pharaby was taking all my time) I began Jessamine’s dress. The fabric was a happy accident: an online store sent the wrong print years ago, and it’s been in my stash ever since. I made so many mistakes that I lost count. Yep, sleeves again; one went in upside down. Aaaalll the seams and gathers had to be picked out and redone. What’s so embarrassing is that I didn’t even notice it was upside down until I’d done all that unstitching for another reason – to make the gathers match the other side. Duh. Maybe that was why they weren’t even?
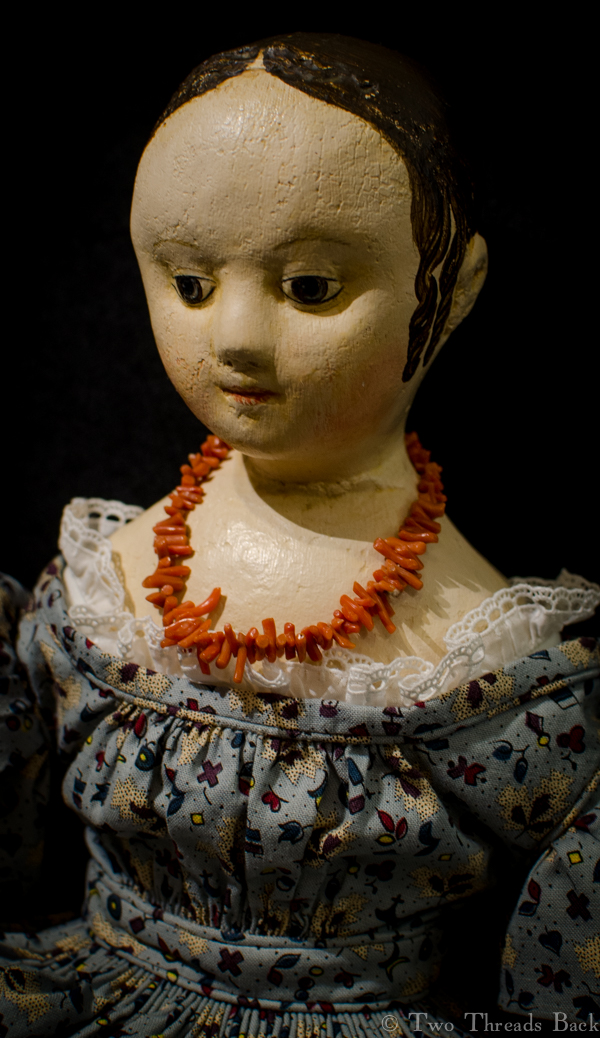
If you spend any time looking at 19th century portraits and daguerreotypes of children, you’ll notice that many (most?) girls wore coral necklaces. I was delighted to find a bargain to finish her ensemble. It was sold as a doll necklace but looks suspiciously like a bracelet. No matter. The graduated coral pieces make it look enough like a necklace to suit us just fine.
I wish I could claim credit for the pretty red shoes, but that goes to the her incredibly talented maker. Here’s a peek at Jessamine’s feet – too sweet! Transported back to 1860 as a child, I would have been sooo tempted to take her wading in the summer! (My dolls suffered worse.) But it’s December, I’m grown up, and there’ll be no such mischief. We wouldn’t want St. Nicholas to leave only a lump of coal, would we?
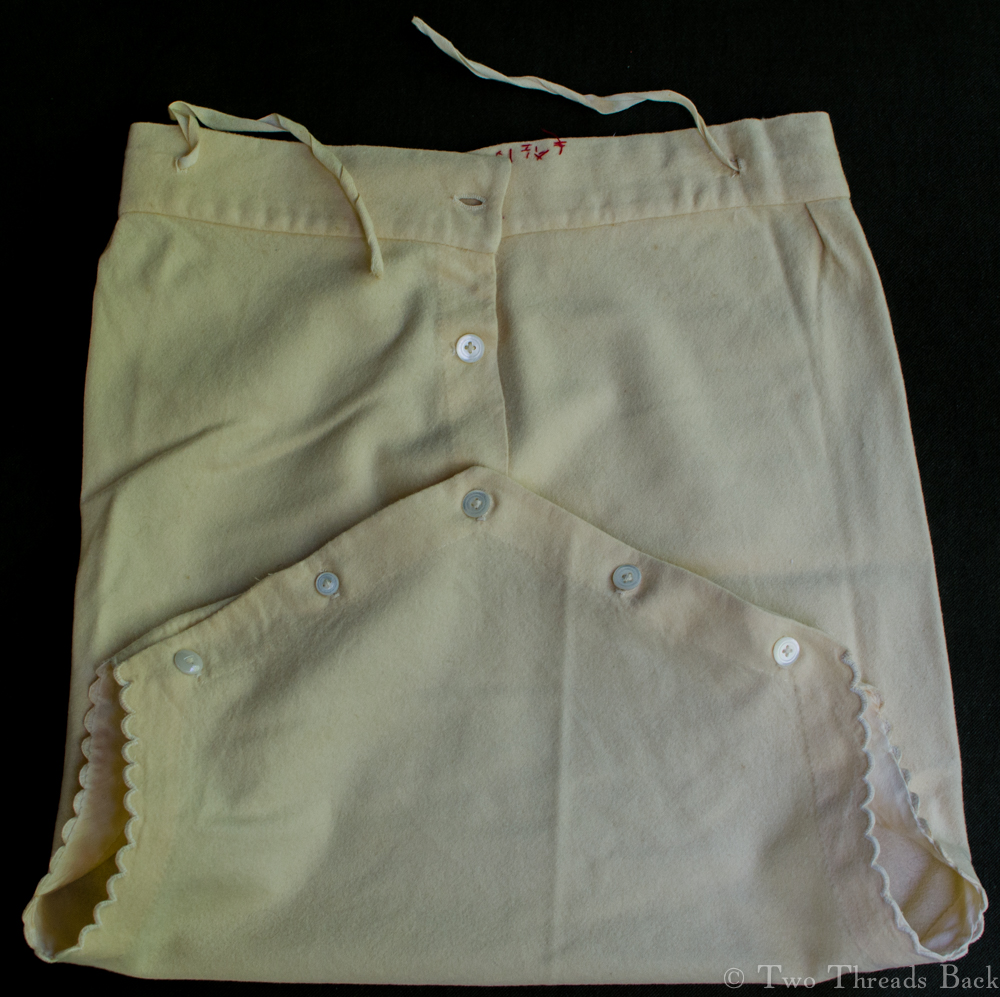
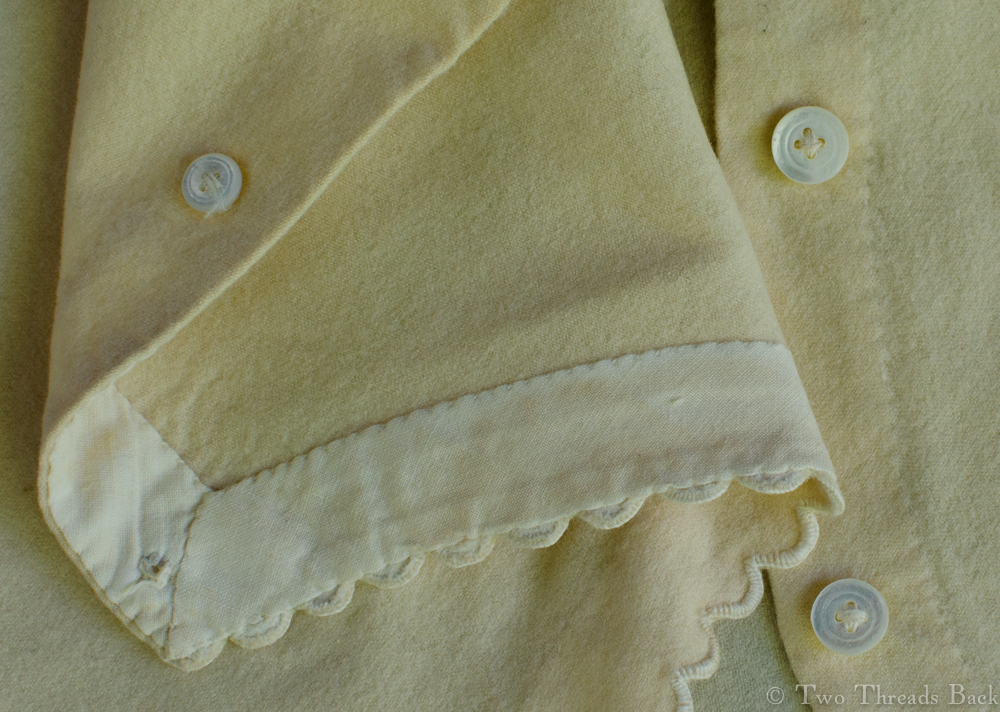
Diaper cover, late 19th century. Plain sewing in flannel! Could those red cotton stitches be laundry marks?
There is an odd Notion enough entertained about Change, and the keeping of Children clean. Some imagine that clean Linnen and fresh Cloaths draw, and rob them of their nourishing Juices. I cannot see that they do any thing more than imbibe a little of that Moisture which their Bodies exhale. Were it as is supposed, it would be of service to them; since they are always too abundantly supplied, and therefore I think they cannot be changed too often, and would have them clean every Day; as it would free them from Stinks and Sournesses, which are not only offensive, but very prejudicial to the tender State of Infancy. – Dr. William Cadogan, 18th century author of An Essay upon Nursing
Plain sewing examples are usually cotton or linen, but here’s one of wool flannel: a baby’s diaper (or napkin) cover. Maybe this one is similar to what Mrs. Bakewell meant in her 1836 Mother’s Practical Guide. “I cannot too strongly recommend the use of a flannel napkin over the diaper for the very young babes, when they are carried out. The chest, too, should be guarded with flannel, especially if there be any constitutional or hereditary predisposition to inflammation.” Wool, the cure for what ails you!
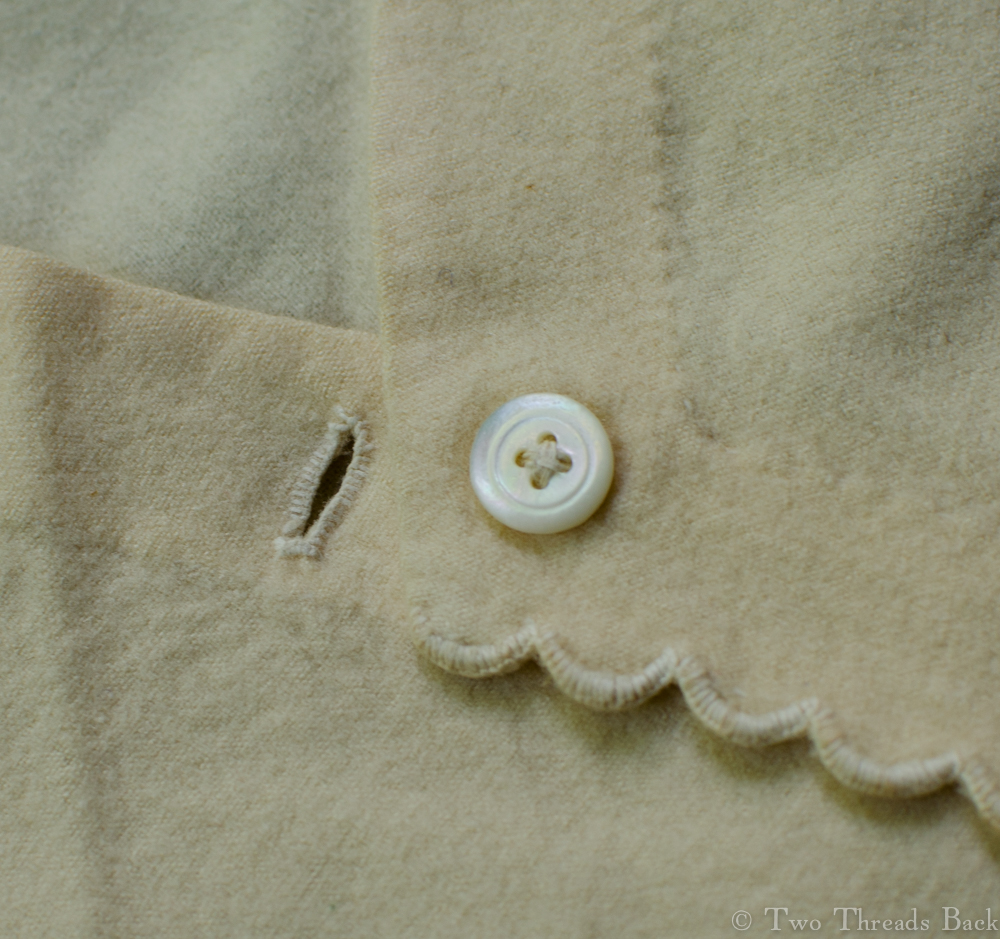
Instead of the herringbone stitch, this has been bound with a cotton facing and trimmed with a blanket stitch in neat scallops. Herringboning, the stitch recommended in period manuals for anchoring seams on heavy material, wouldn’t have been sufficient to secure the edges, considering the laundering required.
Cotton facings, hemmed with tiny stitches.
In the days before modern heating, wool flannel was often part of a baby’s wardrobe. Although warm, it seems like wool would be awfully heavy and itchy if worn close to the skin. Maybe that’s just my modern-day sensibilities? But at least the wearer of this diaper enjoyed the relative comfort of buttons for fastening, rather than pins. And I don’t mean safety pins! Babies in earlier times weren’t always as fortunate as the owner of this diaper. Advice books often warned against pins and the possibility of terrible consequences when they pinned the baby instead of the clothing! William Buchan, writing in 1808:
It would be safer to fix on the clothes of an infant with strings than pins, as these often gall and irritate their tender skins, and occasion convulsions. Instances have been known, where pins were found sticking above half an inch into the body of a child after it had died of convulsion-fits, which, in all probability proceeded from that cause.
Closeup of the button and scalloped trim. Better than straight pins, any day!
Unless the fits resulted from trying to scratch the wooly itches!
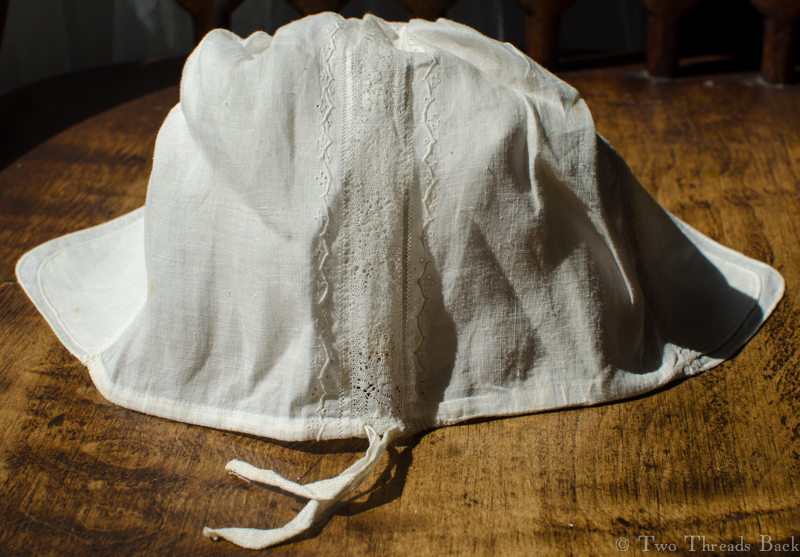
An 18th century cap for a baby, made of fine linen.
If it’s fair to judge from the advice books of days gone by, enlightened physicians had an uphill battle trying to convince mothers to dress their children sensibly. The following quote is from William Cadogan in his Essay Upon Nursing and the Management of Children, 1750.
I would recommend the following Dress : A little Flannel Waistcoat without Sleeves, made to fit the Body, and tie loosely behind; to which there should be a Petticoat sew’d, and over this a kind of Gown of the same Material, or any other, that is light, thin and flimsy. The Petticoat should not be quite so long as the Child, the Gown a few Inches longer; with one Cap only on the Head, which may be made double, if it be thought not warm enough. What I mean is, that the whole Coiffure should be so contrived, that it might be put on at once, and neither bind nor press the Head at all: The Linnen as usual. This I think would be abundantly sufficient for the Day; laying aside all those Swathes, Bandages, Stays and Contrivances, that are most ridiculously used to close and keep the Head in its Place, and support the Body. As if Nature, exact Nature, had produced her chief Work, a human Creature, so carelessly unfinish’d, as to want those idle Aids to make it perfect.
Out of all the clothing that has survived over the past couple of centuries, it seems like the finer baby garments are some of the most numerous. I guess that makes sense: they possess great sentimental value, exquisite handwork, and hey – they don’t take up much space!
Baby cap, back view with ties.
This little cap is a classic of 18th century style. It’s made of extremely fine linen (I know it looks coarse in the photos but it’s really not) with a double brim and a narrow linen tape to draw it up to fit at the neckline. There are no ties to fasten it under the chin, nor signs that there ever were.
Close-up of lace and embroidery.
Even though I’ve laid a ruler across the needlework, the photo doesn’t really show just how minute the embroidery is. And the plain sewing is a staggering 48 backstitches per inch!
The pattern of buttonholed scallops and dots is very common on baby caps and shirts of this era. It also appears on the first “Little Biggin” I wrote about, although this one has tiny eyelets as well as dots. The lace is handmade, but not being a lace person, I can’t identify it. Help??
The brim is about 2 1/2 inches deep, front to back, and 11 inches from side to side. The two layers have been tacked together and the crown gathered and sandwiched between them.
A “closer”-up of the cap from the inside. Can you make eyelets that measure 1/16″ across? I can’t even SEE them without squinting!
I think this little “Coiffure” is so contrived that it may, indeed, meet with even Dr. Cadogan’s approval!