And green. And gold, and seeds, beads, shells, fish scales, feathers, hair, paints, papers, and too many kinds of threads to name. There was no limit to the elegant (or not so elegant) crafts that Romantic Era ladies of leisure could enjoy.
Yes, this sort of handiwork is probably the polar opposite of plain needlework. (I did warn about rabbit trails!) Colorful, creative, and infinitely variable in materials and form, vs. white, repetitive, and predictable in materials and form. I can’t help it, sometimes eyes just need candy!
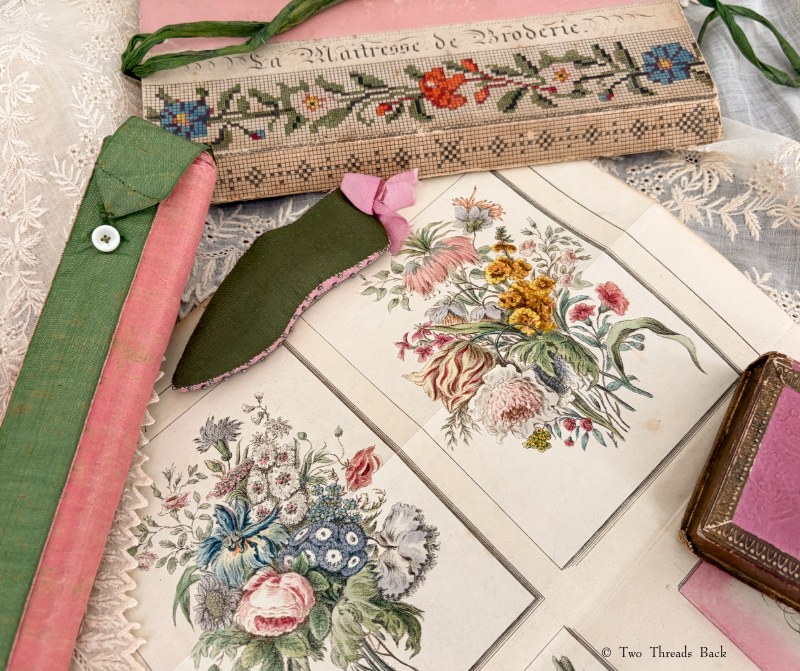
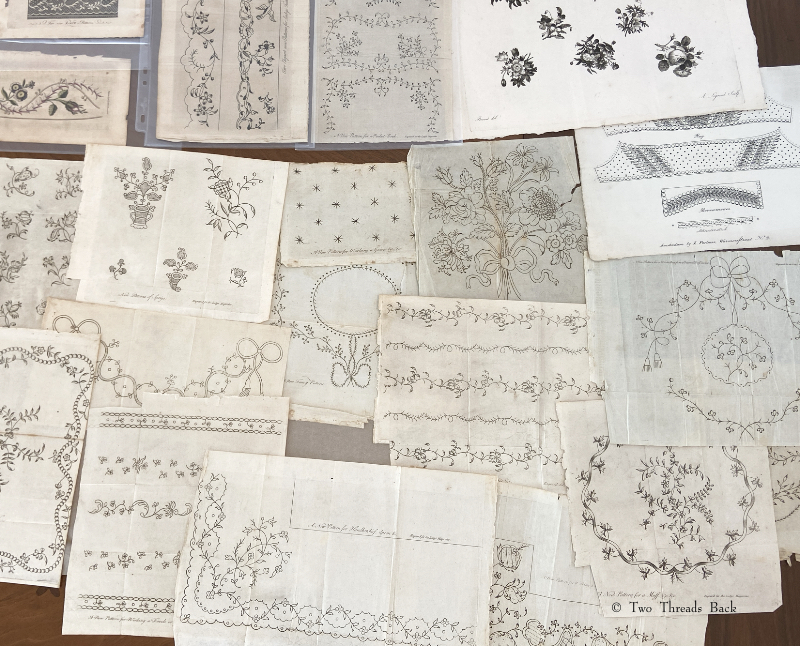
The earliest patterns to be included in periodicals, such as these from The Lady’s Magazine and La Belle Assemblée, were for needlework and published without hand coloring…
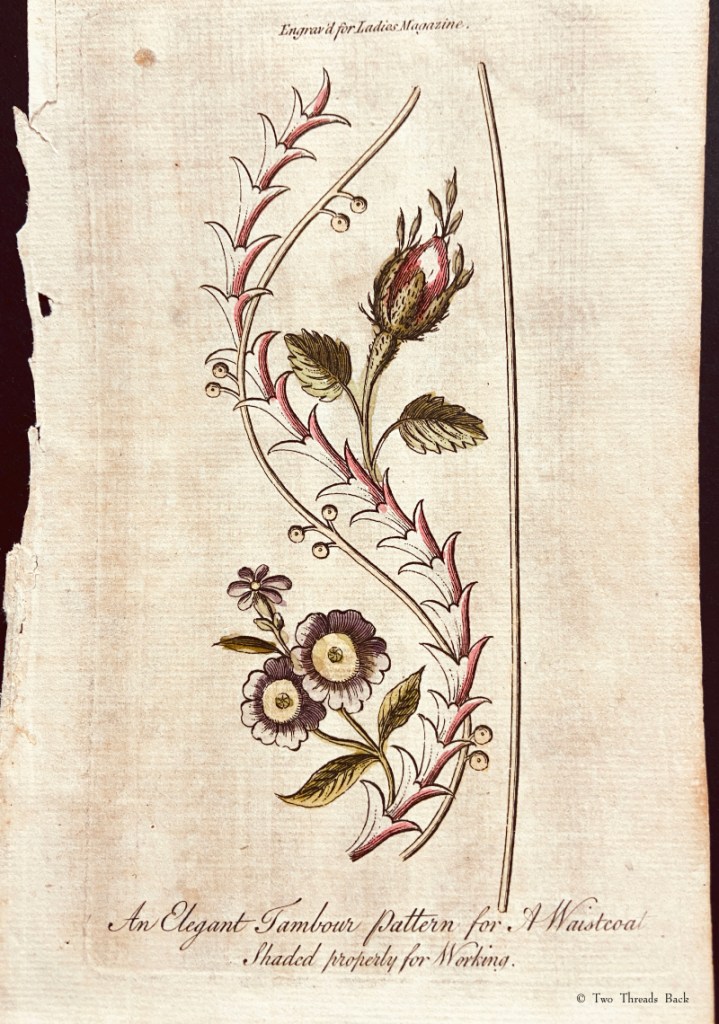
… with an exception to prove the rule. A “properly shaded” pattern from the Lady’s Magazine, 1772.
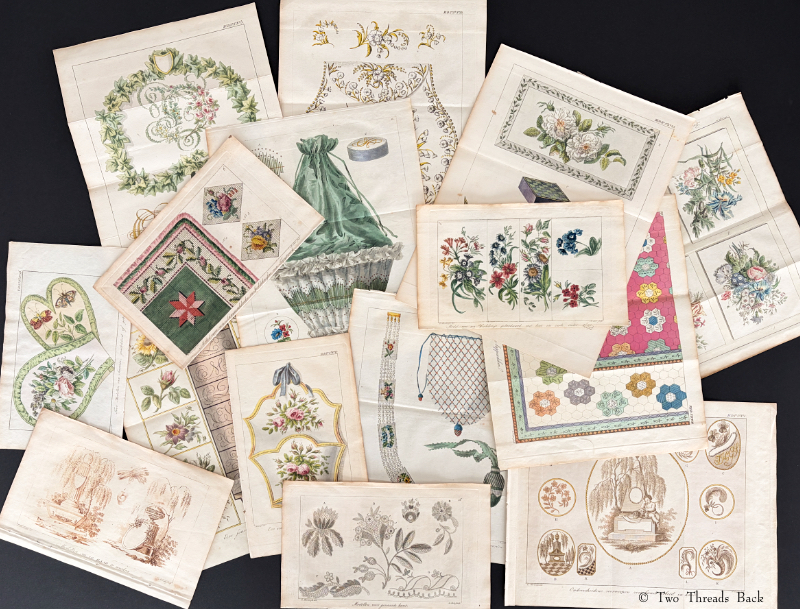
Surviving patterns are almost as much fun to study as the items that were made from them. Penélopé, of Maandwerk was a Dutch ladies magazine which offered hand colored patterns and projects as early as 1821 (it ran until 1835). Half of each issue was devoted to crafts and half had a literary focus. The patterns range from stunning to “what were they thinking?”
Penélopé offered not only needlework, but patterns for things like hairwork, painting, patchwork quilting, beaded reticules, etc., many in color. These are for a variety of projects c.1820s.
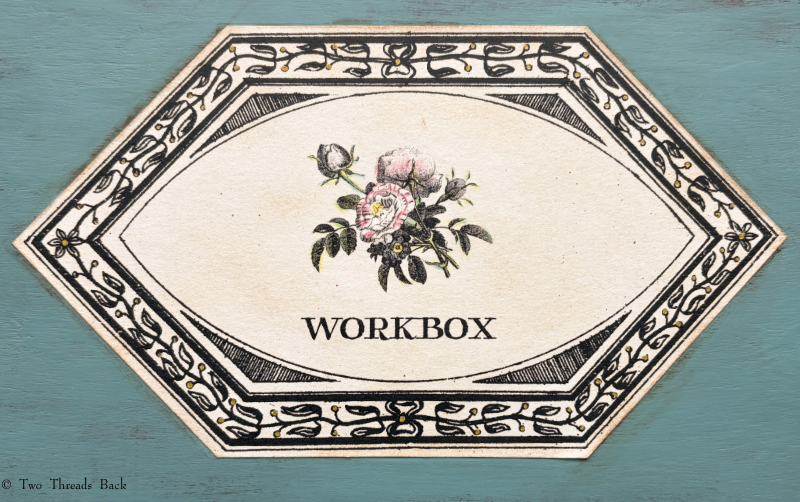
Of course if you want to play with old patterns today, you don’t have to use them for their original purpose. Not everyone needs a bell pull, a mantelpiece container for “spills,” or a hand screen. I’ve had fun scanning and printing designs to use in projects like labels, cards, and ornaments. There are lots available online, both for sale and free (public domain): Google books, Hathitrust, the Internet Archive, and the Antique Pattern Library, are fabulous sources, and I’ve used them all.
This is a combination of two patterns I used to make my own label for a workbox.
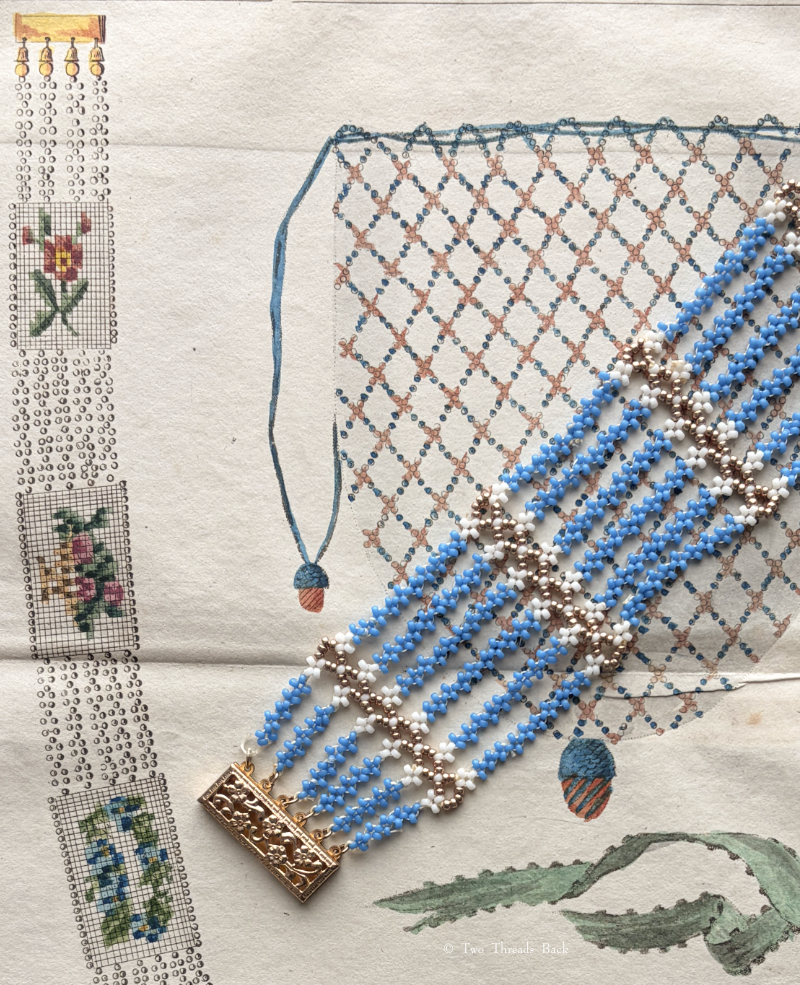
My daughter surprised me one birthday with her version of Jane Austen’s bracelet. I was thrilled! It’s exciting to see that ladies of the day really were getting ideas from these publications. Or wait…maybe it was the other way around?!
I suppose ladies saved and passed patterns around then the way we used to do with recipes. Today it seems like everything is digital – even recipes! I do love how accessible and how easy that makes sharing ideas and inspiring creativity. But isn’t there something extraordinary about a pretty paper that lets us hold an idea in our hands, long after its maker is gone?
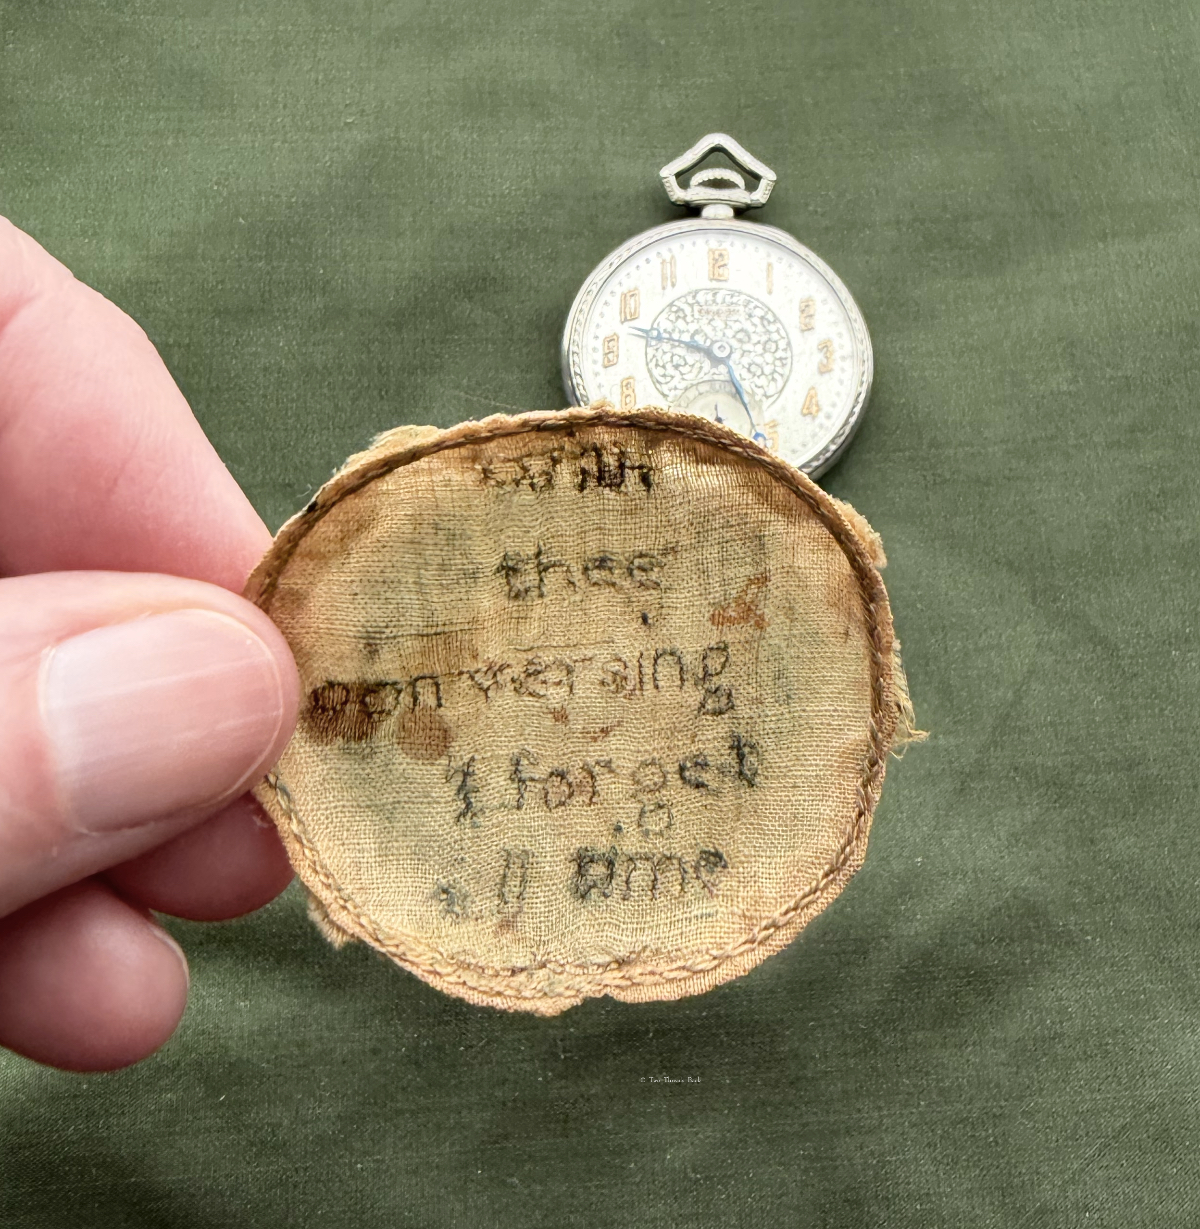
Plain sewing often taxed the eyesight and dexterity of a seamstress and many of the examples I’ve shown used mind-bogglingly small stitches. They certainly boggled mine, anyway! Such microscopic work wasn’t limited to practical garments and household linen; it could also be used to make a sentimental token for someone special. The “watchpaper” above (which is obviously not paper) is an example.
A watch was quite a luxury until the 18th century, but by the end of that era they were more common, although still greatly valued. It was customary to protect the delicate workings inside with little circles of paper that could be printed with a variety of pretty or amusing things such as portraits of famous people, landmarks, poetry, or even advertising for the maker. And of course, they gave ladies the perfect opportunity for artistic expression. Now highly collectible, some papers were painted, or perhaps inscribed with elegant calligraphy while others were… drumroll… made to show off needlework!
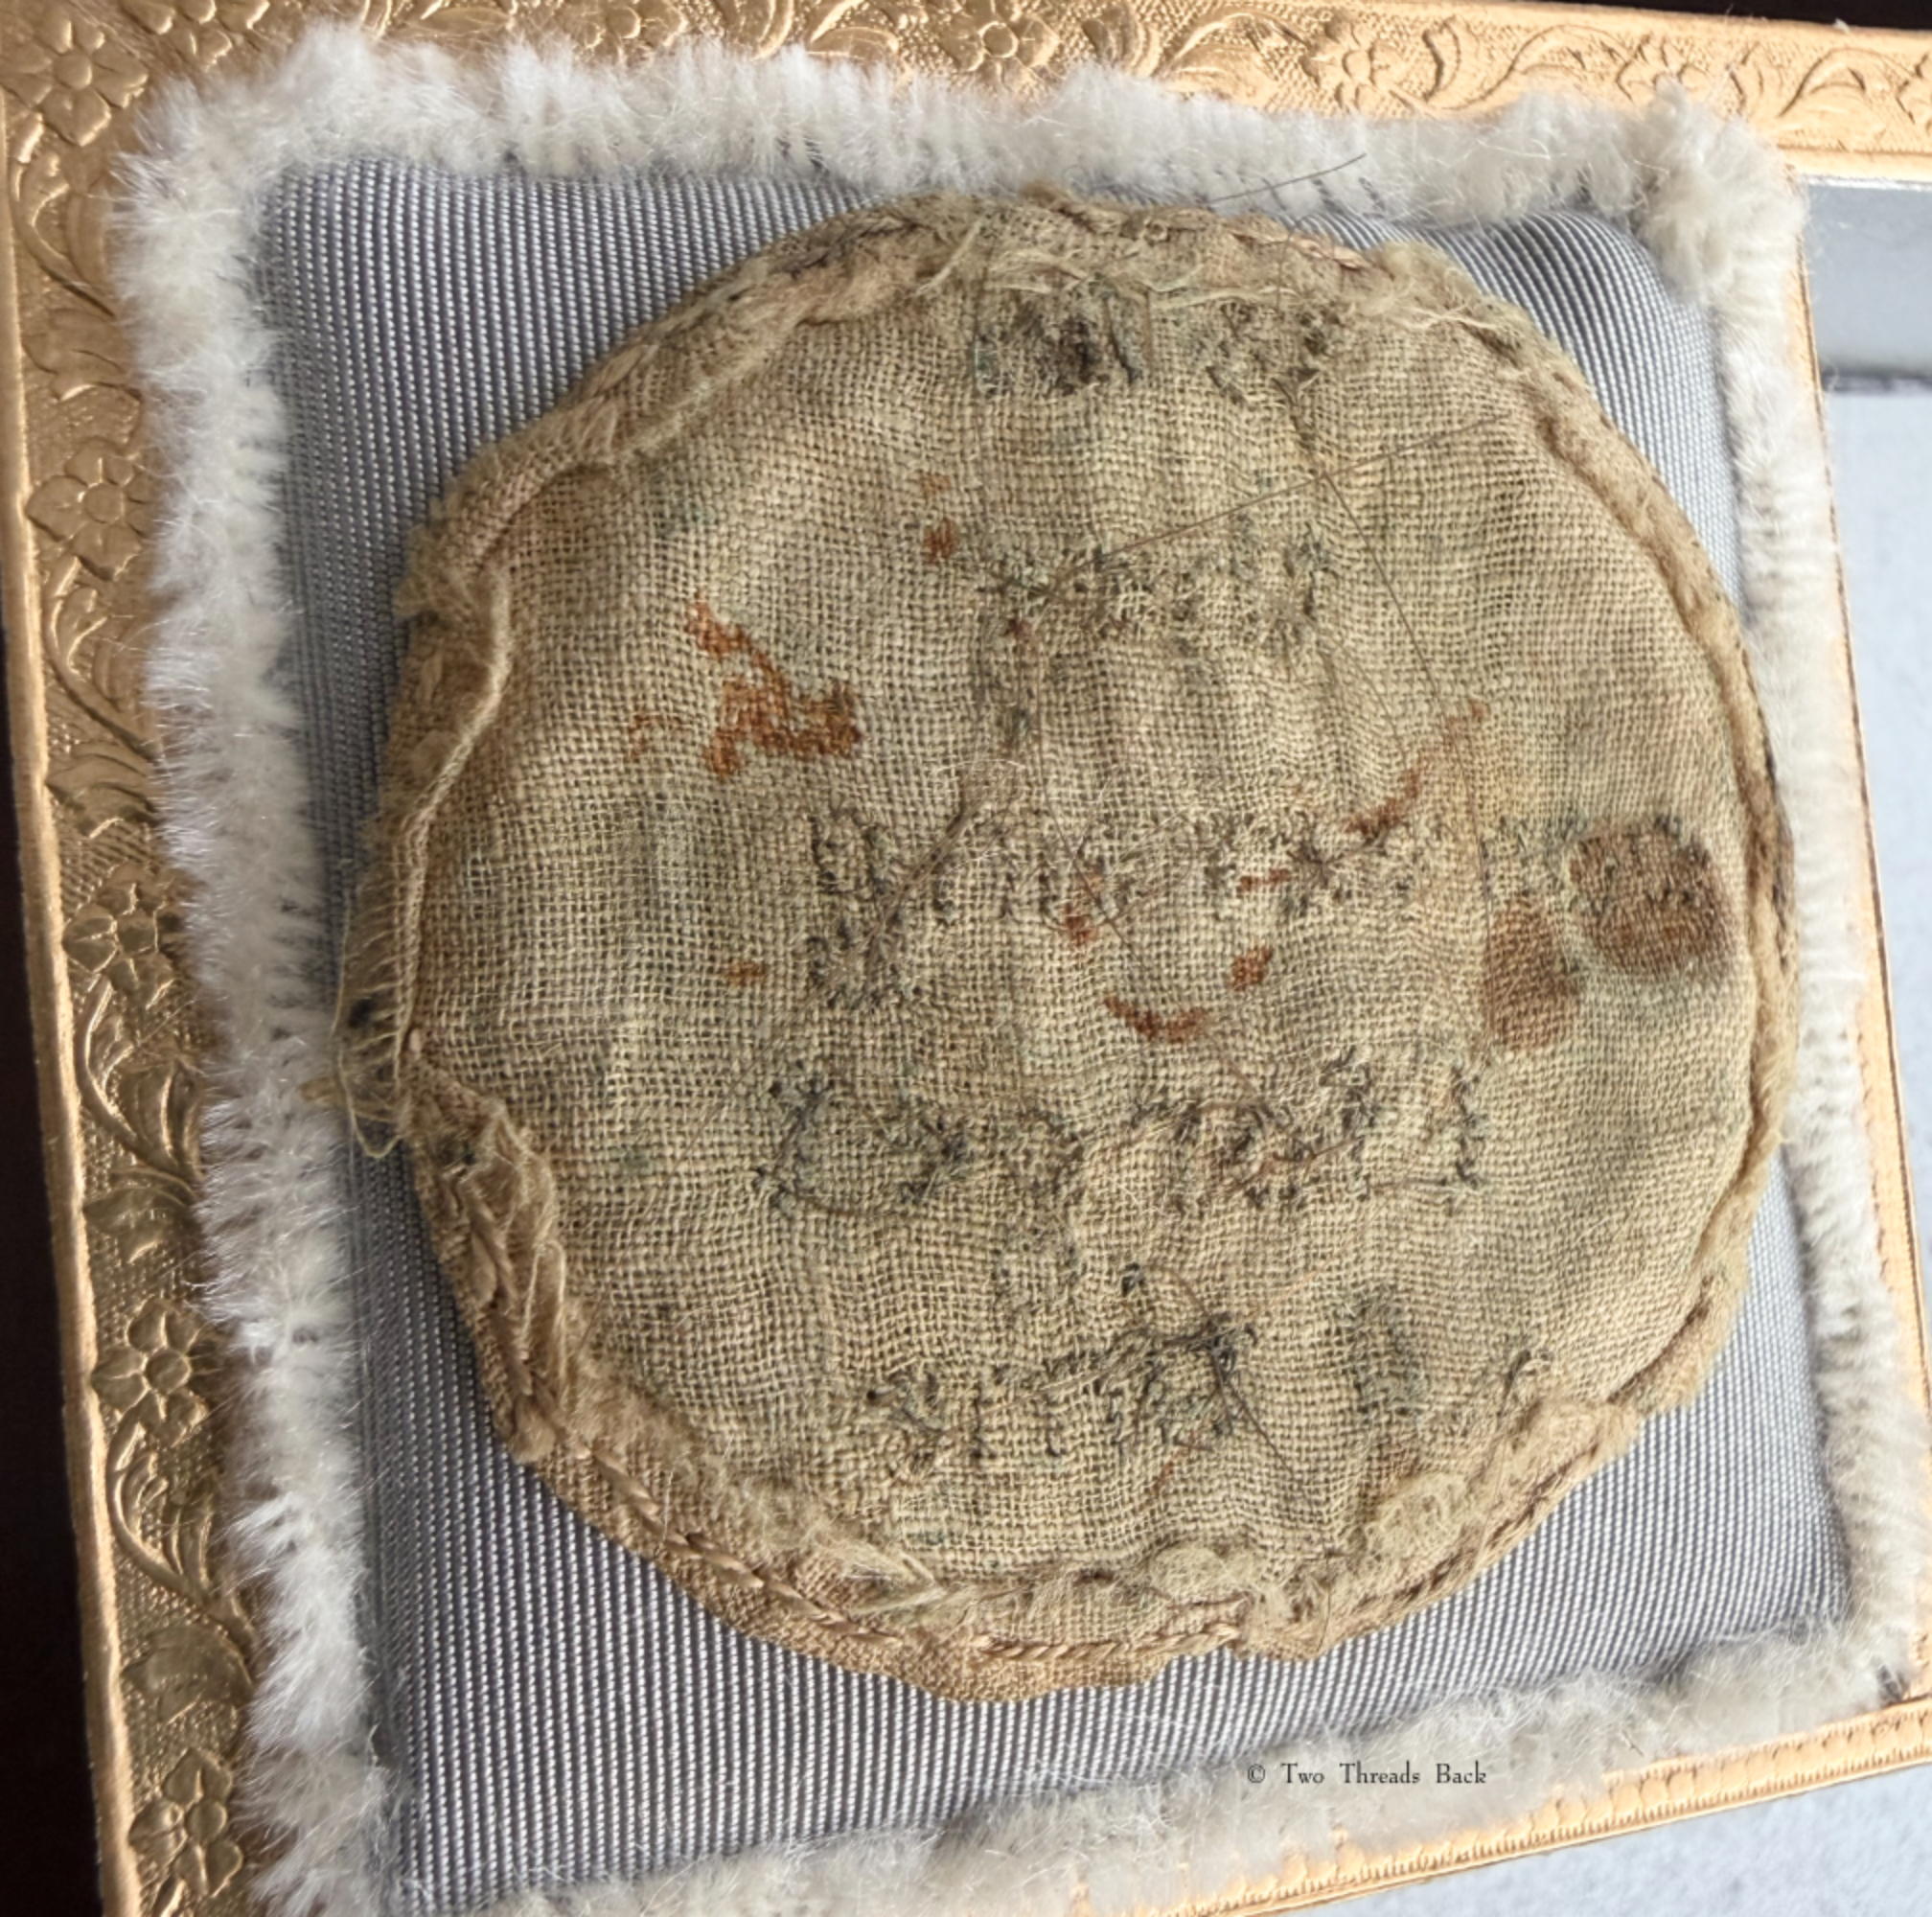
Watchpapers could be embroidered, made of lace, or use simple stitches such as cross-stitch (marking) to convey affection or good wishes. I’m not sure what kind has been used to make the one above since it’s so small and time has taken a toll. What I find most touching is that the maker who stitched
“With thee conversing I forget all time”
has woven the silk thread with her (?) his (?) hair for the embroidery! If you are a bit ambivalent about the “hairwork” or preserved locks found in old jewelry or albums, I understand. But I think the eeriness is part of its appeal, a personal touch through time that makes the past real.
I like the idea of making one of these myself. It would be utterly useless since I haven’t got a watch for it. It would create eyestrain to the point of a headache. But it would only require scraps of material and a little bit of time – my kind of project!
PS You’ll find more on the history of these tiny treasures online, and lots of pretty ones to see (Pinterest or auction sites) if they catch your fancy. PPS This one will be available on my Etsy site soon, as I continue uncollecting!
Library of Congress, Prints & Photographs Division, FSA/OWI Collection
My dear sister Fannie, As I have just dropped my scissors in the well, have no more sewing cut out, and can conscientiously spare the time, I will write you a few lines. Indeed I would have written you before this, but I have no time at all to do anything for myself. I’m teaching the boys from eight till time for doing my cooking. All of us are quite well, so are all Pa’s folks.
Pa has not settled down steadily to work since Ma’s death. Keeps us uneasy all the time. I have set no hens yet, but intend to raise a lot this year. What luck are you having with your chickens and geese this year?
Can your baby walk yet? Mine is beginning to talk, has eight teeth and four more in sight. He is not much trouble now, only he climbs and can go up the stairs a good deal faster than I can. With much love to yourself, Ben and the children, I am as ever, Yours affectionately, Mollie
1882 Letter to to Fannie Dudley in Florida from her sister in Georgia1
You can’t sew without scissors, right? Seems like a pretty good excuse to me! I haven’t been sewing much lately either, but I’ve managed to entertain a few leisure hours with good books. Here are some I’ve found so interesting that I thought I’d share.
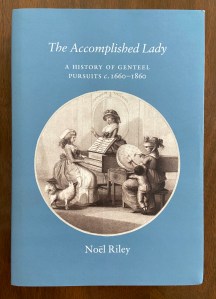
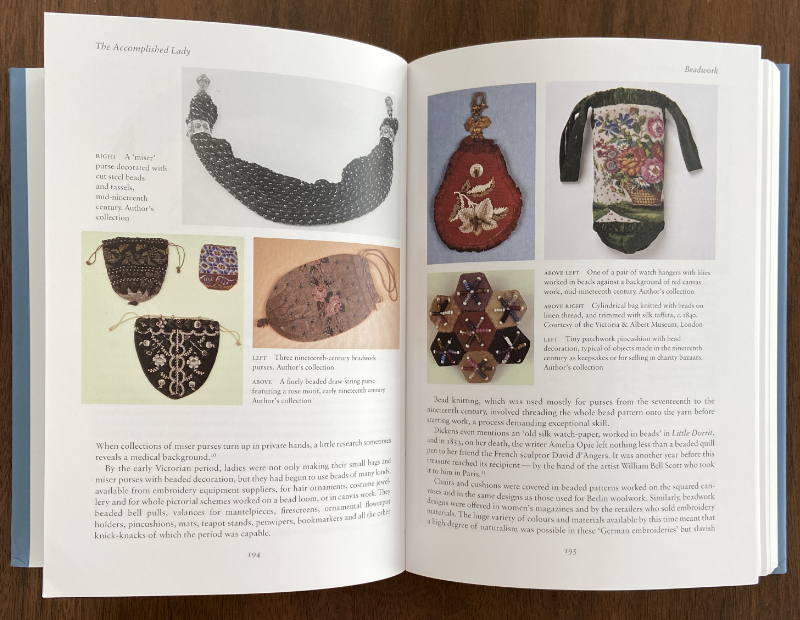
The Accomplished Lady, A History of Genteel Pursuits, c. 1660-1860 by Noël Riley is a guilty pleasure for this plain sewing enthusiast, since it’s far from plain. It’s a fabulous look at the 17th-19th century crafts, hobbies, and amusements that women who could afford leisure pastimes enjoyed. It covers the things you’d expect such as music, dancing, and cards, but I found the chapters on needlework, beadwork, shellwork and other nature crafts especially fascinating. Seaweed pictures, straw work, paper filigree… so many ways to exercise talent and display creativity! There’s even a bit on theorem or “poonah” painting. It’s beautifully illustrated – got to love the eye candy! – but the scholarly research which sets it all in context (without the tedious academese saturating so many similar works today – thank you, Ms. Riley!) makes it a valuable resource. The Accomplished Lady is definitely worth a book search or trip to the library!
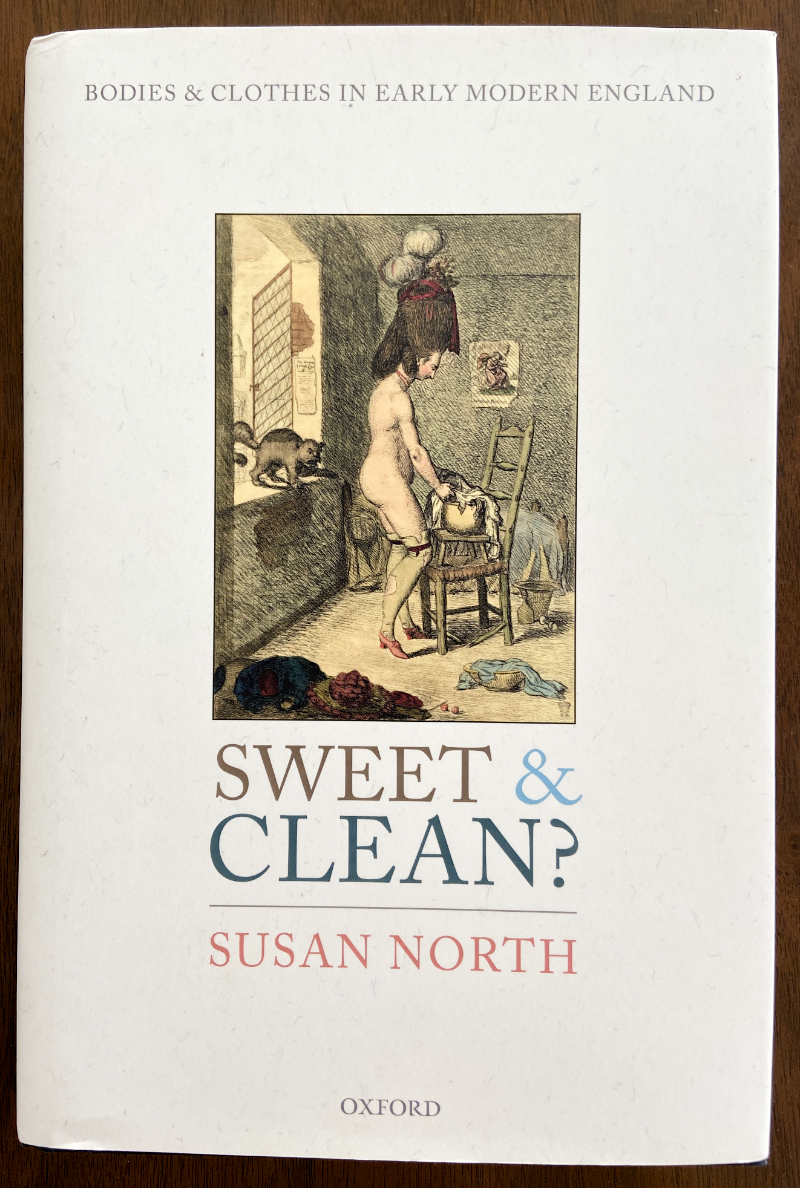
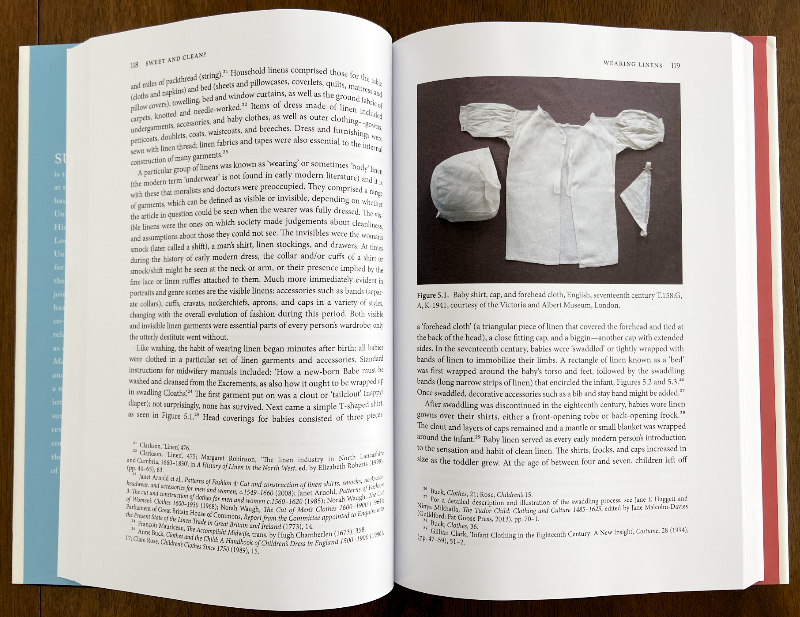
Another happy find is closer to my plain sewing focus. Sweet & Clean?, by Susan North. While the title is the topic, personal cleanliness in early modern England, there is a lot of information on the making, wearing, and washing of underlinen (shirts, shifts, etc.). That, of course, means plain sewing figures prominently!
The exhaustive research on the most private areas of daily life kept me engrossed through every chapter. If you have an interest in clothing, health, and domestic life during those years, you’ll find answers to questions you didn’t even know to ask. Sweet & Clean? might be overwhelming if you like to rush through historic site tours to get to the cafe. But if you’re someone who lingers and wants to explore behind all the closed doors, this one’s for you!
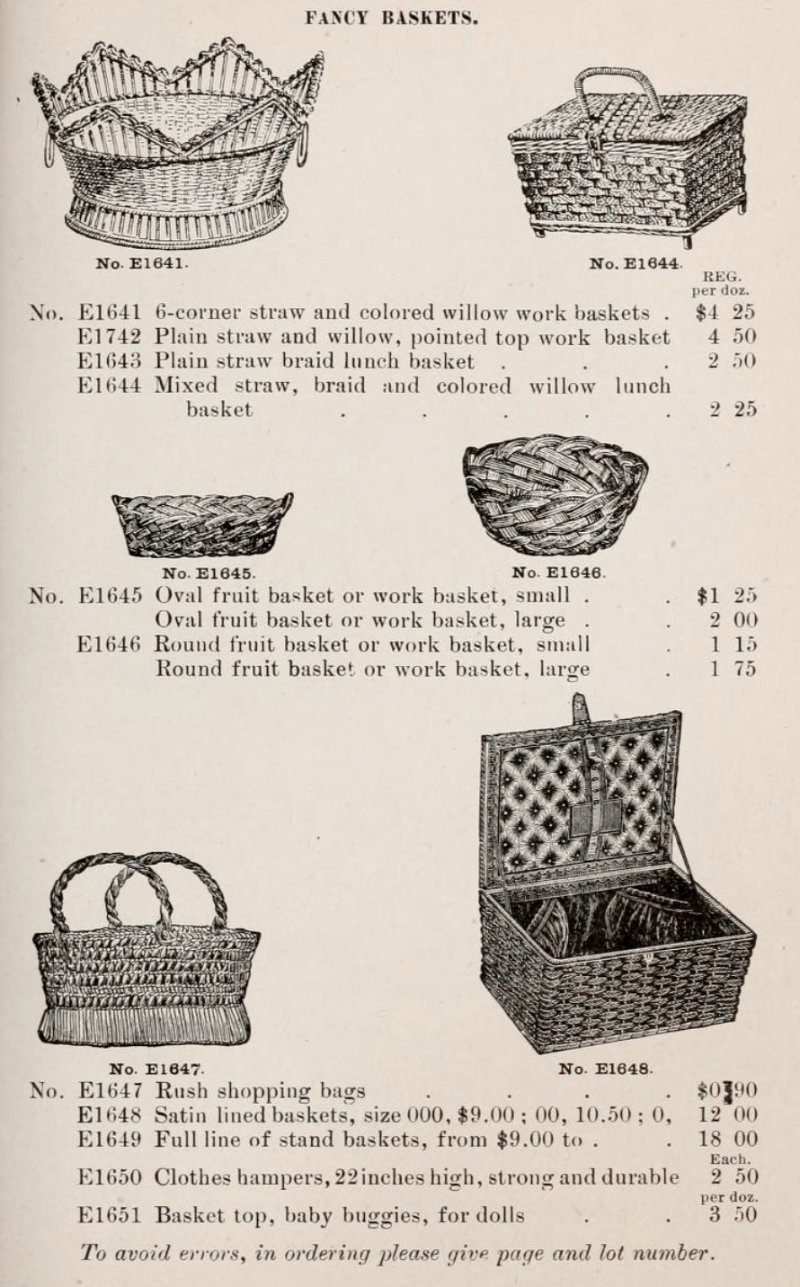
Not all my reading is print – books that are available online can be just as entertaining. Old catalogs are lots of fun to browse, and I’ve found that sewing time can dwindle because of them. Mollie’s lost scissors may have been much like these. Which, no surprise, actually look a lot like those in my sewing basket now. The image below is from Carson, Pirie, Scott & Co. Wholesale Drygoods Catalog, 1893. Have a look, it’s like shopping the past.
1893 wholesale catalog. Note the prices per dozen!
I have one like E1646 – and it’s not antique, just old!
Maybe when you can “conscientiously spare the time,” you will have as much fun reading as sewing. And if you have any good books to share, please do! It may be a while before I retrieve my scissors from the well.
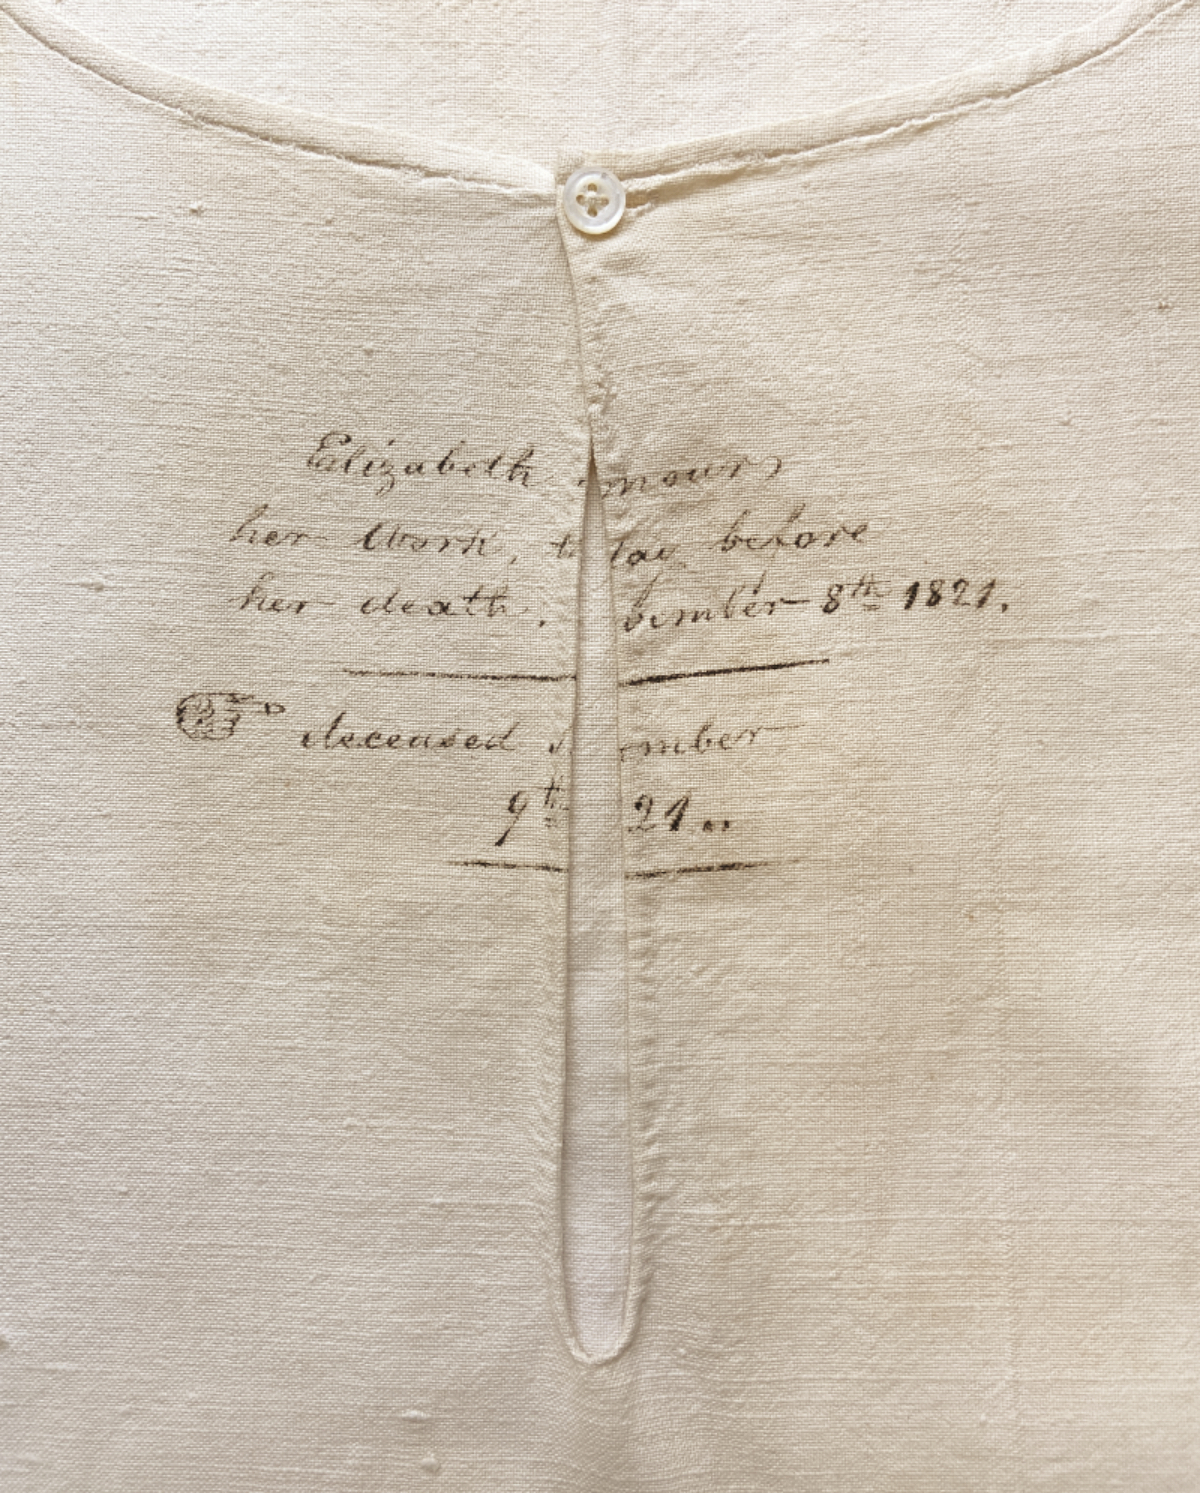
Elizabeth Armour, her work, the day before her death. November 8th, 1821. deceased November 9th, 1821.
Most of the time we never know who wore the antique clothing that we preserve and study, much less who made it and when. So it’s thrilling to find a piece with a story that connects us to a life lived long ago. Her name makes her real.
Shifts and chemises follow closely behind men’s shirts as prime examples of plain sewing. This rare linen shift has its provenance inscribed in ink across the heart. Not only does it give the name of the maker, Elizabeth Armour, but it tells when she made it, November 8, 1821, and when she died – the next day.
Occasionally notes are found attached to clothing, usually intended for family members to pass down, or perhaps when donated to museums. But I’d never seen one quite like this! How could I help but try to find out more about Elizabeth?
Elizabeth Armour’s plain shift, still in excellent condition.
Thanks to the wealth of genealogical data available online now, it was easy to search for a woman with that name and date of death. What a thrill to find her! Of course, I can’t be positive it’s the same person, but the odds seem pretty good.
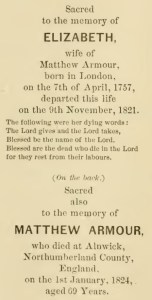
Transcript of Elizabeth’s gravestone.
Elizabeth, wife of Matthew Armour, was born in London on April 7, 1757, and died on November 9th, 1821 in Philadelphia. She was buried there in Christ Church and St. Peter’s Churchyard on November 11, 1821. Her name was entered in the register of burials as “Eliza. Armor.” I don’t know whether the gravestone still exists, but at least a record of it does:
The following were her dying words: The Lord gives and the Lord takes, Blessed be the name of the Lord. Blessed are the dead who die in the Lord for they rest from their labours.
Who was Elizabeth and what was her life like? I found traces. Elizabeth Nesbet married Matthew Armour in the City of London at the church of St. Andrew Holborn on July 2, 1780. She next appeared as the mother of Susannah Nesbitt Armour who was christened at Christ Church and St. Peter’s in Philadelphia on July 3, 1785.
Wait, Philadelphia? 1785? It bargles (as my daughter used to say) the mind! More American history than I can even begin to explore. I suppose there are so many books, essays, and dissertations written on that place and time that they would collectively collapse my little local library. Even the church the Armours attended has a past so rich it makes me dizzy. Benjamin Franklin, George Washington, Betsy Ross, and many of the signers of the Declaration of Independence attended, all during the years the Armours were worshiping there as well.
In 1788, son William was born. Matthew appears on various records during those years as a house carpenter. If there were other children besides Susan and William, I didn’t find a record of them. We know the hazards of illness and accidents in those days, but in 1793 a yellow fever epidemic (here’s a compelling read) struck Philadelphia killing 5,000 of the 45,000 residents, and caused another 17,000 to abandon the city. It struck again in 1797, ’98, and ’99. Did it touch the Armours or their kin? I doubt I’ll ever know.
Matthew continues to appear in the early 1800s on tax, census, or manifest records (he made trips to England) as a carpenter. The family moved several times within the city through the years, and siblings Susan (as she was known) and William apparently never married, but kept house together and owned a dry goods store. In an 1811 affadavit sworn as a super cargo, William (at age 22) states he was 5’9″, fair complexion, blue eyes, with 3 scars on his left forefinger! There’s something eerie about knowing 200-year-old personal details like that. But perhaps no more than slipping my hand in the sleeve of Elizabeth’s chemise?
Elizabeth may have been ailing by 1821, since the cause of death was “dropsy.” We know what she was doing in the days before her death because of the inscription on her shift. More poignantly, we know how much her handwork meant to someone, probably her daughter Susan. I understand how that feels; I have handmade treasures from my late parents that move me to tears when I hold them.
Philadelphia, Nov. 9th, 1821 Died this day of Dropsy Elizabeth Armour aged 64 years.
Matthew returned to England sometime after Elizabeth’s death, where he died at Alnwick on January 1, 1824, aged 69. In 1830, Susan and William’s cousin, Martha Cheesman (b.1818), came from England to live with them in Philadelphia. William died in 1851, and Susan in 1857. She left an estate of $15,000 with bequests to Christ Church Hospital, the Northern Home for Friendless Children, her nieces, and the remainder to her “cousin Martha Cheeseman.” That was a lot of money for the time. It seems that the dry goods business was very profitable! I was getting a little lost and weary of genealogical research at this point, so I let the trail end with cousin Martha’s death in 1906. Perhaps the shift had been left in her care?
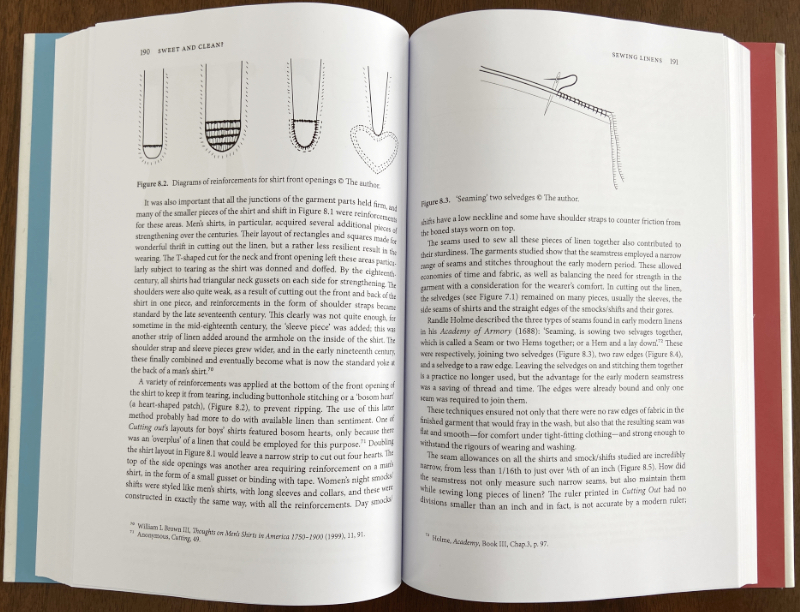
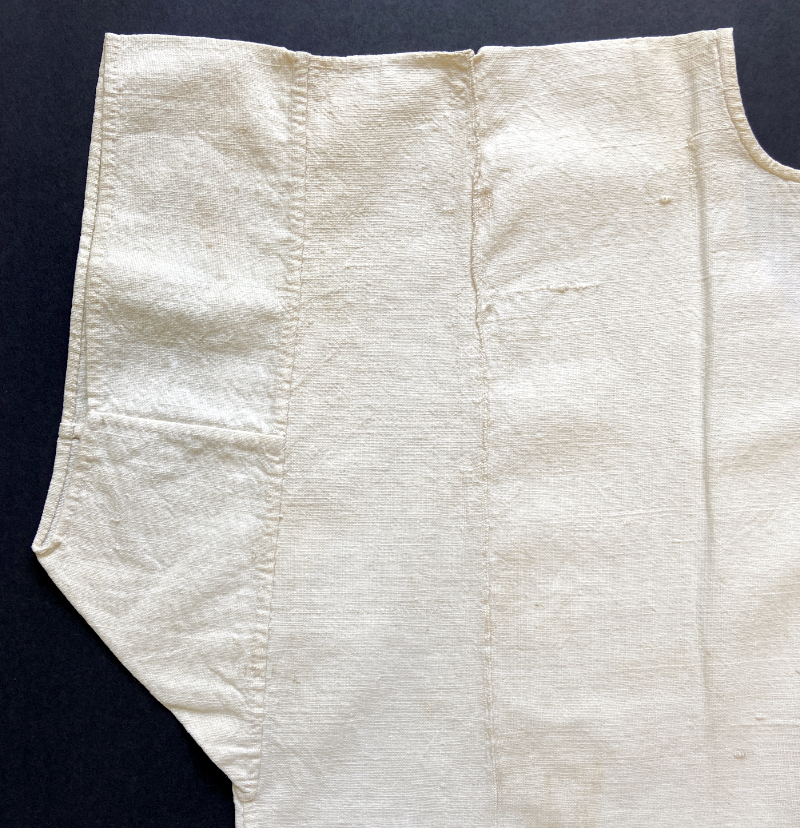
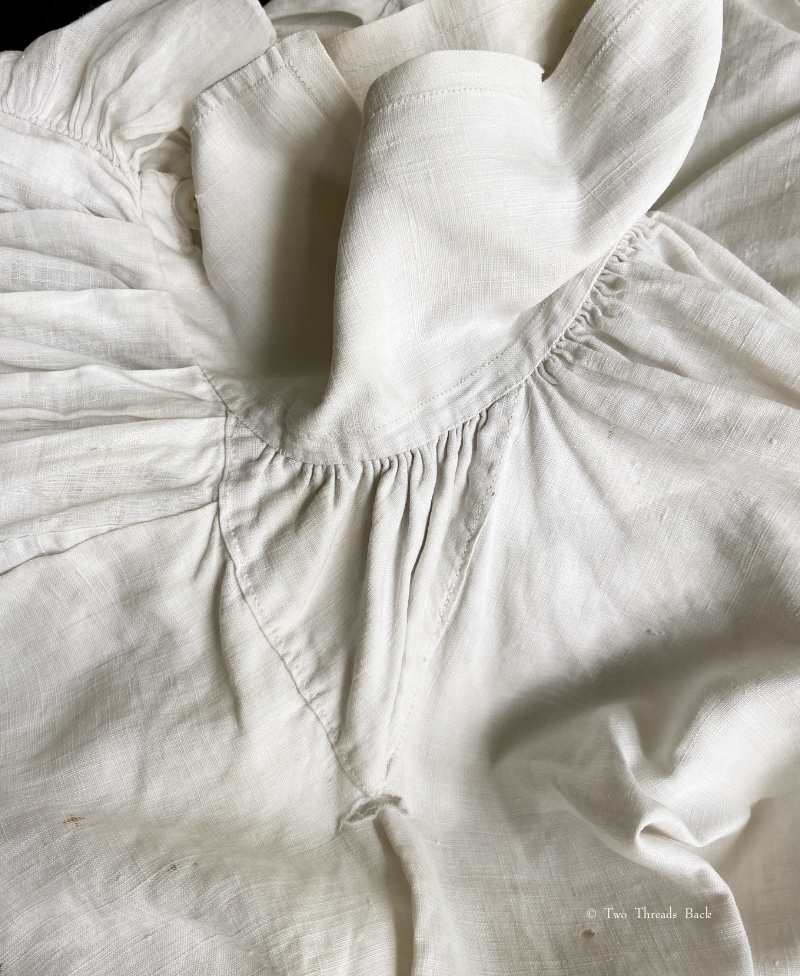
The shift is very simple. The linen is homespun and sewn with linen thread. The economic impact of the War of 1812 and then the Panic of 1819 meant times were still hard, so perhaps homespun was a necessity. The stitching is neat and even, but not particularly fine. The fabric was of insufficient width and so another piece was seamed to it to make the full width of the body, and then folded at the shoulder.
Left sleeve viewed from the back. You can also see the seamed join where fabric was added to a selvedge to make it wide enough.
The sleeves are short, and the right one is pieced. There are gussets under the arms with a small curve at the bottom. It angles slightly wider toward the hem, but has no gores. The seamed join was sewn from the outside, and because the materials were a bit coarse and the stitches a bit deep, it makes a slight ridge. I can see why it’s positioned on the outside, since it would be rather uncomfortable against the body. The inscription was made before the slit was cut for the opening, because the writing is folded under where it’s hemmed. I don’t know if Elizabeth made the shift for herself, her daughter, or a servant, but it could be considered a “comfortable” size more than a petite one.
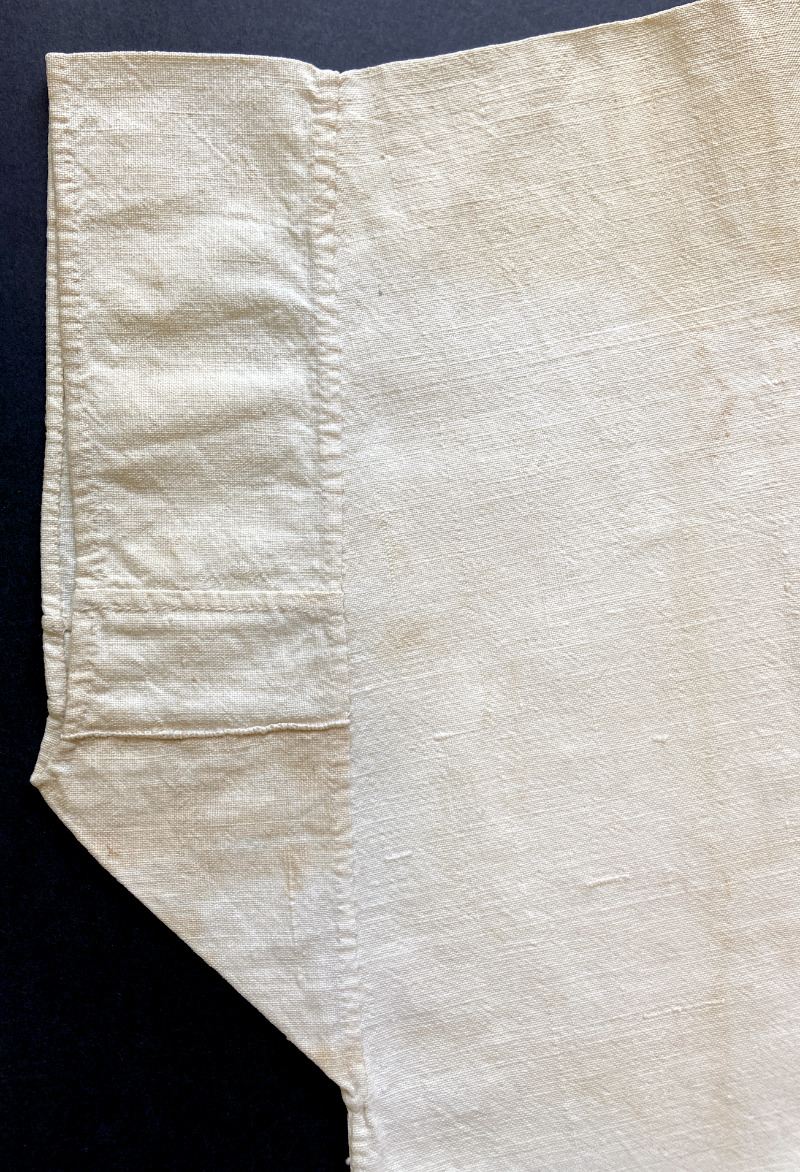
The right sleeve is pieced, using every scrap of fabric. The left one is whole.
A view of the narrow hem and join. You can see how she “seamed” (narrow overcasting) with wrong sides together. It should make a flat, nearly invisible seam, but the linen and thread are coarse and she took the stitches rather deep.
Elizabeth Armour, maker of the shift, lived from 1757 until 1821 in England and America, through the years of the founding of the United States in a city where the most radical historical events were occurring. And what serendipity! She was there when JOSEPH LANCASTER was living (briefly) in Philadelphia! She learned plain sewing in 18th century England, and was able to make a thrifty shift of homespun linen using a minimum of fabric, in the “old” fashion – just as styles were about to change from “shifts to chemises.”
The majority plain needlework I’ve seen (or drooled over) through the years, whether manuals, samplers, or items of clothing, has been from England, and the rest from here in the U.S. It’s truly remarkable to find “threads” from England, America, world-changing history, endearing family sentiment, Joseph Lancaster, and plain needlework all sewn together with a story in this shift. I’m awed.
Who doesn’t love to watch a magic trick? I think they can be a lot of fun, at least as long as I’m not the volunteer from the audience. Especially for this trick!
1784
To pull off any Perfon’s Shirt without undreffing him or having Occafion for a Confederate.
This trick requires only dexterity, and nevertheless when I performed it at the Theater-Royal in the Hay-Market everybody imagined that the person whom I had tricked out of his shirt was in a confederacy with me.
The means of performing this trick are the following, only observing that the cloaths of the person whose shirt is to be pulled off be wide and easy.
Begin by making him pull off his stock, and unbuttoning his shirt at the neck and sleeves, afterwards tye a little string in the button-hole of the left sleeve; then, passing your hand behind his back, pull the shirt out of his breaches, and slip it over his head, then pulling it out before in the same manner, you will leave it on his stomach; after that go to the right hand, and pull the sleeve down so as to have it all out of the arm; the shirt being then all of a heap, as well in the right sleeve as before the stomach, you are to make use of the little string fastened to the button-hole of the left sleeve, to get back the sleeve that must have slipped up, and to pull the whole shirt out that way.
To hide your way of operating from the person whom you unshirt and from the assembly, you may cover his head with a lady’s cloak, holding a corner of it in your teeth.
In order to be more at your ease, you may mount on a chair, and do the whole operation under the cloak. Such are the means I used when I performed publicly this trick.
–PHYSICAL AMUSEMENTS and DIVERTING EXPERIMENTS, 1784
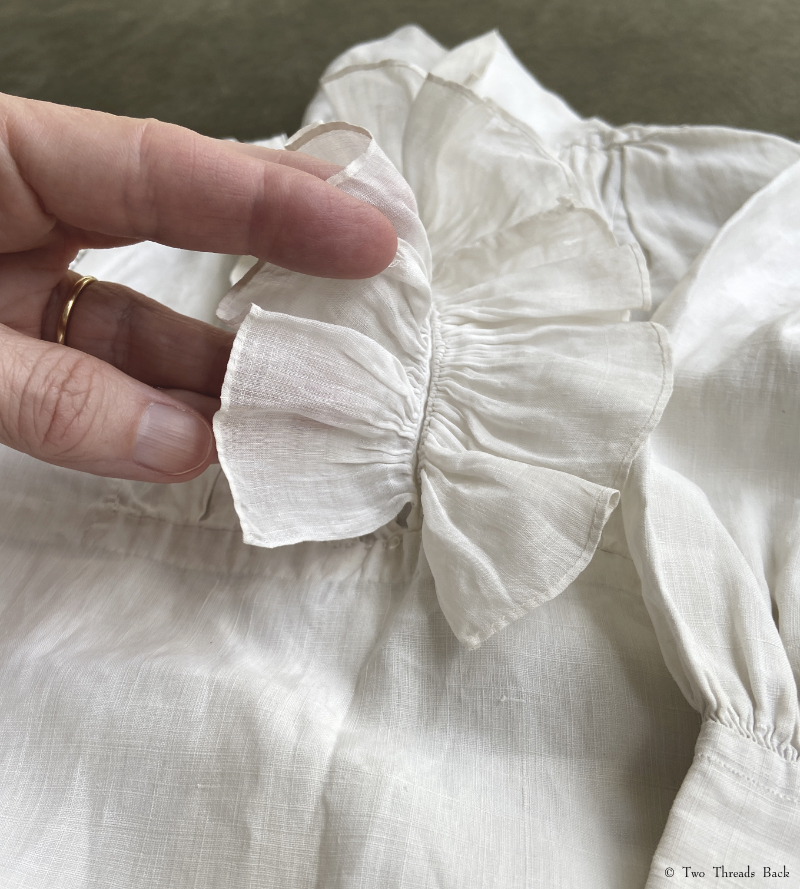
That kind of describes what it feels like when I’ve tried to change clothes in the car. Actually, I think this trick would require a good bit of dexterity, as well as a few practice runs. But still not as much as was required to make this little boy’s shirt. A lot of stitches went into it; decorative backstitching on the collar and cuffs measures about 32 per inch. The simple hemming was 12-14 stitches per inch and seaming (like shallow overcasting) was up to 20 per inch!
A small boy’s shirt, early 19th century. The fineness of all the plain sewing I try to photograph is hard to convey, since close-up shots make the materials seem coarser. But in a more scaled shot, it’s hard to see the dainty stitching. Maybe this one where I’m holding it adds perspective. It would fit a 4 or 5 year old.
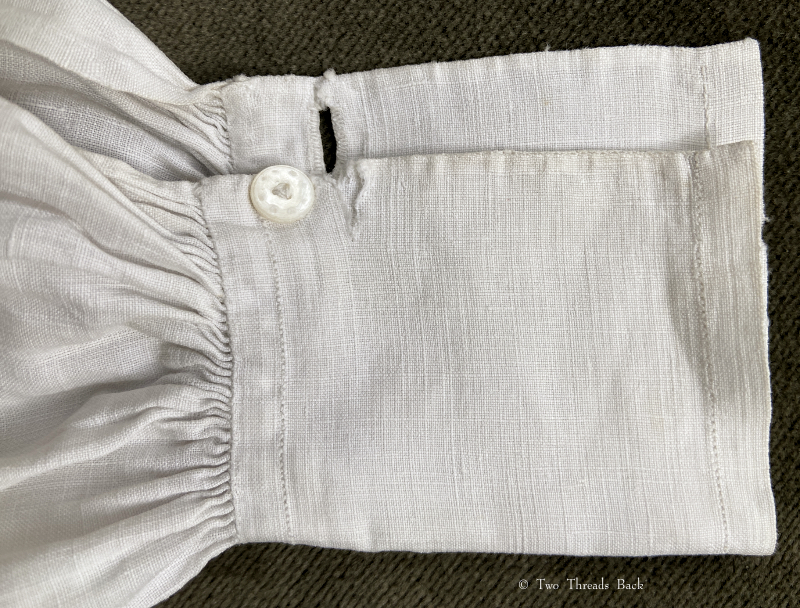
He did get some wear out of it! There are several mends and worn spots, like on the wristband here. So this buttonhole is where the conjurer would attach the string!
The boy’s shirt is made like a man’s shirt. There were 20 parts in a “gentleman’s” shirt:
The body, two sleeves, two wristbands, two binders, two shoulder-straps, one collar, two sleeve-gussets, two neck gussets, two side-gussets, two wrist gussets, one for the bosom, and the frill.
This one, however, was made with without the shoulder straps (a strip of linen along each shoulder), binders (lining next to the armscye), wrist gussets, or a “bosom gusset.” It did have a frill and an inserted pleated front made out of finer linen
It was interesting to see that the two separate ruffles were both sewn to the wearer’s left side, and hemmed folded in the same direction, making them look correctly worn when both are folded over toward the right and exposing the pearl buttons. On all the other shirts I have or have seen, the ruffles are hemmed with each side’s hem folded inward toward the front opening.
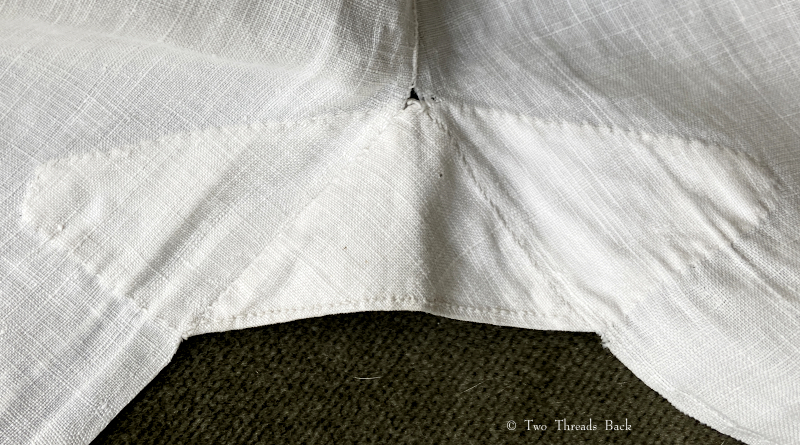
This is the neck gusset next to the collar, and the tear at the point along the shoulder gives a hint why most shirts needed the reinforcement of “shoulder straps.” Perhaps more for strength when tugged than for abrasion!
Bet the little guy couldn’t wait to unbutton his collar – it measures barely over 10 inches when buttoned!
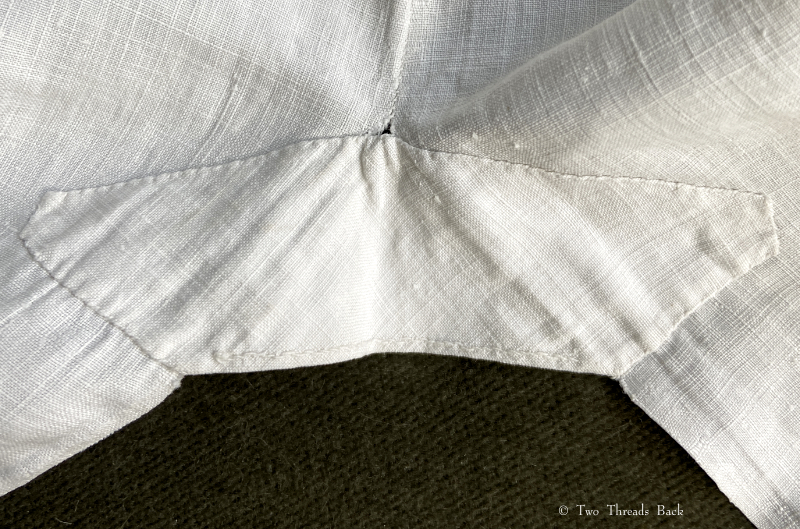
The neatly sewn underarm gusset.
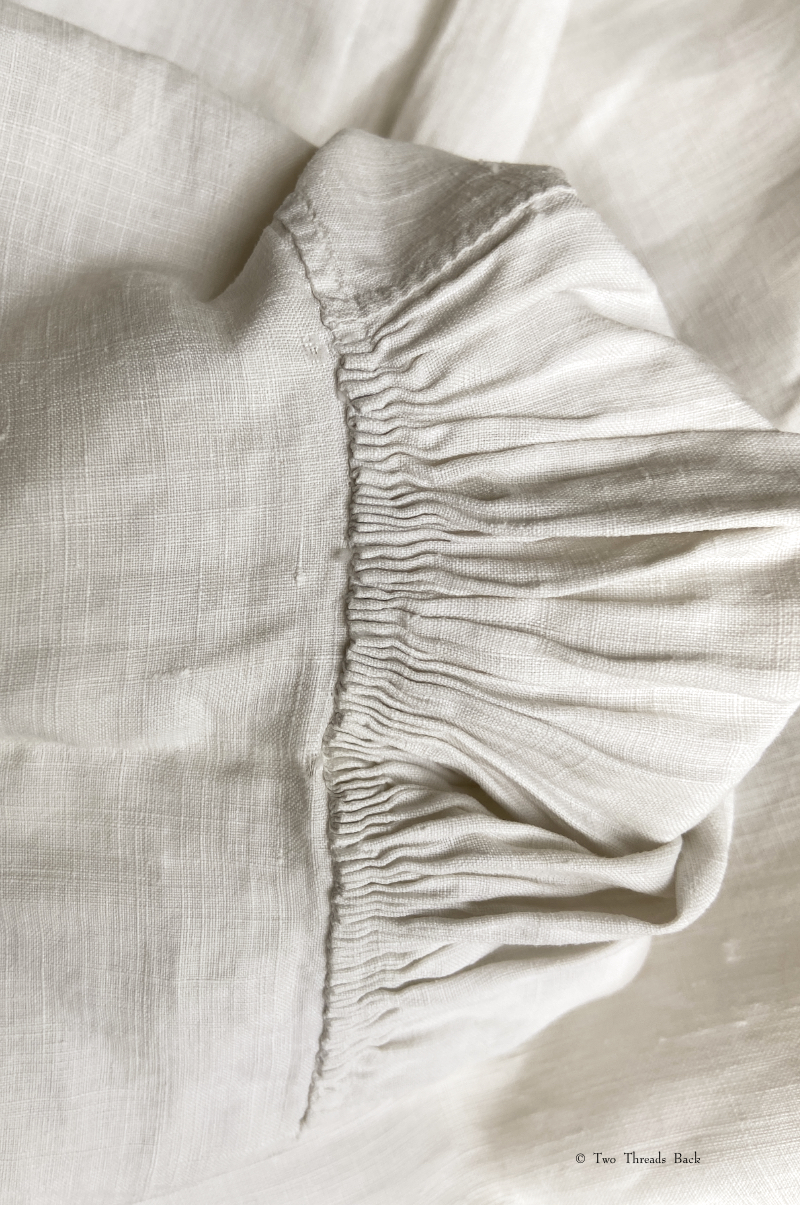
Inside view of the sleeve gathers at the shoulder. These aren’t usually visible in surviving shirts, because they are hidden inside “binders” which weren’t used on this one. The other shoulder has two coarsely-mended vertical tears, one at the same point on the gusset.
Side gusset exterior.
Side gusset interior.
A peek inside the the shirt front, which had 4 pleats on each side of the front opening. A narrow strip of linen covers the bottom edge.
The SHIRT TRICK was republished in other books over the following decades. It even showed up as late as 1870, but by that time the cut of a man’s shirt was more fitted and complex, and I doubt the stunt would work as easily. Maybe the little fellow who wore this had a copy of the The Boy’s Own Book (1828) and had a go at it? I can’t imagine the maker would have appreciated seeing her work handled so roughly and the “person who was unshirted” might have had to conjure up an explanation!
I know what lappets are, costumely speaking, and with regard to women’s millinery. They’re those long, lacy, streamer things that hang down from a headdress. The fanciest ones were made of fine lace and could be terribly expensive. They were popular in the 18th century but seemed to fade by 1800 when the classical look was in vogue, and then regained favor, at least with “mature” ladies, in the middle to late 19th century. Early ones were usually found in pairs, or occasionally joined slightly shaped in the middle, while 19th century ones could be . . . more creative.
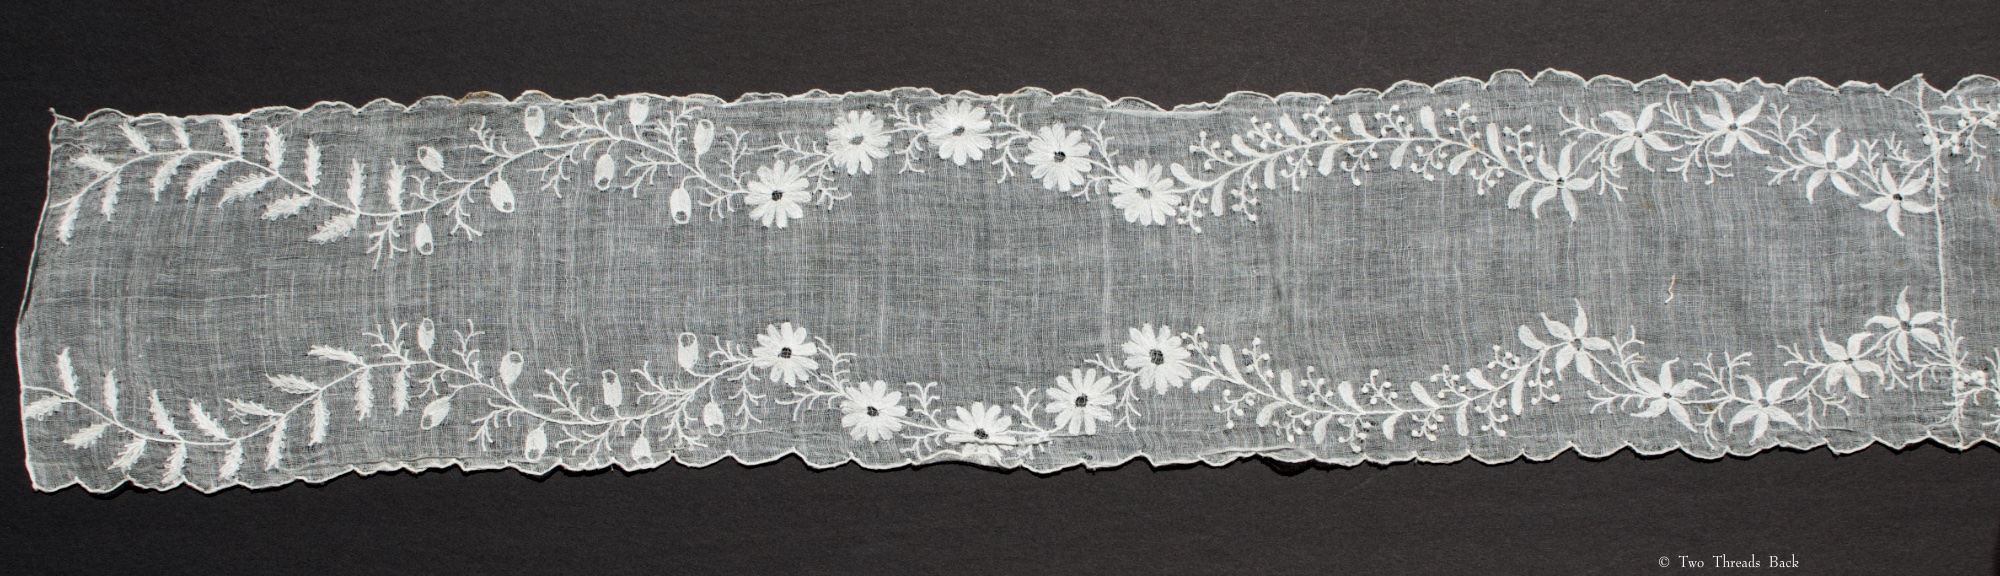
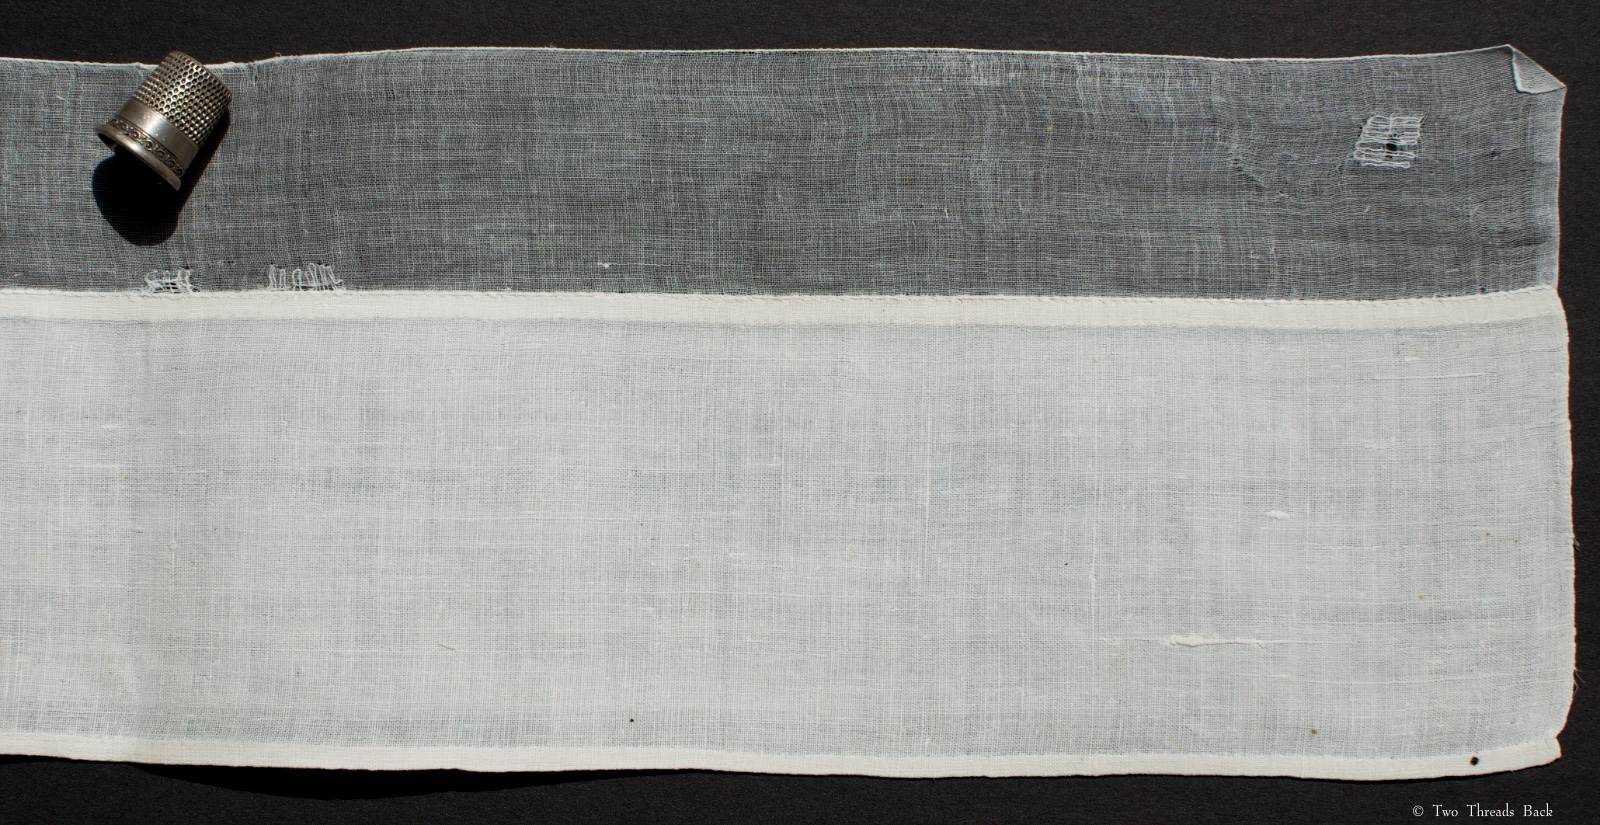
But what have I got here? Two different long strips of fine white muslin, neatly (but probably not professionally) embroidered with whitework. Are they one-piece lappets, or something else?
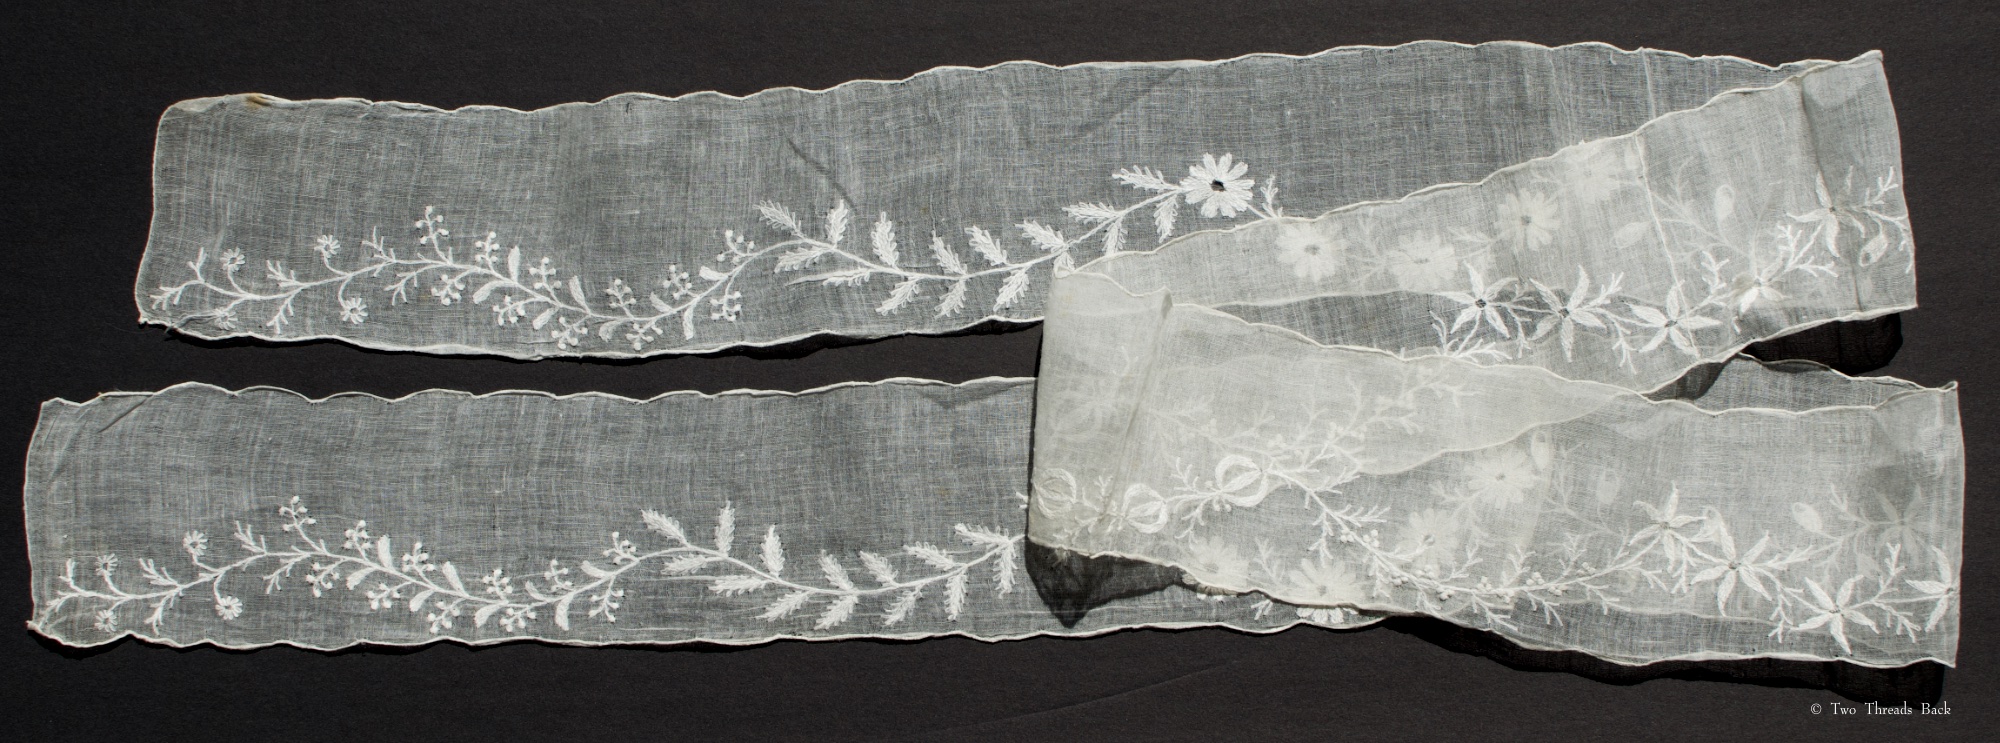
They appear to date to the late 1700s or early 1800s, judging by the materials and floral patterns. One is 58″ x 4″ and the other is 63″ x 3.” The design on the wider one is mirrored on both edges, while the other is worked along one edge only. All edges are scalloped, and there’s a join on both at 20 inches (not the middle) from one end which the embroidery carries right across. Found together + like patterns + like materials = same maker? The design was embroidered to fit, which indicates they weren’t cut from another garment. They seem too fragile for a sash and too narrow for a scarf.
So how in the world would you wear them? It seems like draping across the top of your head would be a bit awkward.
The most fabulous book on accessories of this era is Heather Toomer’s Embroidered with White, and I searched it for clues. It has beautiful photos of lappets. In pairs. With dense embroidery. Sigh. In her book on the next time period (just as brilliant), lappets appear as extensions of other accessories, such as fichus and pelerines. So I’m still wondering what these were for. Help!
The fabric is joined about 20″ from one end (not centered) on both pieces.
The darning is finer than the embroidery!
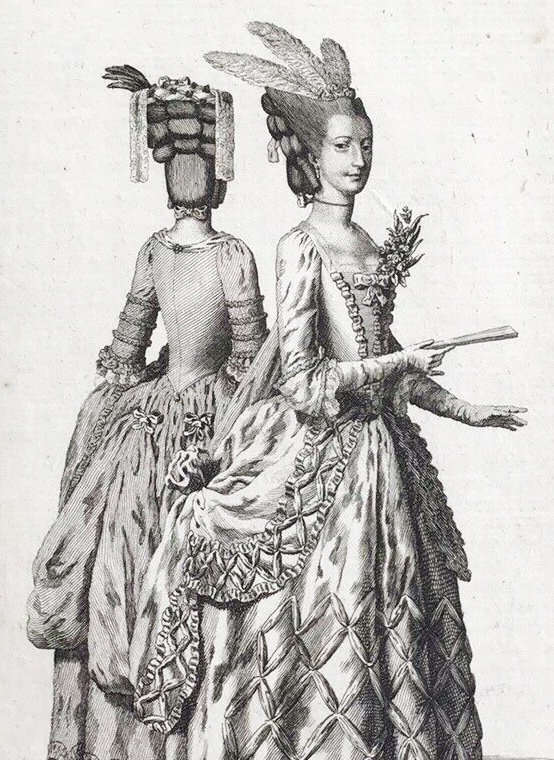
While on the subject of long narrow textiles, I’ll present my next puzzle: tuckers. I’m wandering into dangerous territory when discoursing on 18th century costume, since I know so little. However, I had no trouble finding period references to tuckers. Their wearing location on female anatomy guaranteed attention, one way or another.
Tuckers, as defined in 18th century dictionaries:
TUCKER, tuk’-ur. f. A small piece of linen that shades the breasts of women.
-A Slip of Linen or Lace, pinned along the Top of Women’s Stays -A border of linen or lace on the bosom of a shift -A fine piece of lace, cambrick, &c. pinned or sewed round the neck of a woman’s shift, gown -A shred of linen &c., about the neck of a woman’s shift -A slip of fine linnen, run in a small kind of ruffle, around the uppermost verge of the women’s stays -A strip or ornament of linen worn by women at the uppermost verge of the stays
Then we have Garsault’s 1771 L’art de la lingère, where I’m up to my tucker in speculation:
Tour de gorge en mousseline festonnée. Il se fait d’une aune de long sur un seizieme de large. Painfully translated: Scalloped muslin tucker. It is made one [≈yard] long by one sixteenth wide. A 1788 French-English dictionary defines “tour de gorge” as “tucker,” and “tour de dentelle” as a lace tucker.
This post is already too long to include Joseph Addison’s slightly naughty essay on the tucker – although if you’re curious, you can find one of many reprints here.
There’s no lack of period illustrations of tuckers, but it’s the logistics that have me baffled. Sure, you can tuck a straight band of fabric around the top of your stays – but then all but a few inches in front is hidden under a gown. You can tuck a straight length around the neckline of your gown – but then you have to negotiate the curves, and my mystery pieces seem awfully wide to do it without looking rumpled.
A Lady’s Maid Soaping Linen c.1765-82 Henry Robert Morland 1716-1797 CC-BY-NC-ND 3.0 I don’t presume to know if she wearing a “separate” tucker, or if that’s trimming on her shift. Or neither. But it’s a good illustration of the trickiness of turning corners!
A Laundry Maid Ironing c.1765-82 Henry Robert Morland 1716-1797 CC-BY-NC-ND 3.0 Her frill seems to be a little fuller.
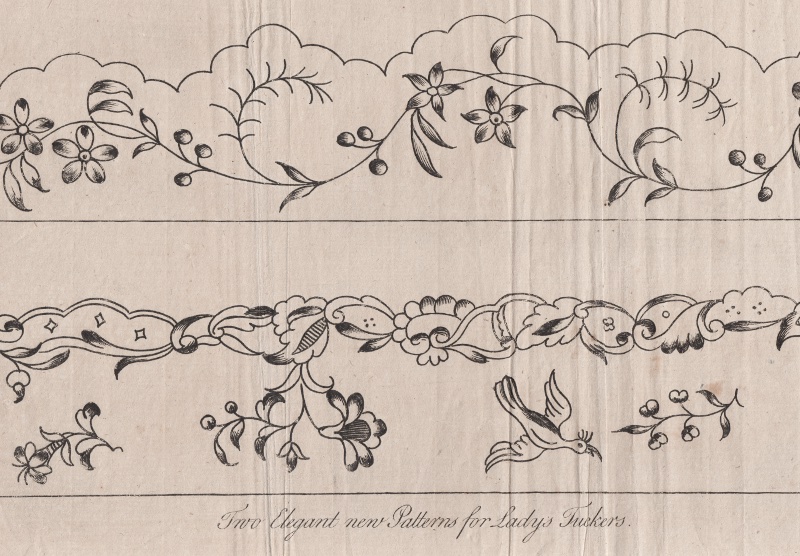
Many paintings show gathered ruffles at the neckline, whether lace or embroidery, although the Lady’s Maid Soaping doesn’t look very frilly. Of course you could always adorn your own tucker, if you were good with a needle.
A pretty pattern from 1772.
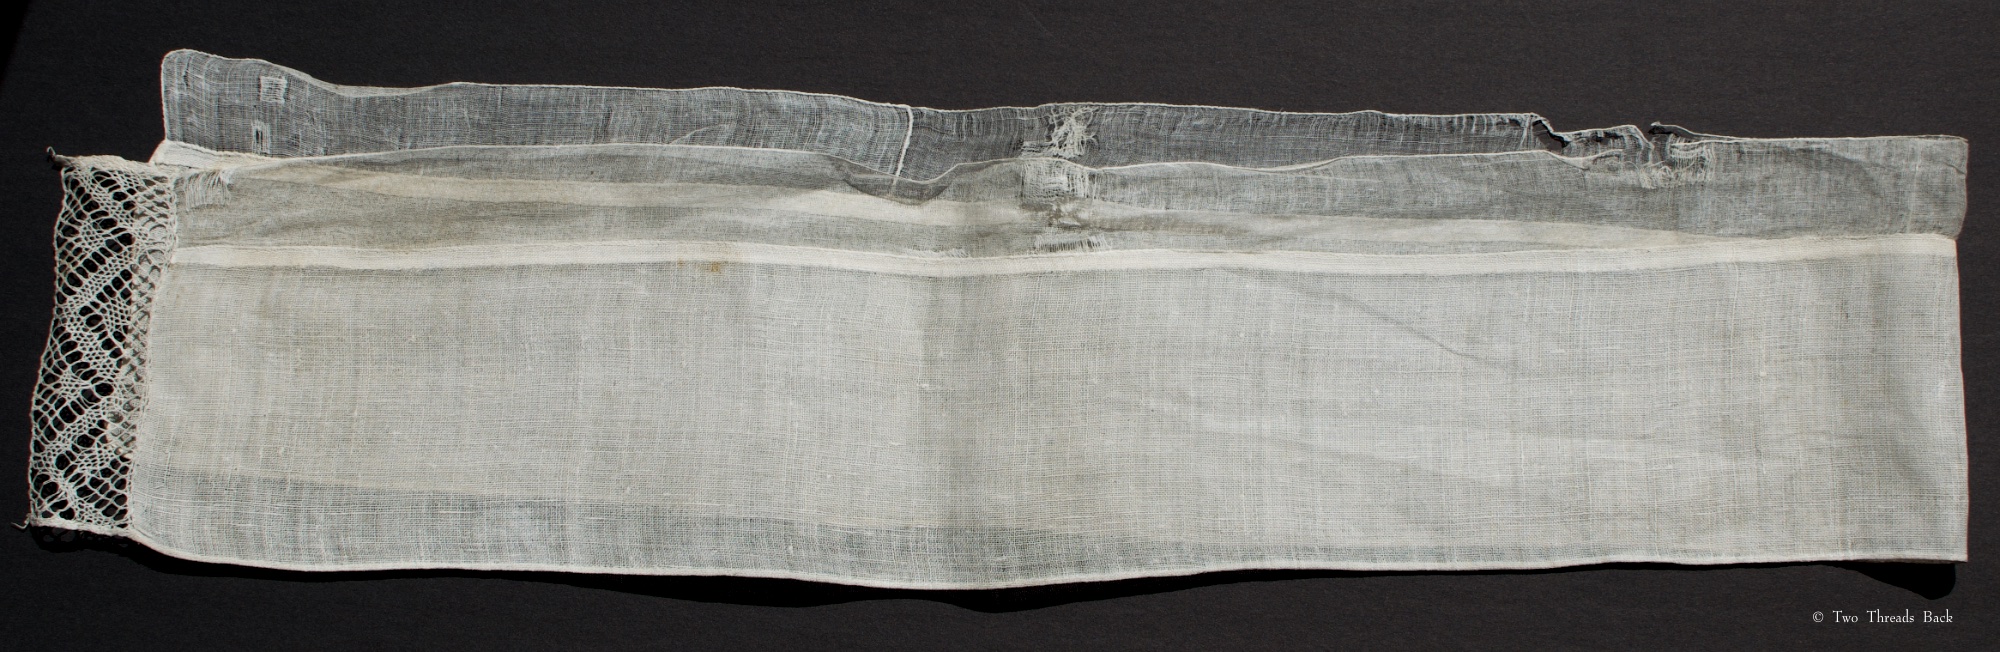
Now here are the four long strips of linen that perplex me, ornamented along one edge, all owned by a woman who lived from 1760-1805, in France. They measure a bit over 40″ long and the linen is @3.5″ wide. If they’re not tuckers, what the heck are they and how did she wear them? Maybe they were part of a headdress. Folk costume. Dresser scarf. Tourniquet with feminine flair.
A closeup of the careful mending. The darns are as fine as the other plain sewing.
There’s a bit of lace on one end only, and a cambric border on one edge. You can see there’s also a good bit of wear.
This one is in better shape, has lace along the edge, no trim on the ends. And her “marked” monogram.
A beautifully simple one, marked with both initials, although the cambric trim on this one didn’t fare so well.
I’ve called these pieces lappets and tuckers, but I truly don’t know. Research didn’t settle anything for me this time, so any help is welcome. Maybe someday in the future our descendants will ask the same questions about our garments. I know I’ve shopped for workout clothes and been just as confounded – these strappy scraps of spandex go how?!
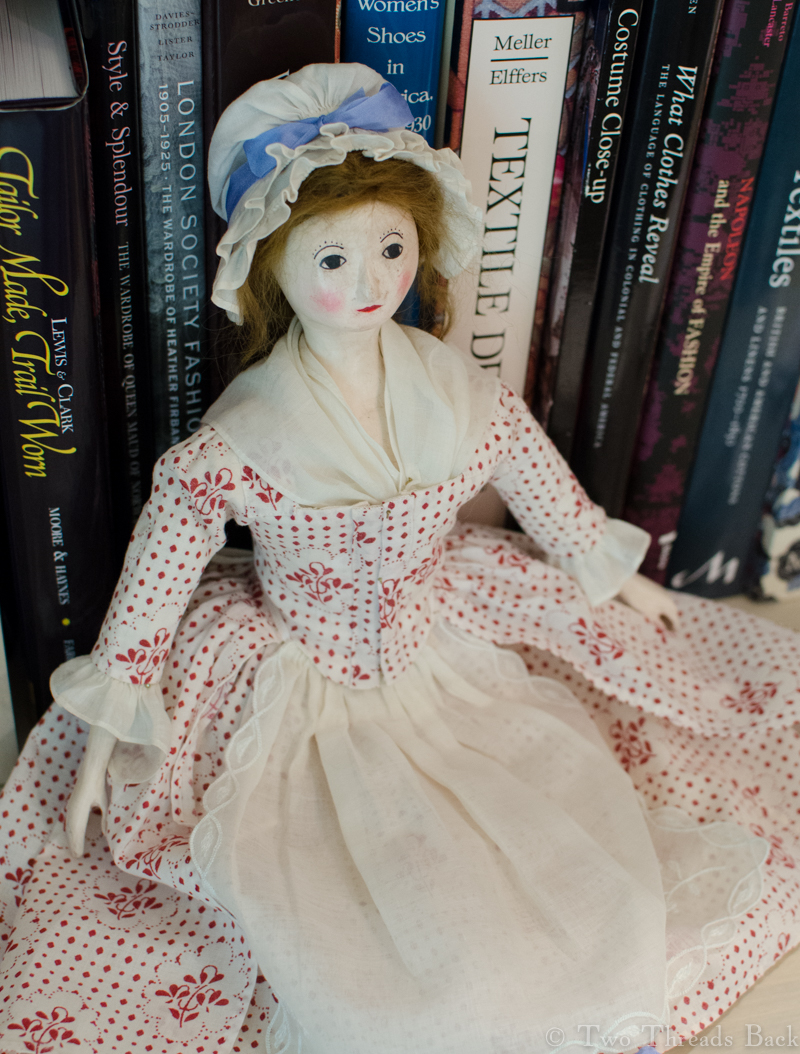
Pharaby, all 16 inches of her, is finally dressed. And contrary to my original intentions, this may be her only outfit! No Pharaby, it’s not you, it’s me.
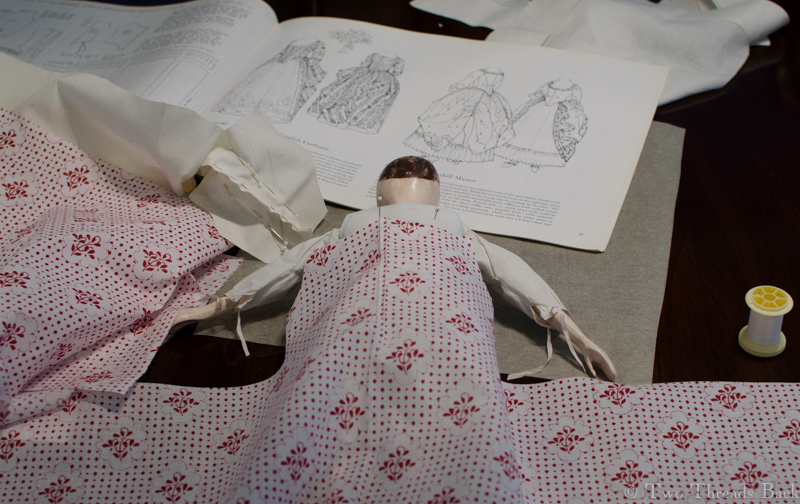
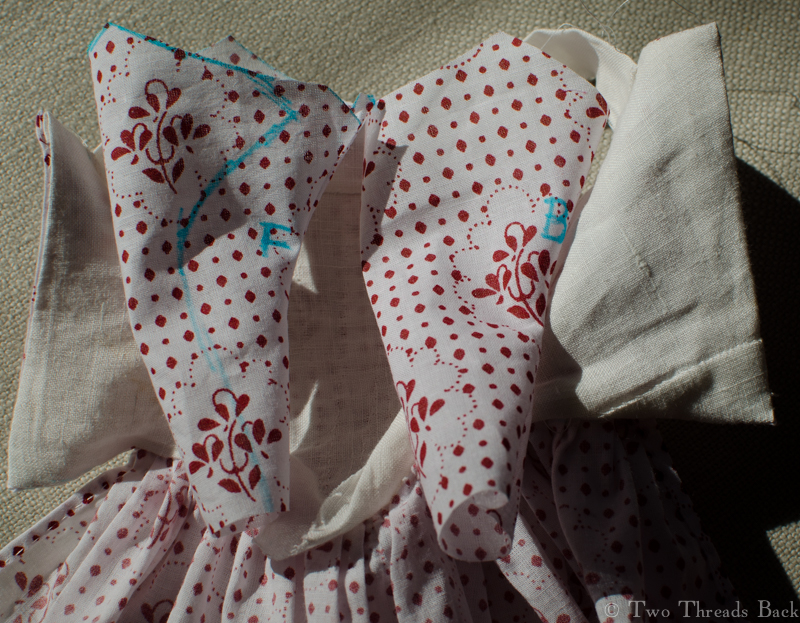
Since I haven’t posted our progress on the gown and final accessories, I decided to say it with (mostly) pictures. For the gown, I’d purchased a red and white cotton that proved not to be colorfast. Guess who has a cute little pink spotted ironing board cover now? However, I’m so in love with the fabric that I’d choose it again. It reminds me of the dress on the Dudmaston doll, seen here.
We started with the usual nightmare of pattern-making misery, as I tried to draw a bodice that would fit her form. Yes, I know some people can do this in 3 minutes or less.
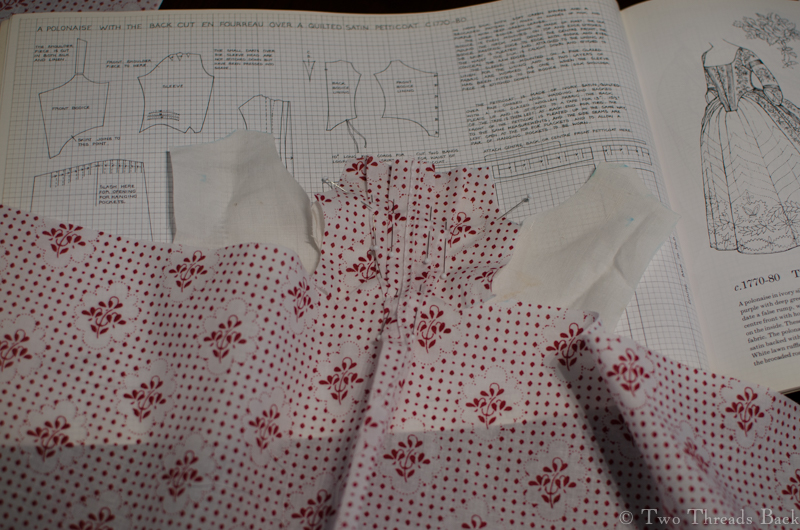
It looks so simple once it’s cut. It wasn’t.
You wouldn’t know that I took a dressmaking workshop at Colonial Williamsburg a lifetime ago. I was too dazzled for much to stick. The nicest memory I have of it is their relaxed attitude toward mistakes. “Yaroo!” as Flavia de Luce would say!
When it started to look like a teensy little gown I began to get excited – motivation to see it through!
Do you know what the “F” and “B” stand for?
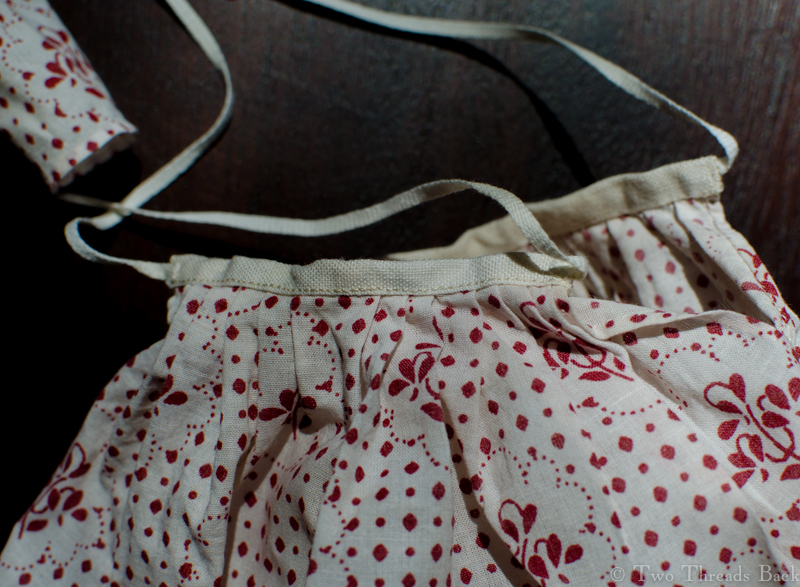
I had to sew the skirt to a paper strip in order to get the pleats even sort of even.
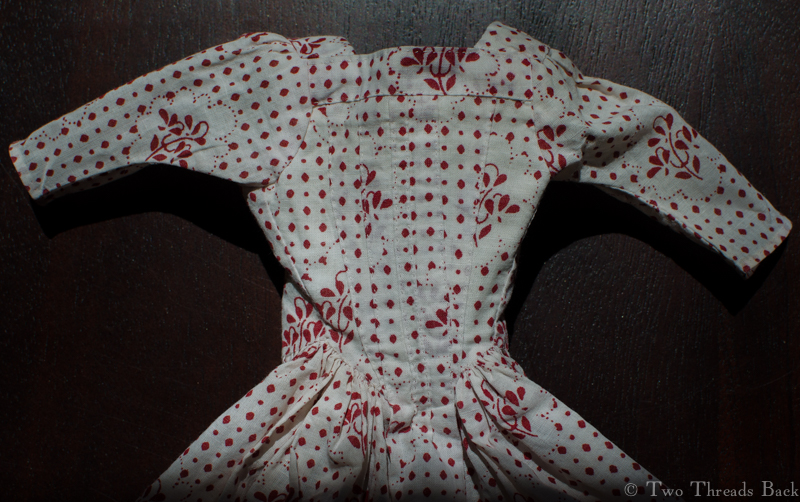
At last! The gown is finished. Or is it? Maybe you’ll notice an alteration in the final photos.
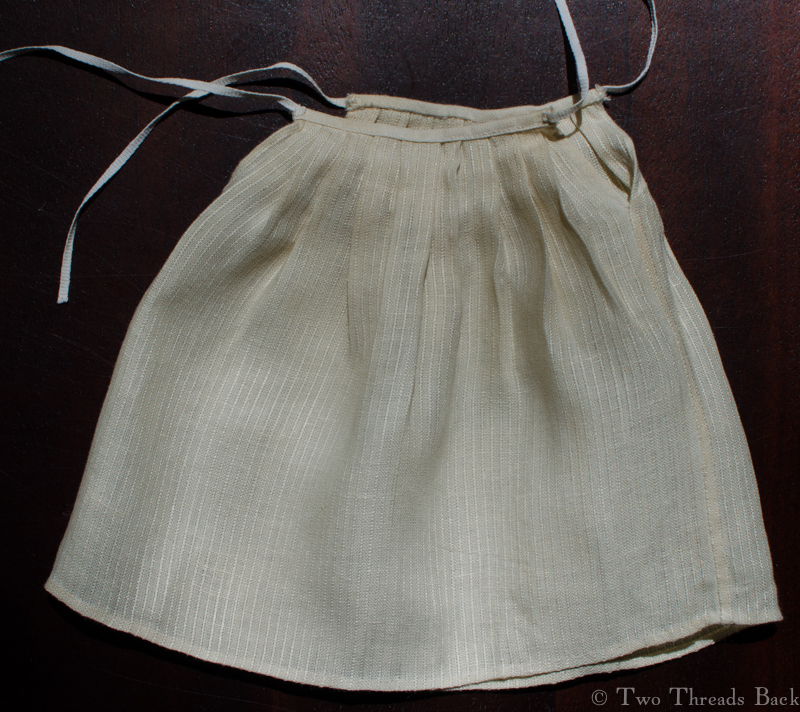
And here’s the petticoat, the only really easy part to sew.
A close-up of the gown folded open, showing the linen lining pieced just like originals could be. Theirs were probably due to a scarcity of fabric. Mine was due to inept fitting.
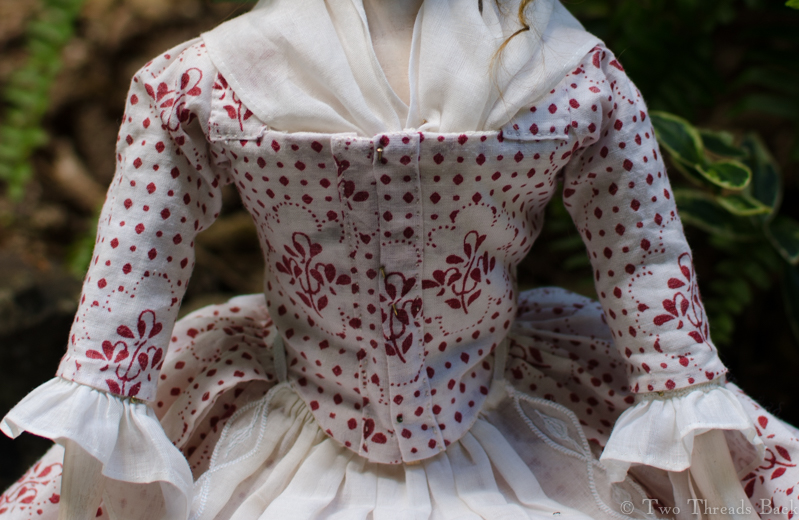
Gown with matching petticoat.
A view from the back.
I was complaining earlier about the accumulation of stuff around Pharaby’s middle. At this point I decided to replace the waistband on her under petticoat to make it more to scale – and reduce her girth.
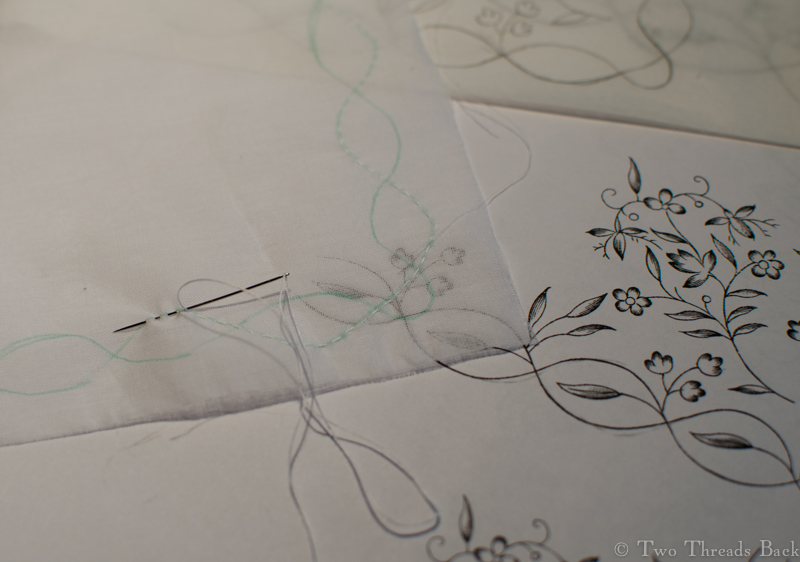
With the gown and petticoat finished, I moved on to her apron. I wanted to use some original 1770s patterns for the embroidery. However … with my limited fancywork repertoire, I had to choose REALLY SIMPLE designs that could be done in a couple different stitches. Like chainstitch. Buttonhole. Running.
I scanned the original pattern and then scaled it to different sizes to find one that would work. Ok, it’s really still too big, but we settled.
The edges are buttonholed, the leaves are simple running or darning stitches, and the sprigs are chainstitch. The leaves looked horrible when I was working them, but once they were all done it wasn’t quite so bad.
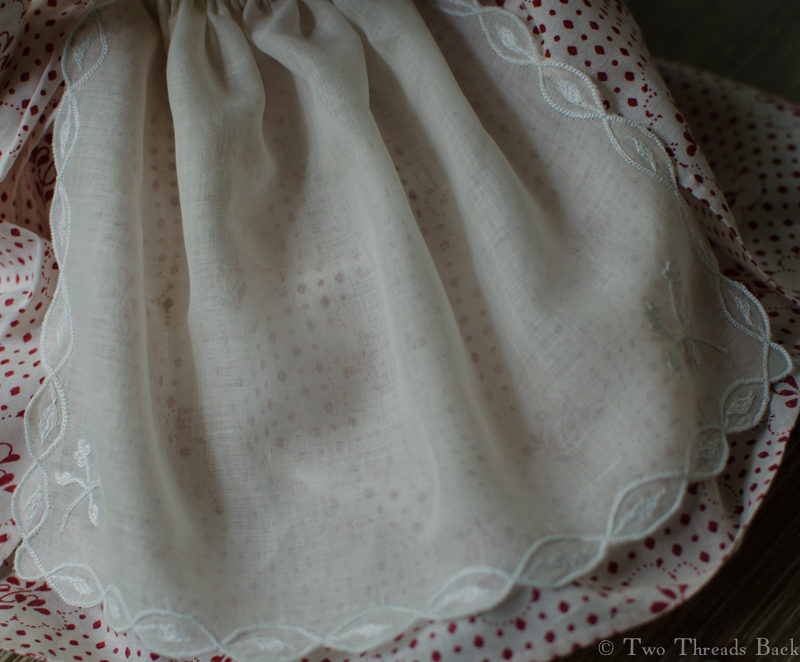
The apron, modeled by Pharaby.
Next came her handkerchief (or fichu, or half-handkerchief). I didn’t do any lace or embroidery on it, since she planned to wear it tucked in. It’s made of the same lovely muslin as her apron. It’s different from her sleeve ruffles, which were salvaged from an antique piece. The older stuff just can’t be matched today, although this came pretty close!
Her fichu, tucked in place; tiny brass pins keep everything secure.
From the back, with her hircine wig curls wimping out in our Georgia humidity.
Most of my silk ribbon was for embroidery and too narrow for the cap. So like everyone else in the colonies, we had to wait on the latest imported goods to find just the right ribbon. A couple of little thread loops were required to hold the ribbon in place on the back, since I wanted it removable. And without having to pick out tacking threads!
Last of all were the shoes. I hadn’t a clue how to do them and I’m afraid it shows. This time I didn’t even bother reading or watching tutorials. I just jumped in with both…hands. Pharaby’s poor little feet are only an inch and a half long, and unique. I don’t mean compared to other doll feet, I mean compared to each other. So I made paper ones for patterns, and then used silk scraps and lined them with linen. They’re green because that’s what I had, and I happen to adore green shoes. They’re bound with blue ribbon because the only ribbon wide enough was some left from her cap!
She has Cinderella tendencies. The right shoe occasionally goes its own way when we’re not looking.
The soles are made from bits off a leather apron. I’m a little embarrassed to show them since they fall so far short of the exquisite slippers I’ve seen done by experts. But everybody needs shoes to relax in and not worry about spoiling. Right?
Pharaby practices directing traffic or perhaps gazes blankly at a wall of ivy, so that you may see her from the back. She’s wearing her bum roll for a little poofiness in the petticoats.
So Pharaby’s finished, for now anyway. She’s very dear to me, after this long adventure. And she’ll always be a reminder of my father’s love of fun – and love for me.
Actually, that should be “Pharaby Sets Her Cap Aside” – for now, anyway. I haven’t completely neglected Pharaby all these months, but sometimes remembering to take photos, and then remembering where I saved them, delay my writing about her wardrobe’s progress.
This project also took longer than I thought it would. It was hard figuring out what I wanted her to wear. Most surviving Queen Anne dolls just have little bits of lace and silk gathered and stuck atop their heads, or if they’re wearing more constructed caps, the photos don’t show sufficient details for me to copy. And sometimes the surviving headwear is not original to the doll, being so obviously 19th century that even I can tell!
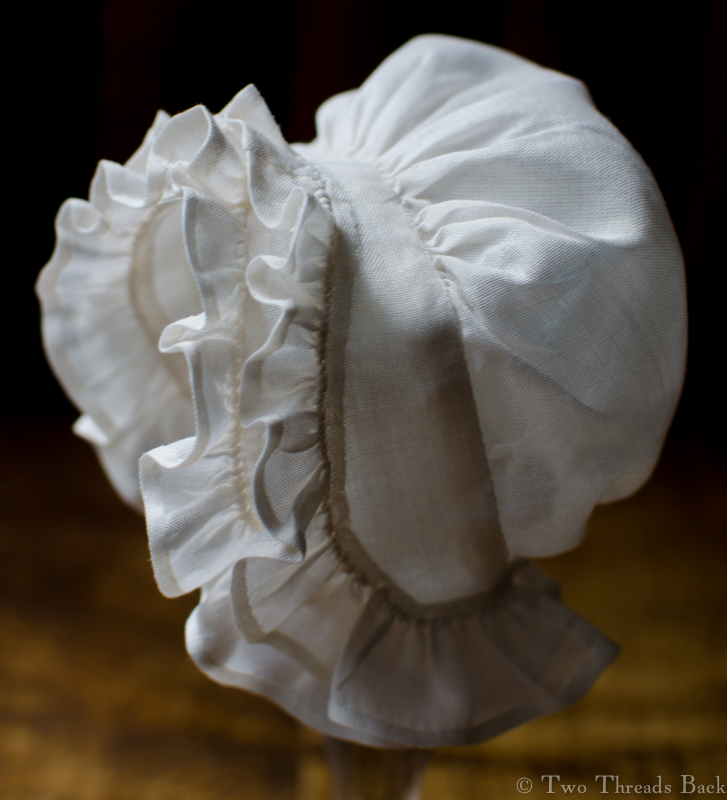
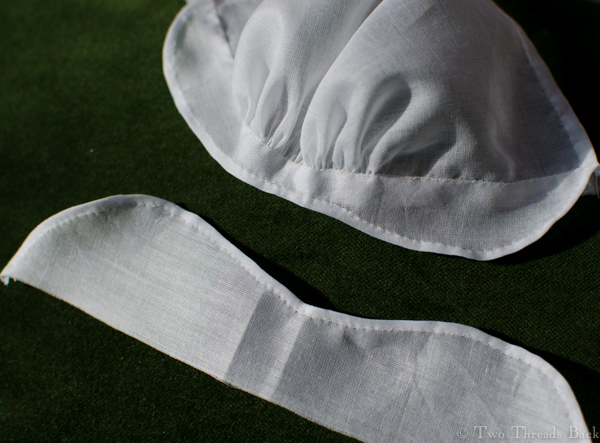
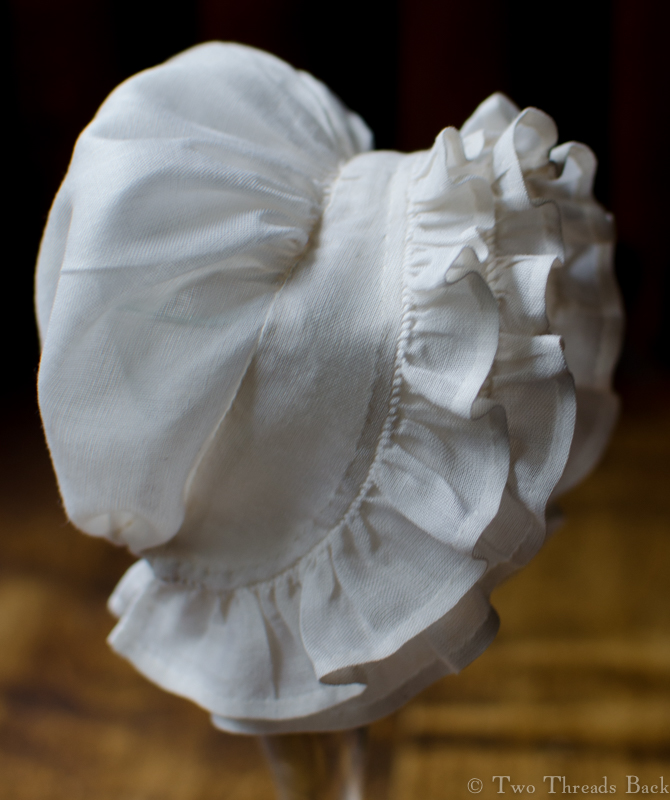
In the end I decided on this style, because it was easy to make a pattern and I’m familiar with the sewing techniques. The cap is formed from a simple half circle gathered at the base of the neck and the crown and trimmed with plain frills.
I did experience one of those aha moments when attaching the headpiece/band/brim to the crown. It was easy to “set in” the little gathers on the top thanks to the fact that the band was double. It worked just the same way as setting a gathered sleeve into a cuff! Maybe that’s why they so often had double brims?
My attempt at narrow hems was a flop, at least compared to what 18th century women could do. But I did manage a very nice tiny eyelet for the back drawstring. It would have been nicer if I’d also remembered to put in the strings and tack them in place before I hemmed the casing down! Did you know that you can thread a large needle and retro-fit a string into a casing?
Perhaps you’ve noticed none of these pictures show Pharaby wearing the cap? That’s due to my inadequacies as a perruquier. Every time I place something on her wig and then remove it, a few mo-hairs (groan) come loose from the carefully arranged style. In order to keep it all together until her final dressing, I had to limit the try-on’s. Pharaby won’t be modeling her cap for a while, so I let a wineglass serve as a mannequin – and then serve to celebrate one more project done!