Pharaby Sets Her Cap

Pharaby Cap 4

Actually, that should be “Pharaby Sets Her Cap Aside” – for now, anyway. I haven’t completely neglected Pharaby all these months, but sometimes remembering to take photos, and then remembering where I saved them, delay my writing about her wardrobe’s progress.

This project also took longer than I thought it would. It was hard figuring out what I wanted her to wear. Most surviving Queen Anne dolls just have little bits of lace and silk gathered and stuck atop their heads, or if they’re wearing more constructed caps, the photos don’t show sufficient details for me to copy. And sometimes the surviving headwear is not original to the doll, being so obviously 19th century that even I can tell!

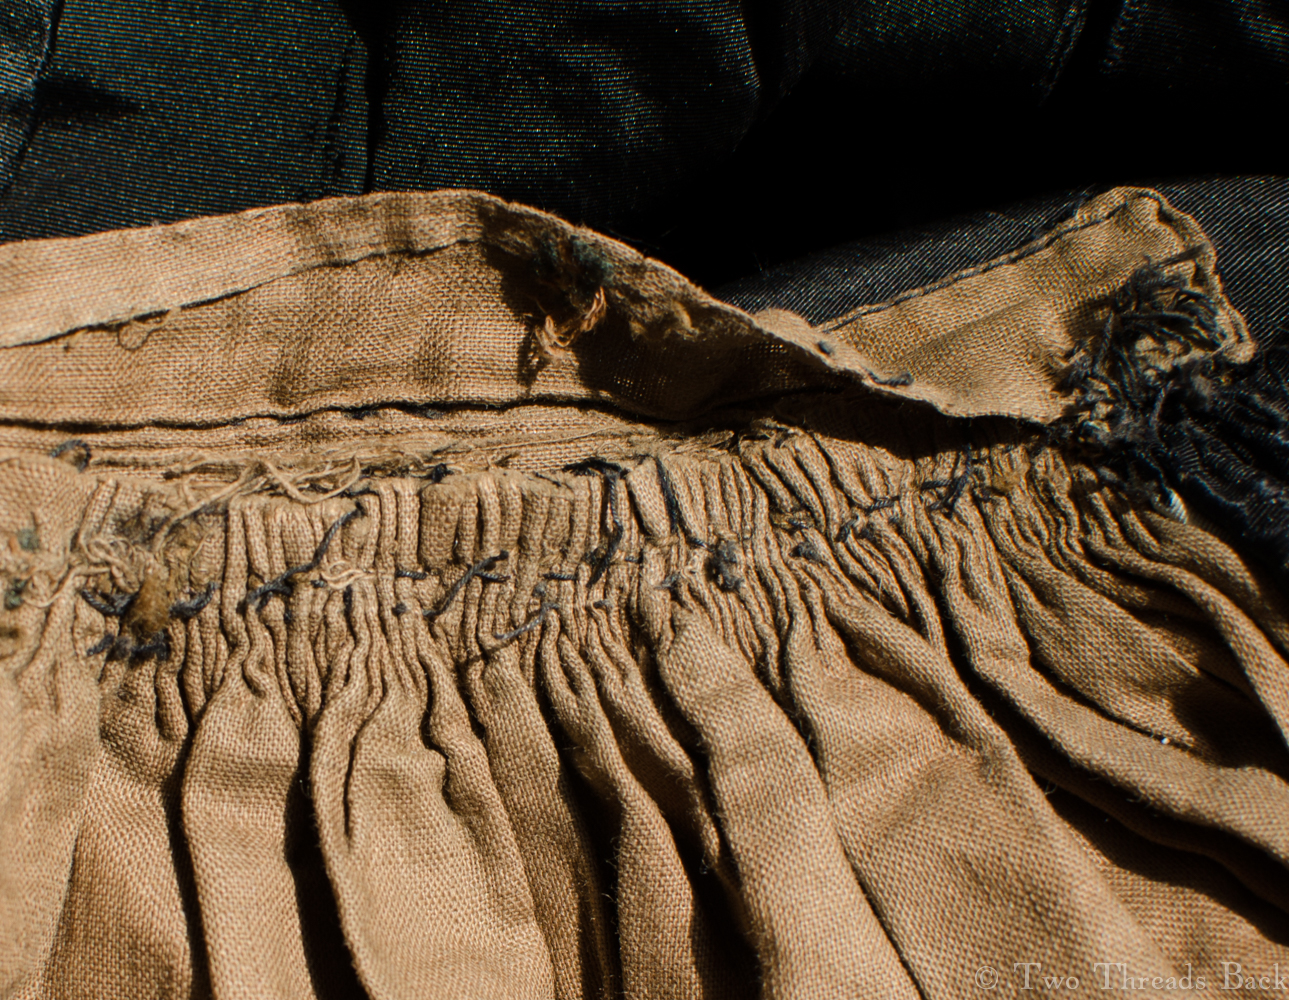
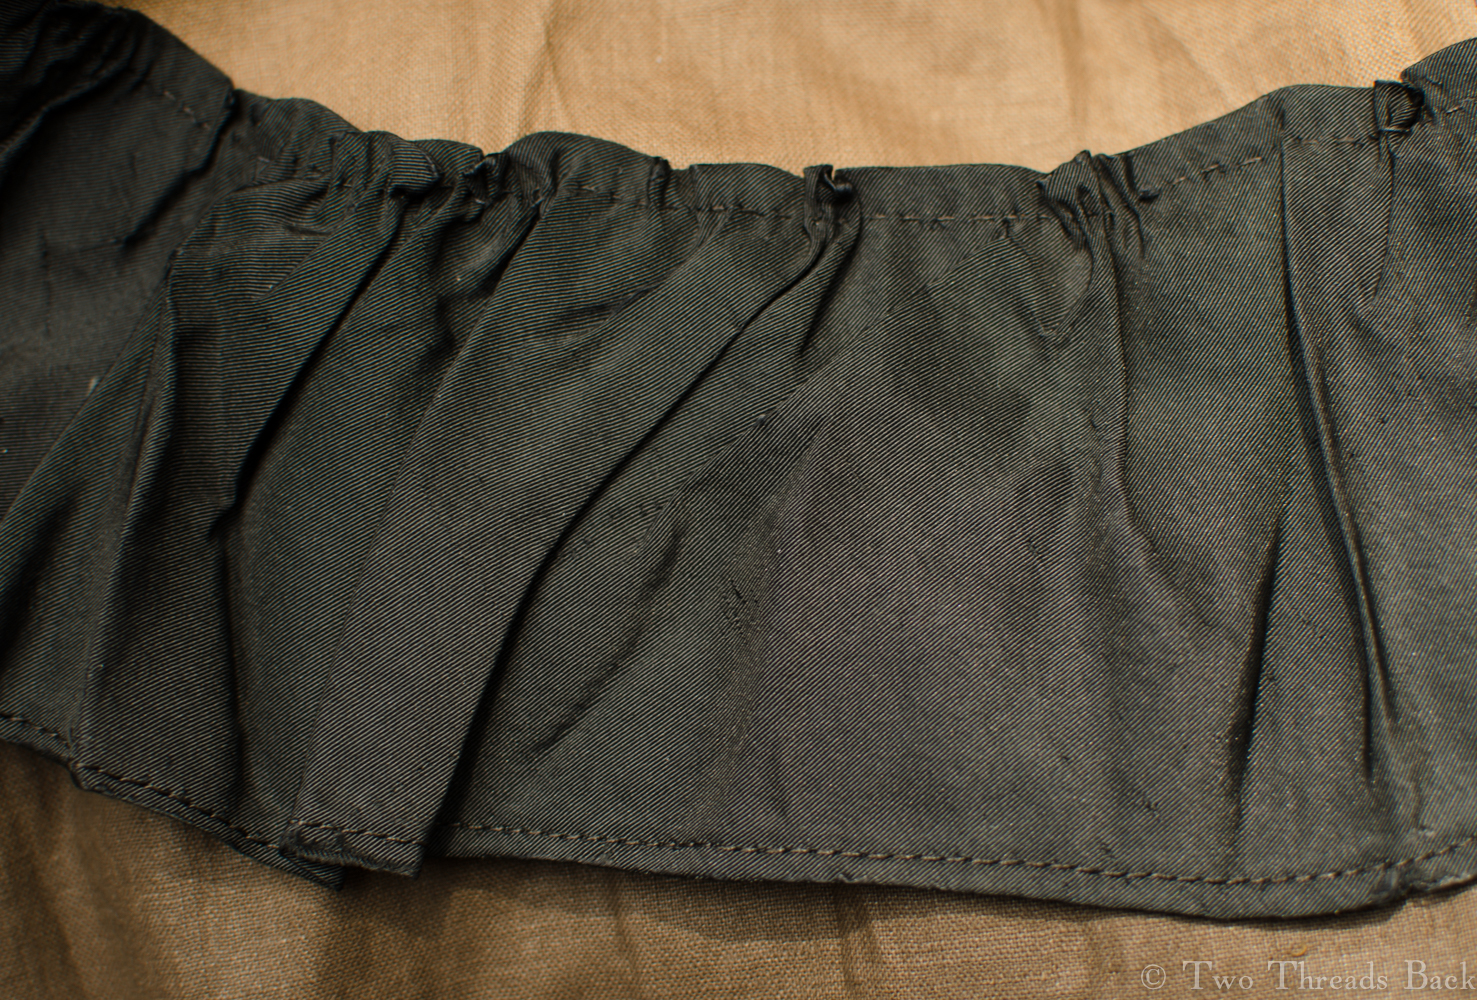
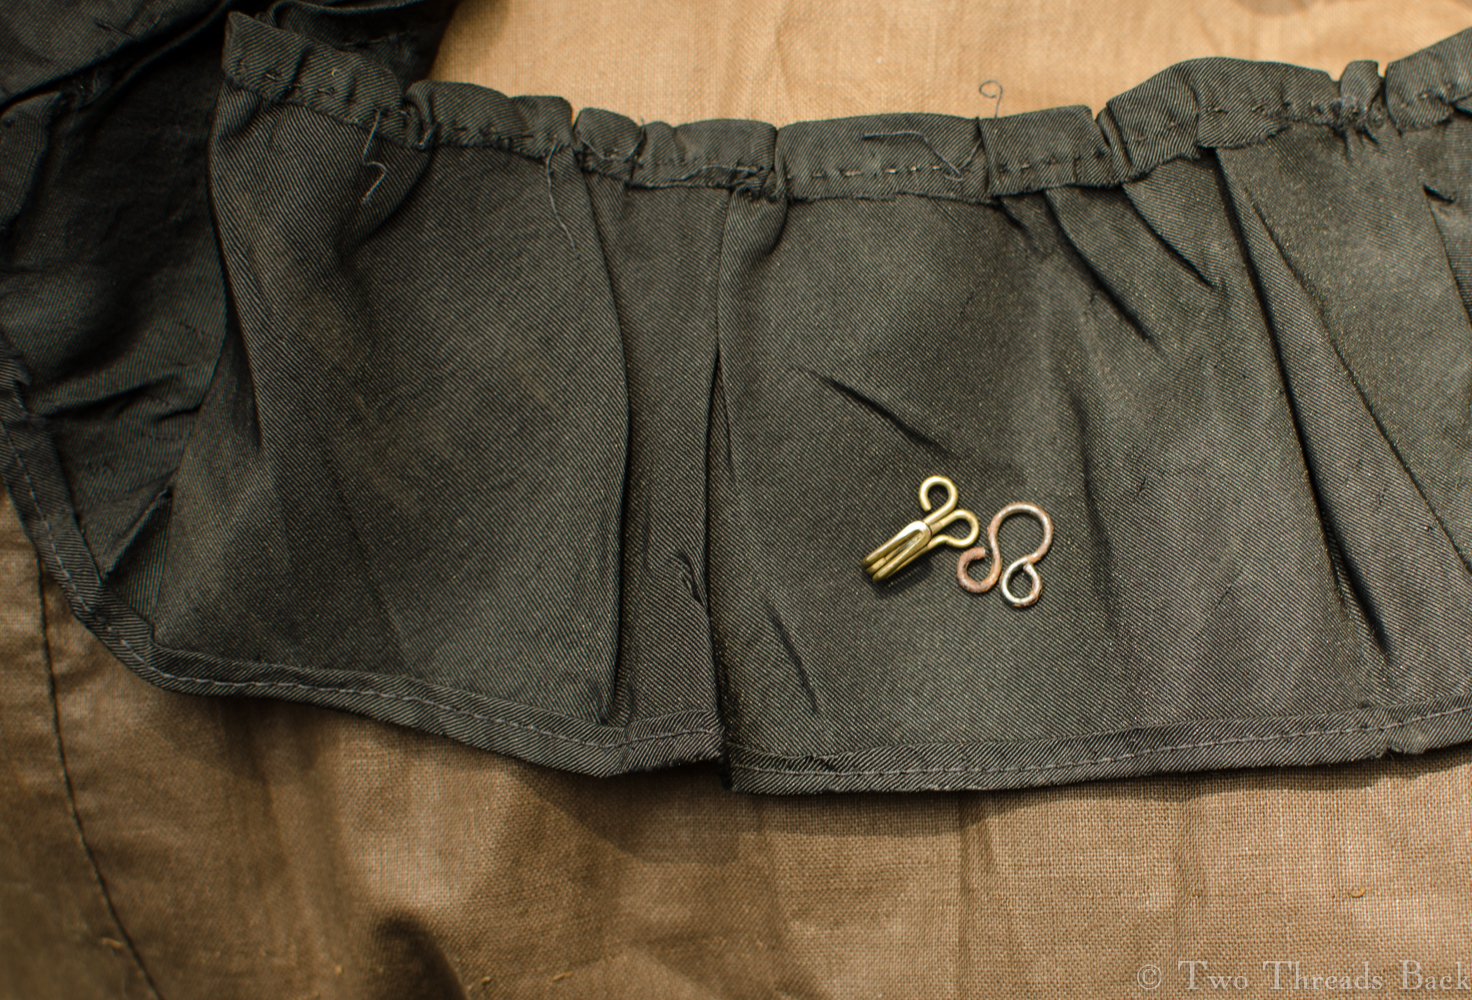
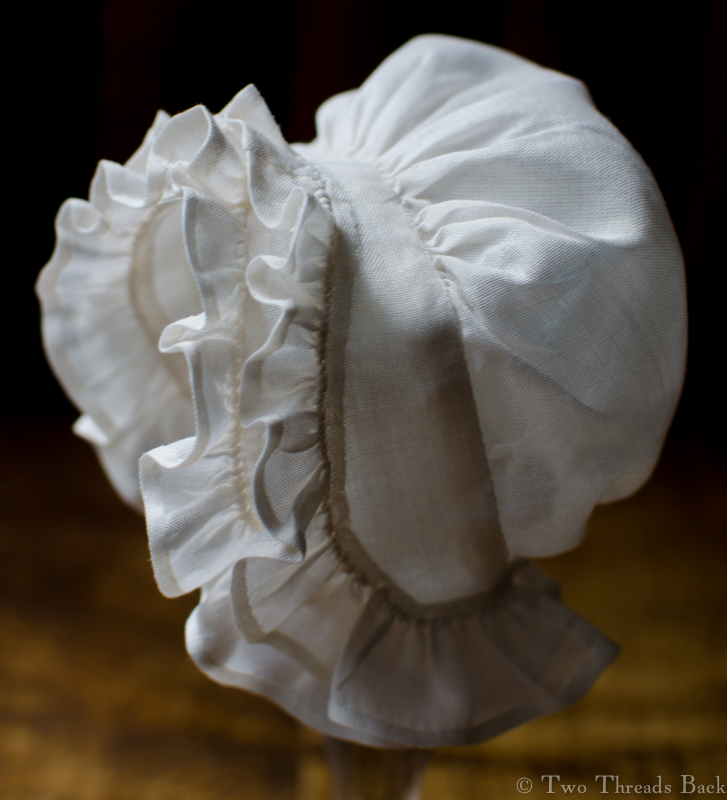
In the end I decided on this style, because it was easy to make a pattern and I’m familiar with the sewing techniques. The cap is formed from a simple half circle gathered at the base of the neck and the crown and trimmed with plain frills.

Pharaby Cap 1

I did experience one of those aha moments when attaching the headpiece/band/brim to the crown. It was easy to “set in” the little gathers on the top thanks to the fact that the band was double. It worked just the same way as setting a gathered sleeve into a cuff! Maybe that’s why they so often had double brims?

Pharaby Cap 8

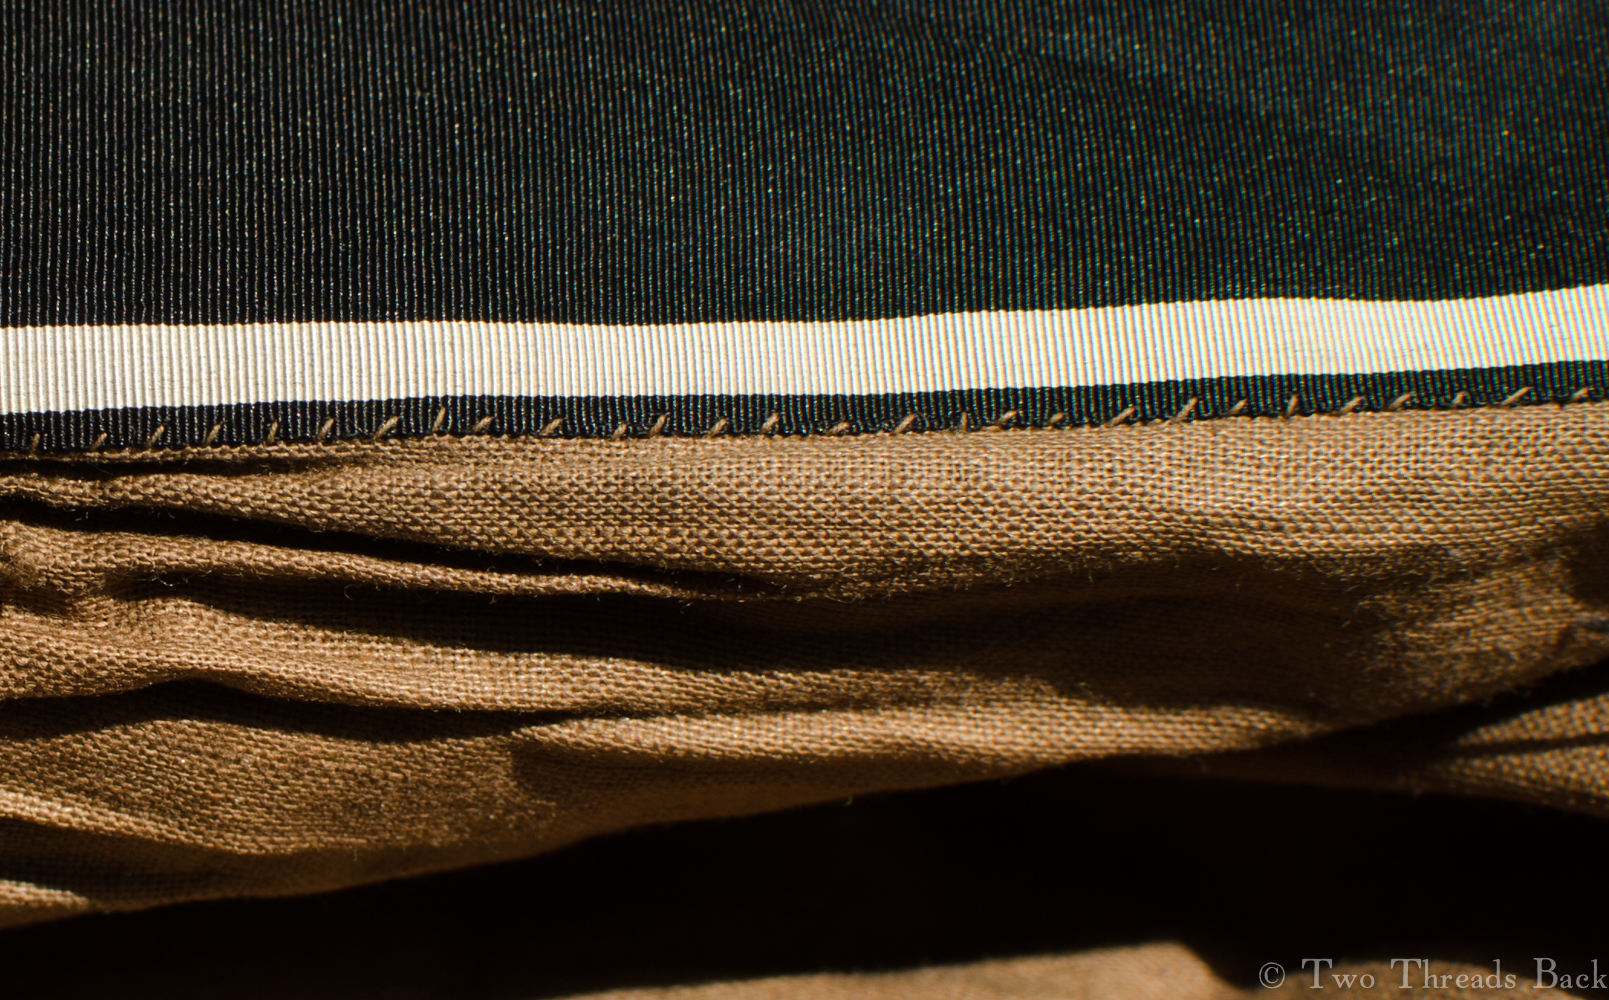
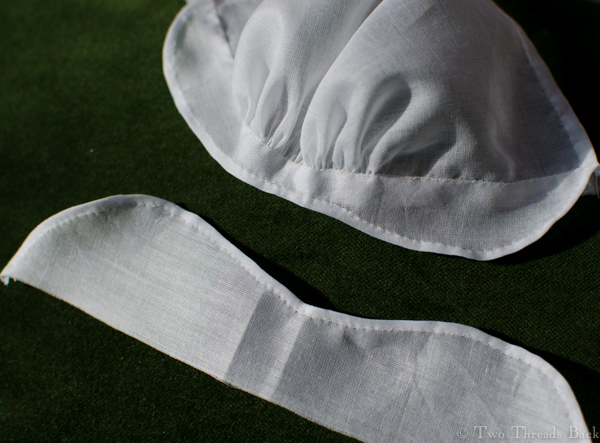
My attempt at narrow hems was a flop, at least compared to what 18th century women could do. But I did manage a very nice tiny eyelet for the back drawstring. It would have been nicer if I’d also remembered to put in the strings and tack them in place before I hemmed the casing down! Did you know that you can thread a large needle and retro-fit a string into a casing?

Pharaby Cap 7

Pharaby Cap 3

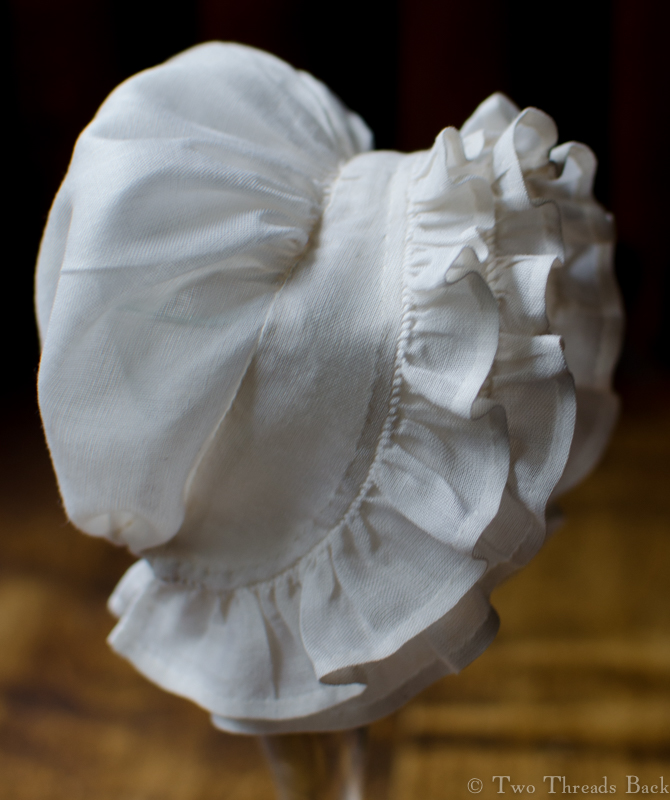
Perhaps you’ve noticed none of these pictures show Pharaby wearing the cap? That’s due to my inadequacies as a perruquier. Every time I place something on her wig and then remove it, a few mo-hairs (groan) come loose from the carefully arranged style. In order to keep it all together until her final dressing, I had to limit the try-on’s. Pharaby won’t be modeling her cap for a while, so I let a wineglass serve as a mannequin – and then serve to celebrate one more project done!

Flower Patches 8 and 9

Flower Patch 09
Maybe with a button-down and sport coat?

Perhaps I should have titled this “What Do You Do When Old Looks New?” These stripes are from the same early 19th century quilt as all the other Flower Patch samples, but they look so modern to me that if I weren’t completely sure about their age, I’d think someone was sneaking in new fabric. However, I’m convinced that all the different fabrics date to within the same few years. (Any fabric experts passing this way are welcome to call and opine!)

I could easily see this pattern on a man’s shirt today. But what would it have been used for then – gowns, aprons, children’s clothes? These have the same glazed finish that many of the others do, and I’ve added the very last picture to try to show that.

Flower Patch 09 Back
The same piece from the back.
Flower Patch 08
Another very contemporary looking pattern.
Flower Patch 08 Back
How appropriate for a blog: Opinion Opinion Opinion…
Flower Patch 08 Glazed
I’ve tried to show how shiny the sizing is, but you may only see a really bad photo.


Deconstruction

Skirt Hook

No, I’m not delving into postmodernism here, I’m talking about sewing – and unsewing! I was sitting on my porch last week, relishing the warm spring breezes and taking advantage of the bright afternoon light to salvage a sad old black silk skirt. As I worked, I realized that most of the sewing had been done by hand, and that I might pay tribute to those hands by sharing pictures before it was gone forever.

Skirt Damage
Silk damaged beyond repair.

Lest you think I cannibalize antique textiles lightly, let me assure you there was no saving this piece. It was a silk faille gored skirt – of such a generic cut that I hesitate even to date it – which had begun to shred and shatter all over. The lining was in excellent condition though, so I wanted to preserve that for reuse.

Unfortunately, I didn’t think to take a picture of the whole skirt before I began. Although it might not have added much to this post since solid shiny black is notoriously hard to photograph! The cut was smooth and somewhat fitted across the front, tapering slightly toward an “A-line” silhouette, with tight gathers in the back. It had a narrow waistband, and two tiers of ruffles trimmed the hem.

Skirt Seam
Side seam of skirt, running stitches with a few backstitches piled on for good measure.

The silk fabric was about 21″ wide with white stripes along each selvage. The skirt was completely lined with the standard brown cotton, and then an extra piece of darker glazed cotton was added to the bottom ten inches. A velvet binding strip protected the edge of the hem. There was one deep pocket which looked like a later, rather clumsy, addition.

Skirt Linings
The extra lining along the lower part of the skirt is neatly hemmed down.
Skirt Pocket
A view of the pocket from inside. Maybe added later?

I hadn’t expected to find hand sewing in this piece, so I was intrigued to note the different types of stitching and thread. The long side seams used a basic running stitch made with a heavy brown cotton thread. Although the finished skirt was nice and sturdy, some of the stitches weren’t particularly neat or even.

Skirt Overcast
The only seam finishing, overcasting, was done where the lining edge was raw. I don’t think the maker was too worried about raveling.

Raw edges of lining were roughly overcast with a light colored thread. The waist was “gauged” in the back. Machine work was limited to the top stitching of the waistband and the hems of the bias-cut ruffles. The only careful handwork was the finishing in some places on the lining. A brass hook and eye were the only fastening, and two loops were attached inside for hanging.

Skirt Gauge Out
The skirt back was tightly gathered using the gauging technique.
Skirt Gauge In
Here’s a view of the gathers from the inside.
Skirt Ruffle Out
The ruffle was hemmed by machine, but gathering stitches were made by hand.
Skirt Ruffle In
And it looks like they were done at high speed!
Skirt Selvedge Finish
The seamstress took extra pains when hemming down the inside of the placket opening with a finer weight thread.
Skirt Velvet Out
It was common in the 19th century to finish skirt hems with a sturdy braid, wool or velvet, to protect them from wear. It could be purchased ready-made, but this velvet strip appeared homemade.

The deconstruction process was predictably tedious, but there was one moment that’s hard to describe. I was working on the old velvet at the hem when out spilled sand and bits of twigs. The debris had obviously been locked inside for a more than a century. It was as if a shadow passed by while I worked. Who was the woman who wore this skirt? Where was she walking, what was she doing, what was she thinking on the day when her shoes kicked up that sand? I don’t suppose I’ll ever know. But I hope her afternoon was as lovely as the one I enjoyed.

Skirt Velvet In
I tried to offer a peek inside the velvet, but it’s too dark to see. I couldn’t hold the crease open with one hand and take a picture with the other!