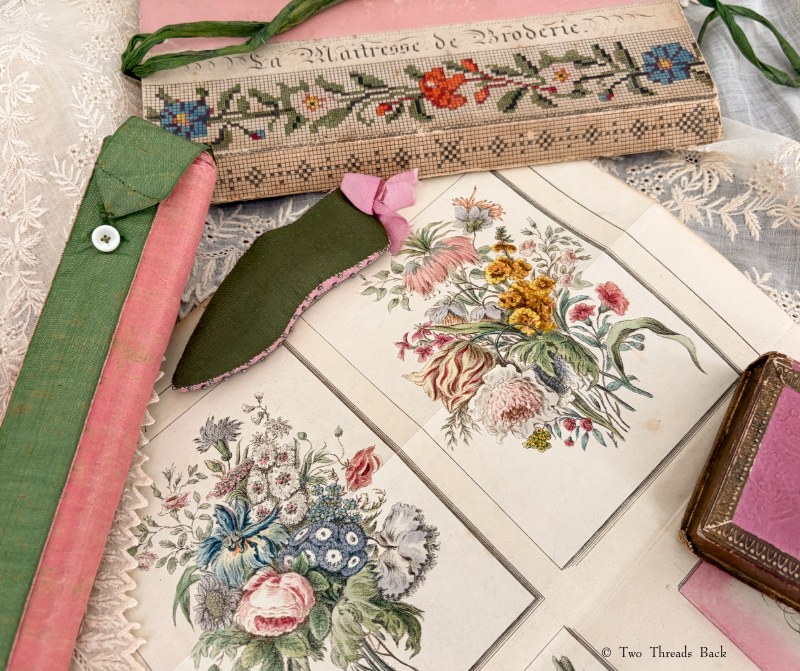
And green. And gold, and seeds, beads, shells, fish scales, feathers, hair, paints, papers, and too many kinds of threads to name. There was no limit to the elegant (or not so elegant) crafts that Romantic Era ladies of leisure could enjoy.
Yes, this sort of handiwork is probably the polar opposite of plain needlework. (I did warn about rabbit trails!) Colorful, creative, and infinitely variable in materials and form, vs. white, repetitive, and predictable in materials and form. I can’t help it, sometimes eyes just need candy!
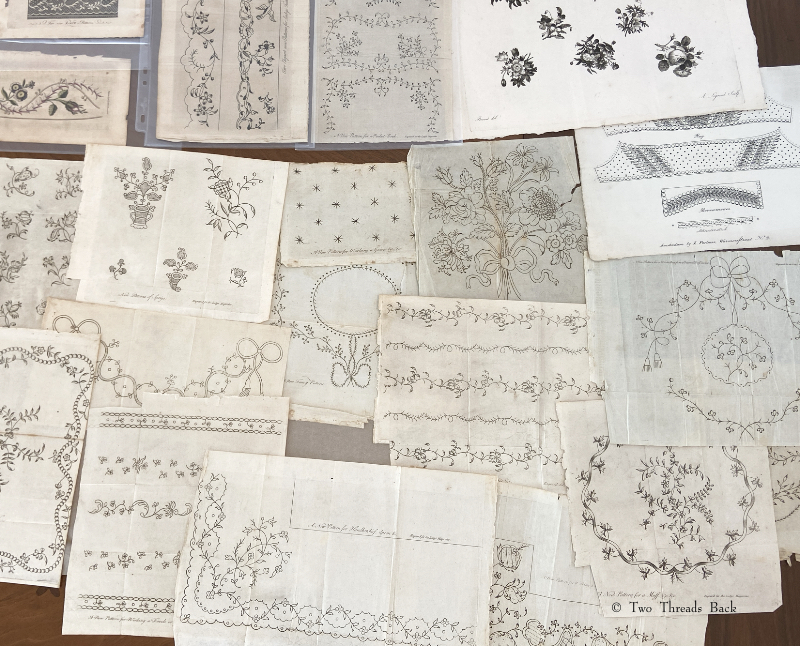
The earliest patterns to be included in periodicals, such as these from The Lady’s Magazine and La Belle Assemblée, were for needlework and published without hand coloring…
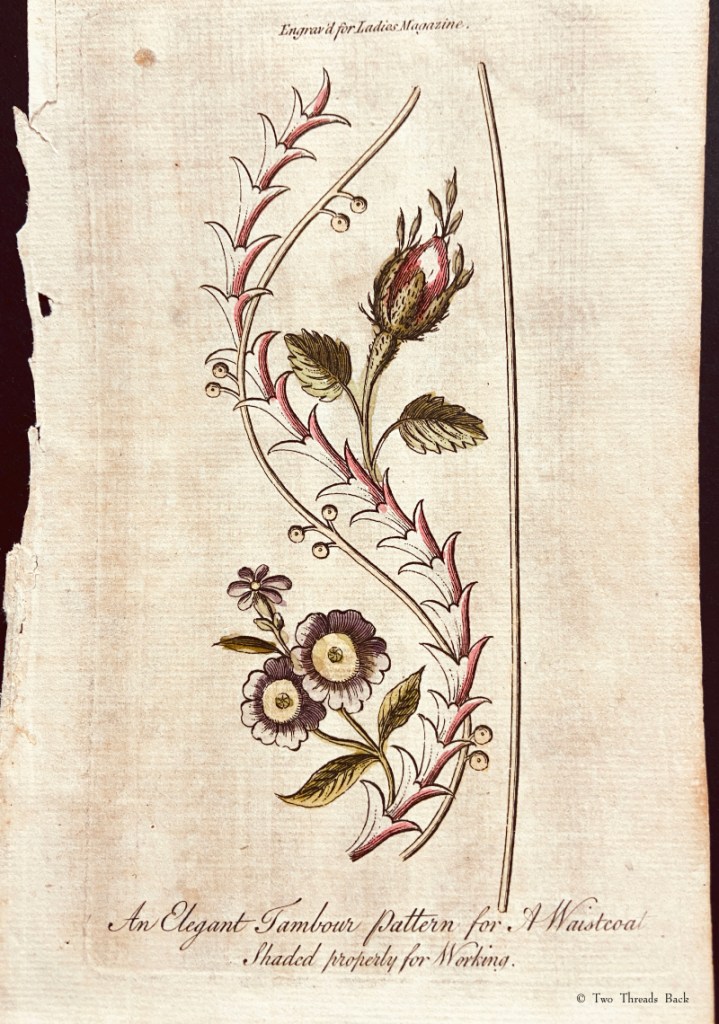
… with an exception to prove the rule. A “properly shaded” pattern from the Lady’s Magazine, 1772.
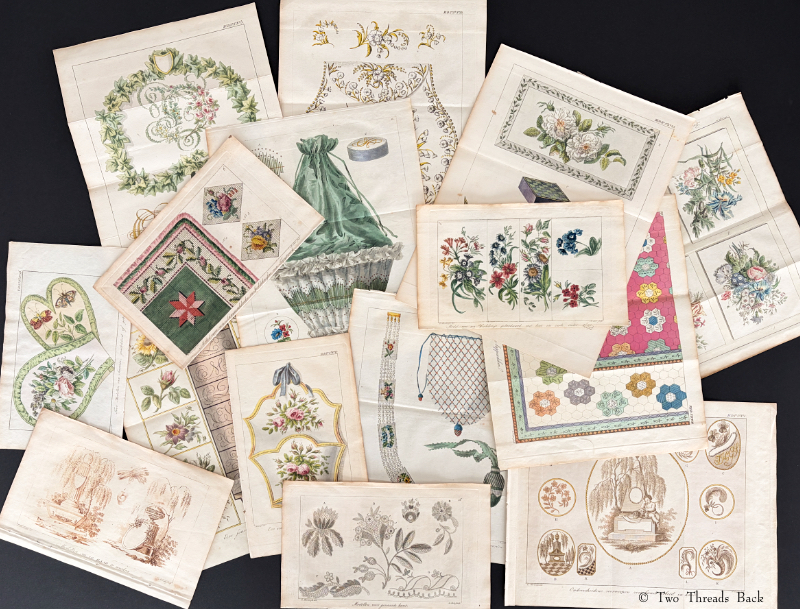
Surviving patterns are almost as much fun to study as the items that were made from them. Penélopé, of Maandwerk was a Dutch ladies magazine which offered hand colored patterns and projects as early as 1821 (it ran until 1835). Half of each issue was devoted to crafts and half had a literary focus. The patterns range from stunning to “what were they thinking?”
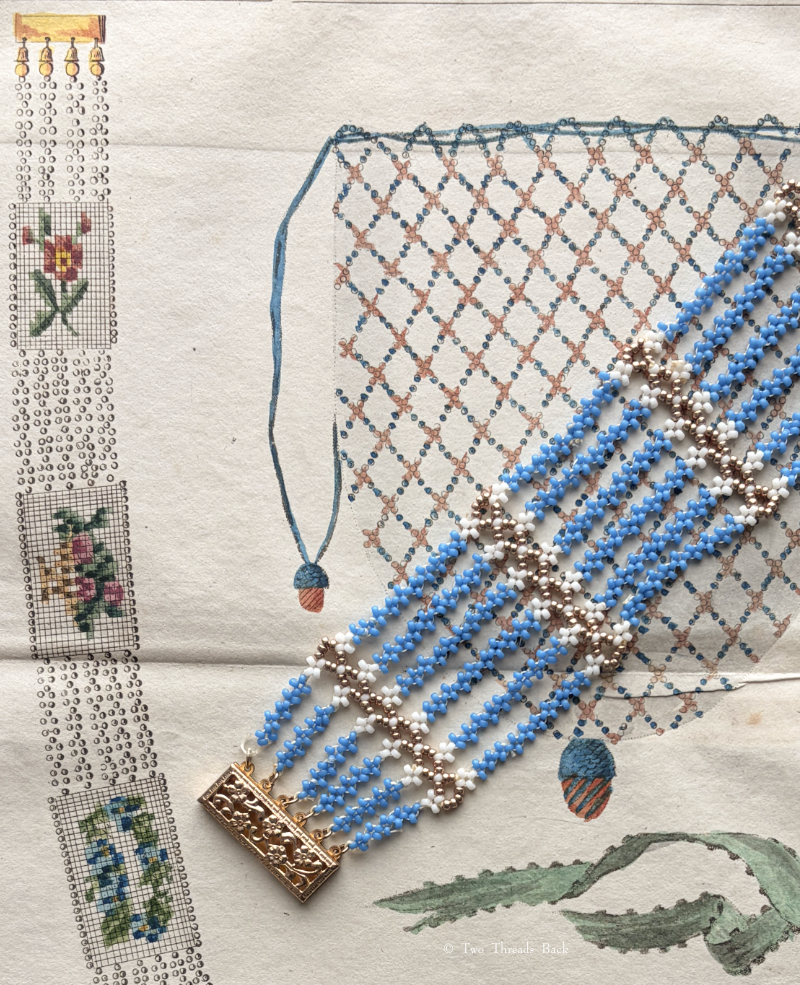
Penélopé offered not only needlework, but patterns for things like hairwork, painting, patchwork quilting, beaded reticules, etc., many in color. These are for a variety of projects c.1820s.
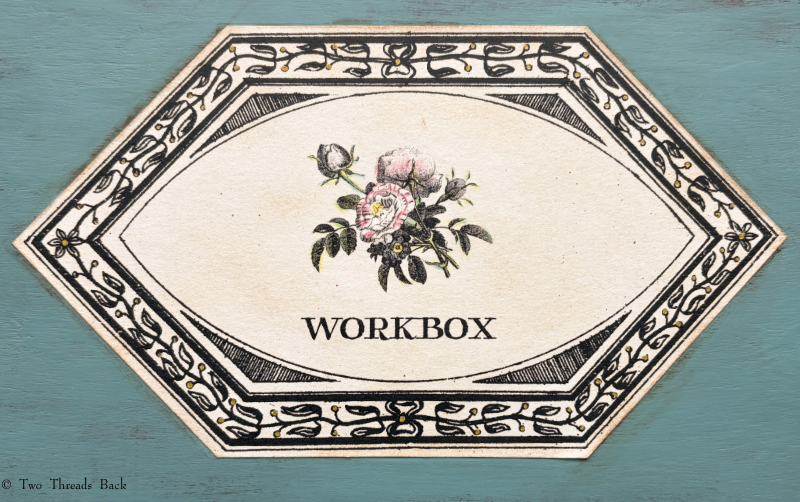
Of course if you want to play with old patterns today, you don’t have to use them for their original purpose. Not everyone needs a bell pull, a mantelpiece container for “spills,” or a hand screen. I’ve had fun scanning and printing designs to use in projects like labels, cards, and ornaments. There are lots available online, both for sale and free (public domain): Google books, Hathitrust, the Internet Archive, and the Antique Pattern Library, are fabulous sources, and I’ve used them all.
This is a combination of two patterns I used to make my own label for a workbox.
My daughter surprised me one birthday with her version of Jane Austen’s bracelet. I was thrilled! It’s exciting to see that ladies of the day really were getting ideas from these publications. Or wait…maybe it was the other way around?!
I suppose ladies saved and passed patterns around then the way we used to do with recipes. Today it seems like everything is digital – even recipes! I do love how accessible and how easy that makes sharing ideas and inspiring creativity. But isn’t there something extraordinary about a pretty paper that lets us hold an idea in our hands, long after its maker is gone?
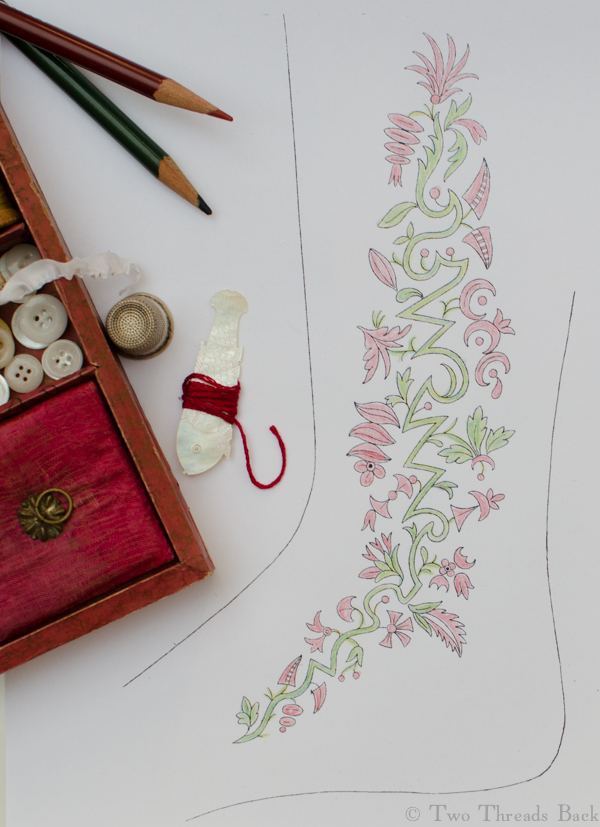
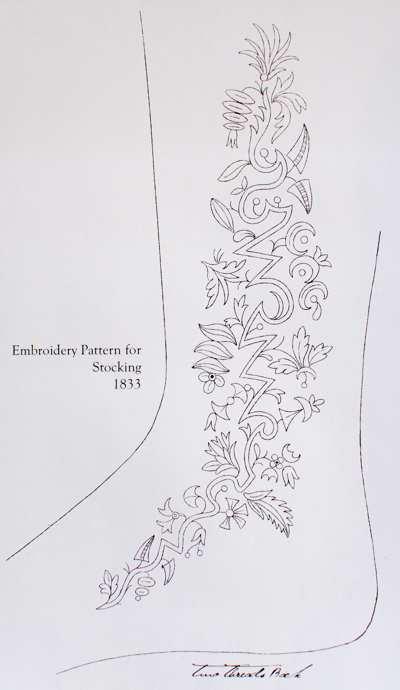
Lost somewhere between Lizzy Bennet’s spencers and Scarlett O’Hara’s hoops, the Romantic Era is woefully unappreciated. Maybe it’s because fashionable women resembled over-frosted cupcakes wearing hats like Rose Bowl parade floats. But oh my goodness. All that delicious feminine extravagance! This pattern from a French fashion magazine is typical for its time, and I thought I’d share it for Christmas.
After scanning and cleaning, I tried to add some holiday red and green to my copy for a photo. Unfortunately, the red looks pink. New color pencils are on my wish list!
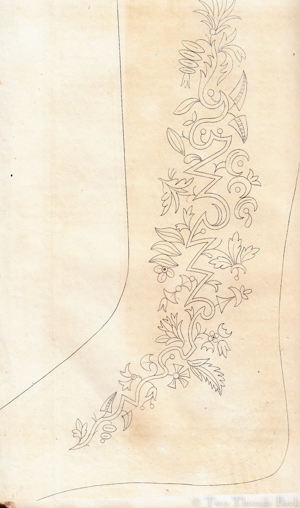
Want to print a pattern to tuck in your workbox? If you’d like a free (meaning all you have to do is ask) actual-size pdf of this one, just email me. I’ll send it to you. Merry Christmas!
An 1833 pattern for embroidery – clocking for your stocking! m@twothreadsback.com
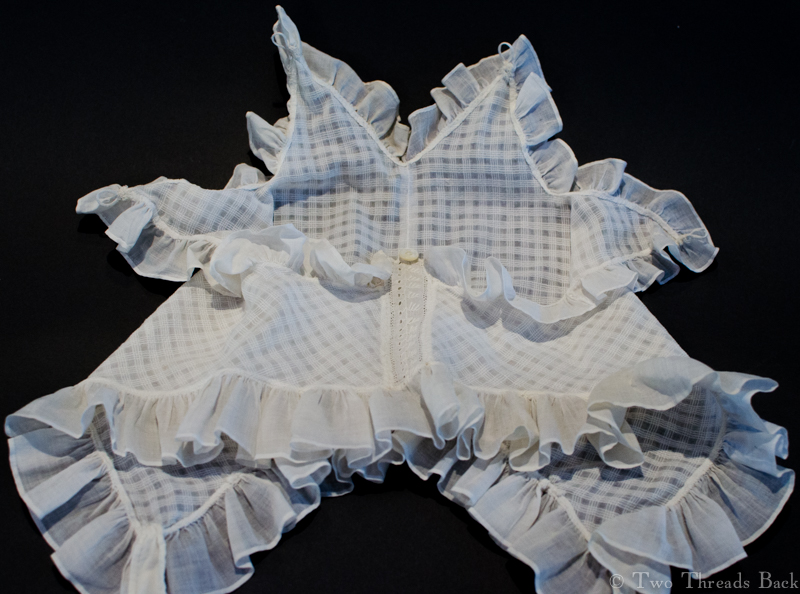
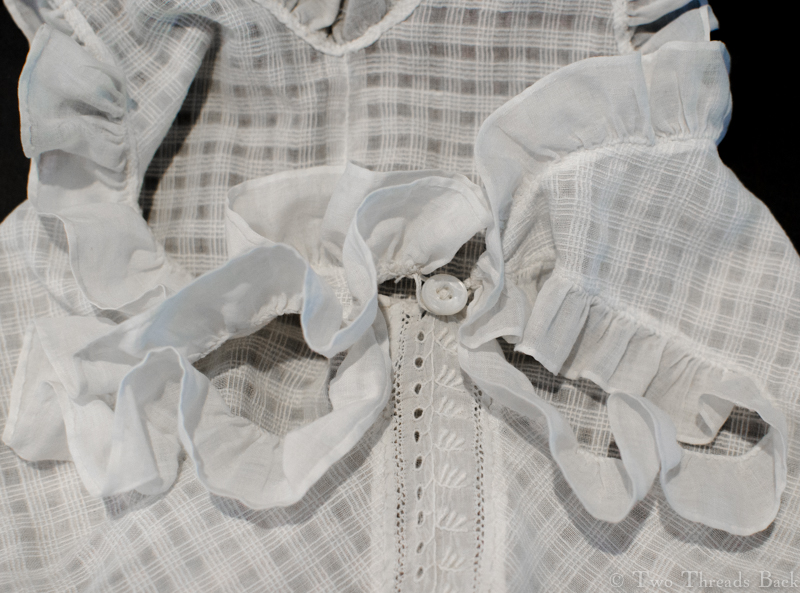
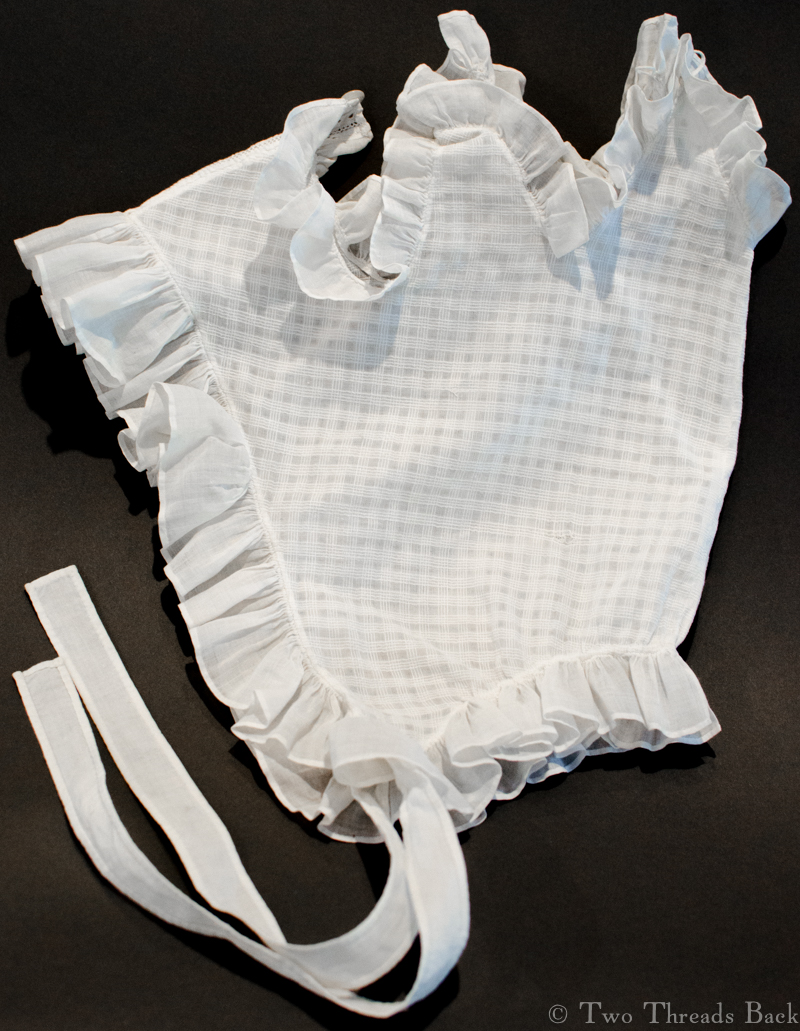
What on earth is it? This wildly ruffly confection that conforms to no known human shape? Where would you wear it, on your person or on your lampshade? How? Why? Take a look at the photo above and see if you know.
Fashion history lovers might recognize it right away, but if you haven’t, here are some hints. It’s cotton (obviously), it’s hand sewn (of course), and it’s old (or it wouldn’t be of interest here).
It measures about 10 x 11 – in certain positions, anyway. I mean, how do you measure something shaped like that? It has one button and four loops, and it uses three basic plain sewing techniques: hemming, seaming, and whipping.
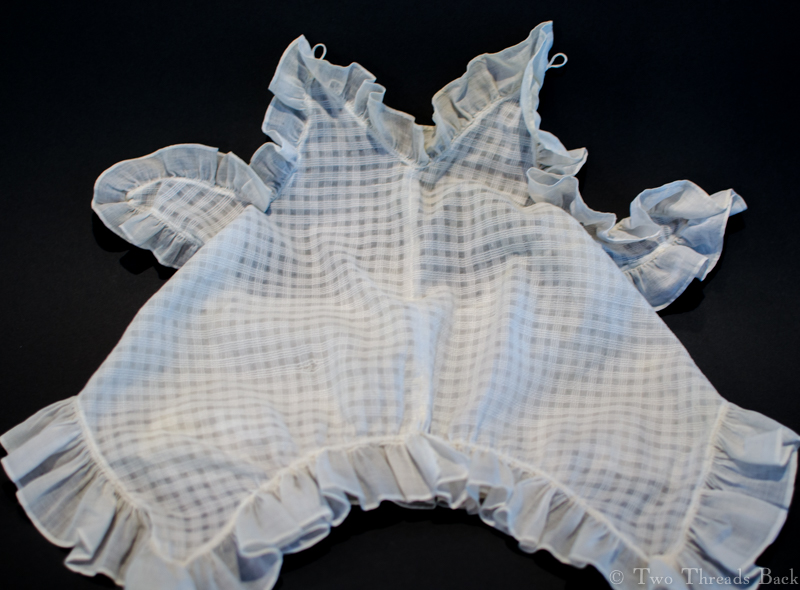
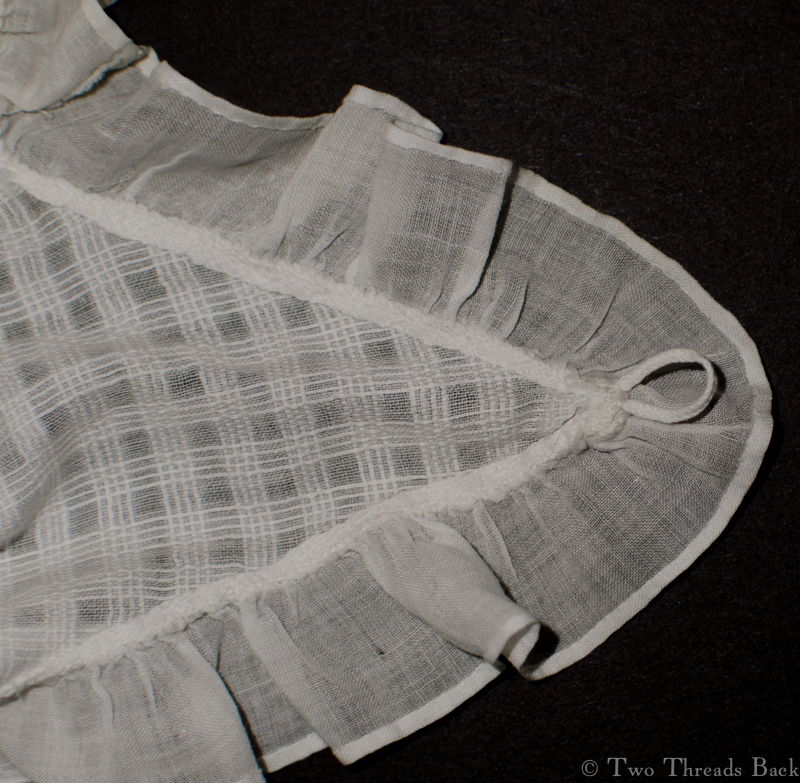
A view from the rear.
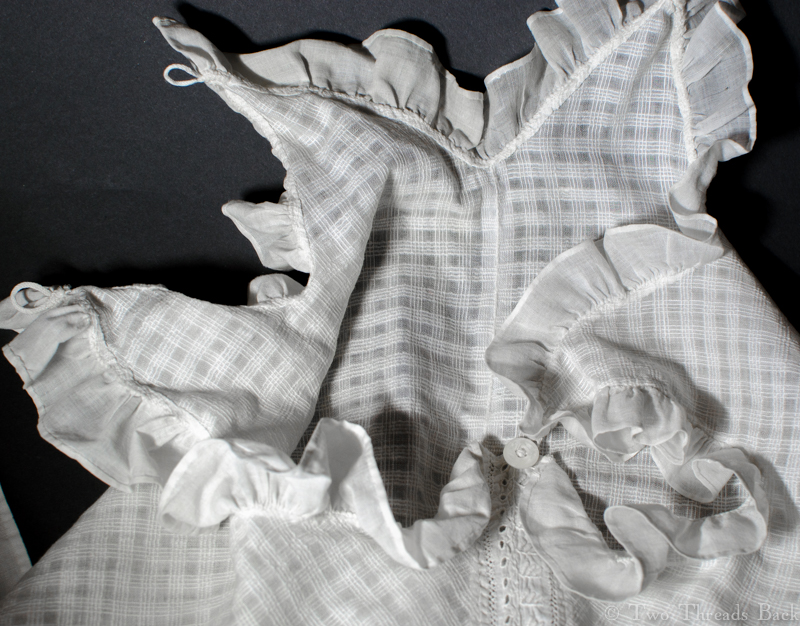
With one loop fastened to the button.
With two loops fastened to the button. Like we’re doing a strip-tease in reverse.
A peek at the loop.
A peek at the insertion. Can you tell that the embroidery was meant for an edge rather than the center of a design? You use what you’ve got available, I suppose. Or maybe the maker had one of those “Aarrgh!” moments once she sewed it in. I’m familiar with those.
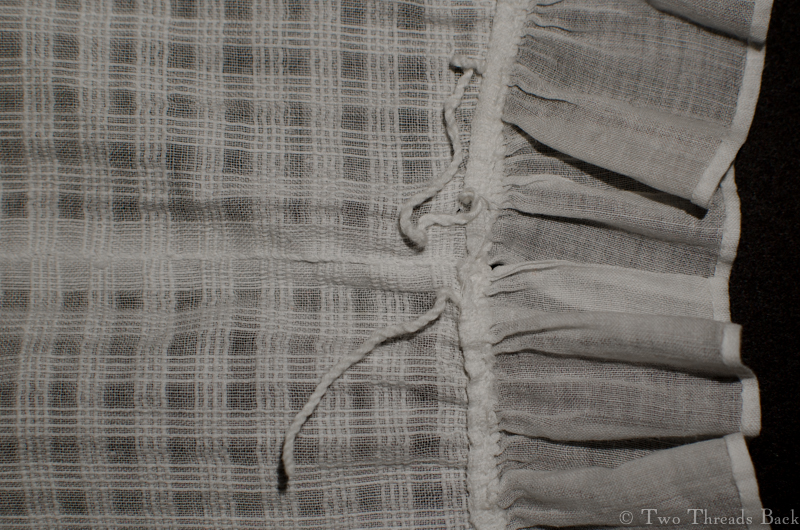
A peek at the gathering cord. It’s different from the tiny flat tapes used for the loops. You can also see the “seaming” (a plain sewing term) where two selvages are almost invisibly joined.
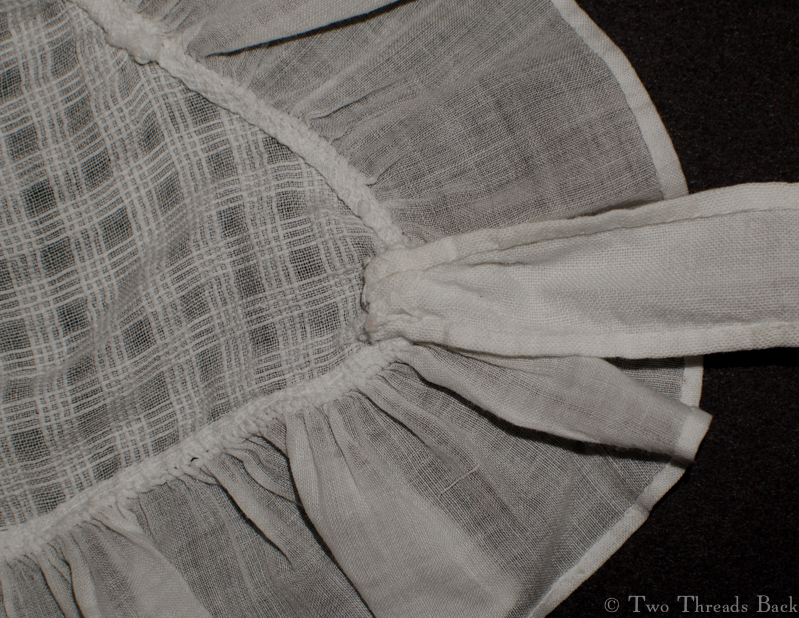
A peek at how the tie is tacked on – and by now, you know what this is.
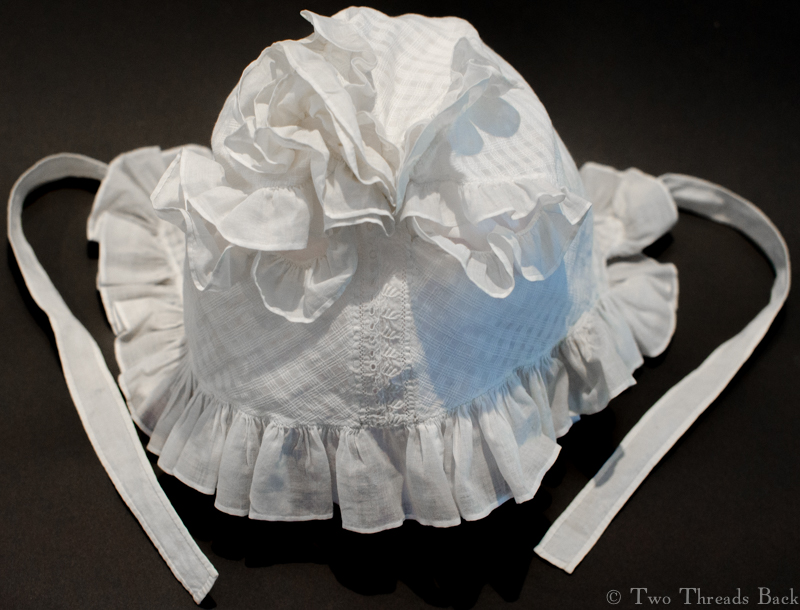
Yes, you’re right. It’s one of those crazy caps that were popular during the Regency (to use the term loosely) era, outré beyond belief, and probably subject to a little ridicule. I suspect they were for morning or afternoon wear.
This little cap manages to achieve its frothy excess with an ingenious pattern. There are four points, fairly simple to cut, which are then looped around a single button on the top. The result is lots of muslin bling for the stitching.
And that’s not all. It reminds me a tiny bit of one in the Workwoman’s Guide (see Pl. 9, Fig. 10). The author’s comment reveals its practicality.
This shape is particularly liked by the poor, from the ease with which it is made up and washed, as, upon undrawing the string, it opens readily at the top, and lies quite flat to be ironed.
As an Artifact Rescuer, I certainly appreciate the ease of laundering! But the most surprising thing of all? It doesn’t look so silly, but rather charming when worn. The effect is extremely flattering. So caps off to the creator of this one!
An easy pattern. And that’s saying something, coming from yours truly.
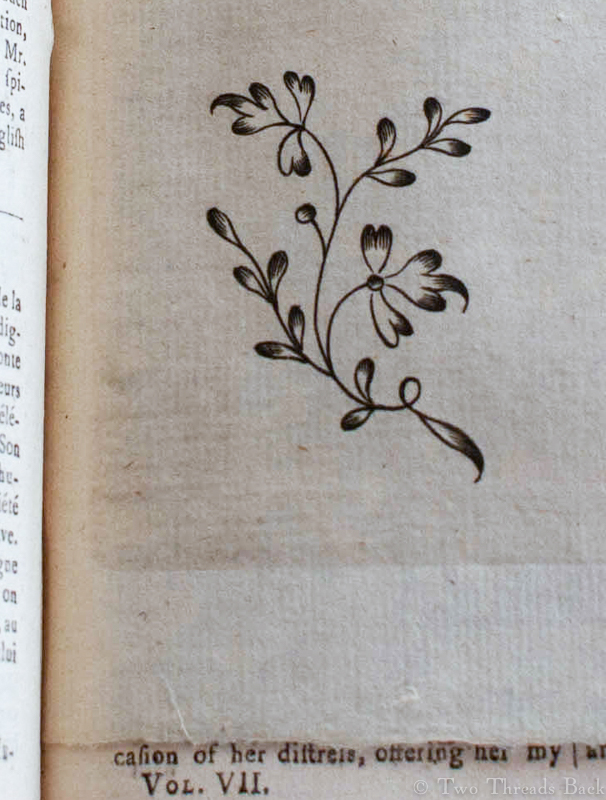
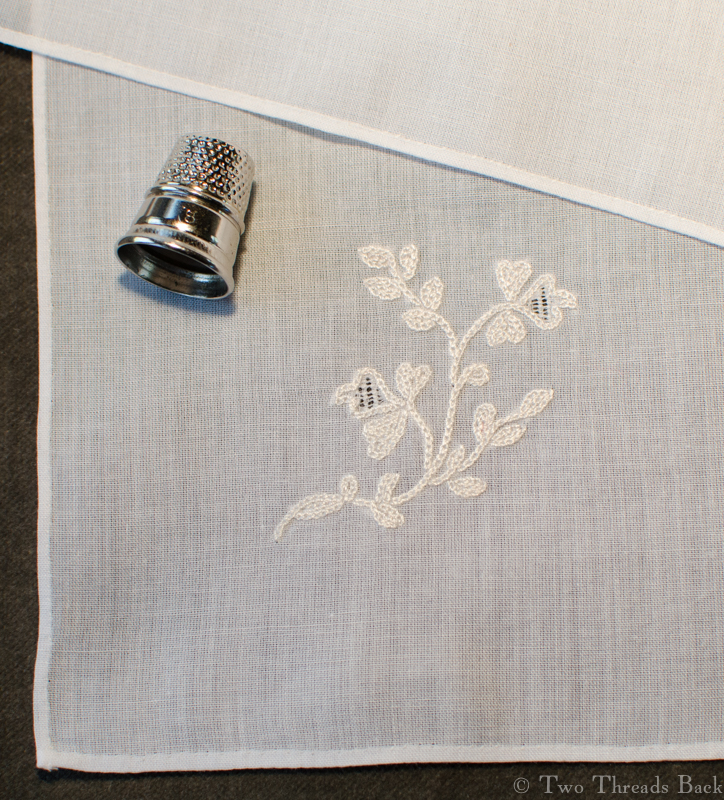
And in this corner we have the challenger: an 18th century pattern of a floral sprig from the Lady’s Magazine, 1776!
When I read about the Great Lady’s Magazine Stitch Off a few weeks ago, I knew it was something I wanted to do. Firstly, because I love early women’s magazines; secondly, because of the Jane Austen connection; and finally, because I could suit my project to my skill level – dabbler seems fitting.
A two-inch flower on a plain muslin pocket handkerchief, worked in a simple chainstitch with some wonderful Au Ver à Soie, would be just right. And perhaps some historical touches to set the mood.
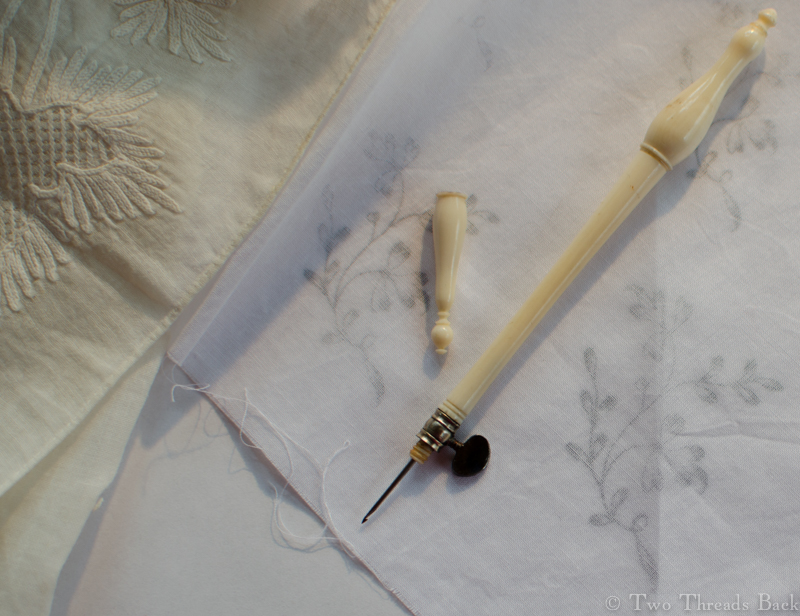
I had visions of myself sitting at my worktable to pounce the pattern, then deftly working the little sprig with an elderly tambour hook. That might occupy me for an hour or two, then I’d pop it in the mail to the Chawton House Library “Emma at 200” exhibit. How hard could it be?
Here’s my fantasy, what I wanted to happen. Note the 18th century embroidery I was looking at for inspiration – carefully folded so the damaged areas don’t spoil the effect.
Well, Fantasy was introduced to Reality fairly soon. I realized that the pouncing powder I’ve had (unopened) for 20 years required a little more research and practice to use than I wanted for such a small project. What’s so bad about using a disappearing marking pen after all?
Here’s the reality, modern day all the way. Notice anything glaringly wrong here?
So next came the tambour hook I’d been dying to try. It seems there’s more to using one than just picking it up and poking it in and out. Not to mention that the ancient point had a tendency to shred a few threads along the way. What’s wrong with using a needle?
Ok, I started with the needle and made it about halfway before I thought: ick! No two chainstitches were alike. I picked it out and decided to try a sort of running/darning stitch, also common on period pieces. Bleh. It looked worse than the first attempt, so I picked all that out and decided it would have to be chainstitch after all.
Well, I did better on the third try. But when I was almost done, I felt something didn’t look right. Maybe you spotted it already? I had put the muslin back in the hoop underside up. And there it would remain. Six hours into this two-inch project, I was not doing it over.
The hemming went better than the embroidery. I didn’t really mind that one side had a wider hem than the other three. But the flower centers looked a little plain. I thought I’d try some microscopic drawn thread work. Isn’t it amazing how fearless ignorance can be?
You can barely see the drawnwork in the flower centers. At least I hope you can barely see it!
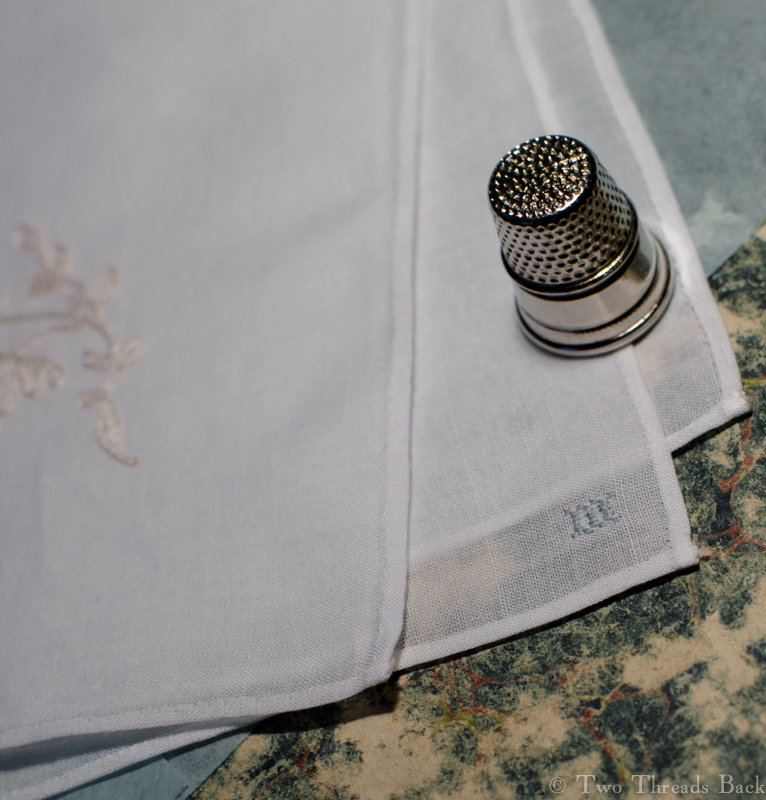
Another six hours later I was done. Then I remembered my calling. Plain needlework! I could not send this handkerchief out into the world without marking it. A silk monogram was beyond my ability, and turkey red thread would be out of place on this mouchoir de poche. So I used blue cotton (I’ve seen real examples) and started on my initials in the opposite corner.
A mono-(in the most literal sense)-gram letter “M” worked in cotton from a period pattern. Most early marking charts I’ve seen had letters seven X’s tall.
It hurt. Not just squinting to see the threads, but to realize I’d placed the “M” too close to the corner to add my other initial. It kind of looks like I meant it to be that way, so I won’t tell anyone.
P.S. Check out the Stitch Off Facebook page too, you’ll see some gorgeous examples of embroidery by people who really know how. In color, no less! Maybe you’ll be inspired to participate?
A cotton chemise, unlike either the French or English styles below. I’m going out on a limb here and guessing… American, 1853.
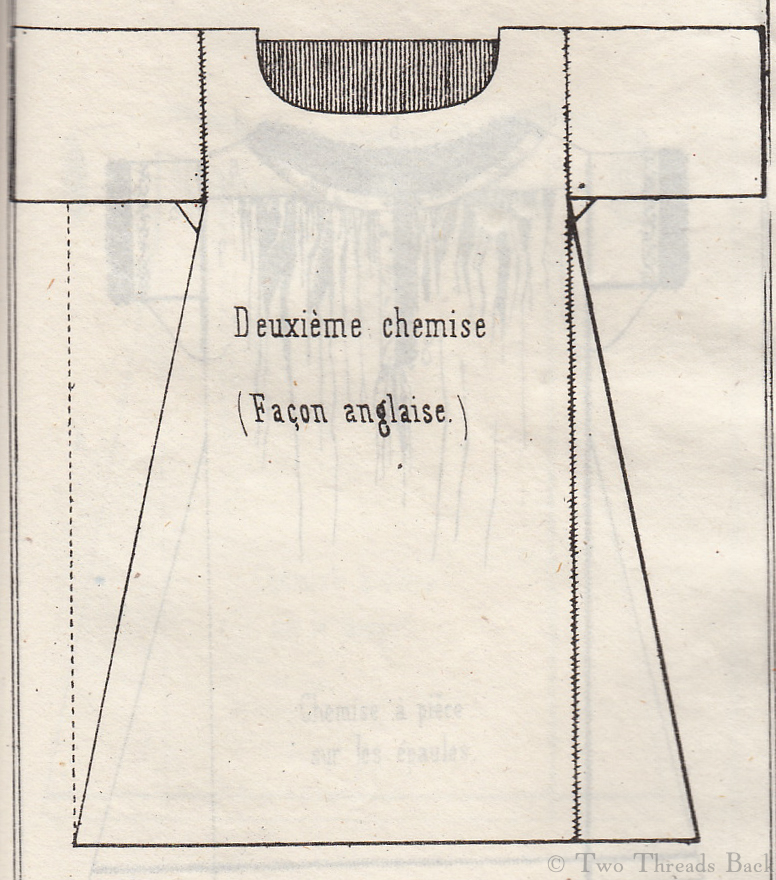
Wouldn’t you know it? Maybe there’s a Murphy’s Law of blogging. Just after proclaiming in my last post that there were no noteworthy distinctions in French and English chemises, I came across the illustrations you see below.
The only difference mentioned in the accompanying text is that the English style is for “skinny persons.” There may be more clues in the cutting directions, but with no knowledge of French, I’ll have to let that pass. The book was published in 1847, and is surprisingly primitive, at least compared to the detailed and beautifully illustrated French magazines of the same period.
However, I still can’t determine that English-made shifts were of one particular pattern, and the French used another. It seems more likely that a lady cut her shift and its gores according to the size of her fabric – and herself! But in the interest of Truth in Blogging, I submit the following:
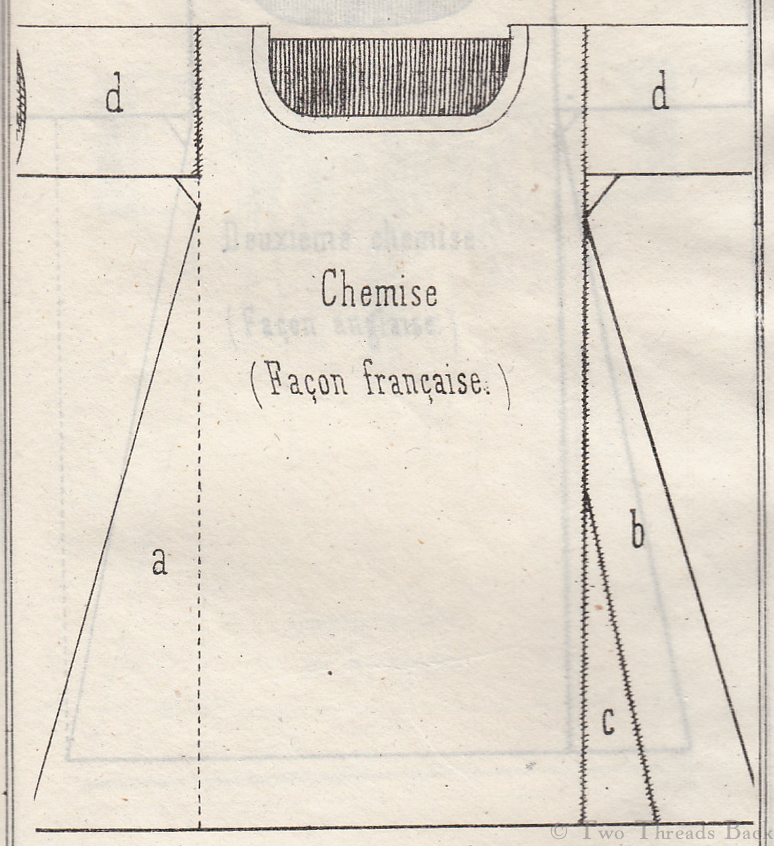
Chemise Francaise. Of course it looks more complicated – they have a reputation to uphold.
Chemise Anglaise. No nonsense, for skinny persons.
Language is a funny thing. I suppose we’re all guilty of following fads in our choice of words, and we all have particular phrases we find irritating or amusing – in other people. I recently came across an example by Jane Austen, written in 1817, just as the polite name of a woman’s undergarment was changing.
So presumably Miss Austen was still wearing shifts, when other ladies were beginning to wear chemises. She wasn’t alone, however, in her annoyance with linguistic affectations. Pantalogia, a New Cabinet Cyclopaedia, Comprehending a Complete Series of Human Genius, Learning, and Industry, Alphabetically Arranged; with a General Dictionary of Arts, Sciences, and Words (1819) has this to say:
CHEMISE, the French word for that article of linen under dress which when worn by men is called a shirt, by women a shift. Some few modern English ladies, with an affected squeamishness of delicacy, restrict the term always so as to denote the article of female dress chemise de femme; but as every one knows what they mean by the expression, and we see no reason why every one should not know what they mean, we recommend the use of the old English term, and the abandonment of the corresponding French word.
Was there really any difference between a shift and a chemise? Well, yes and no. No, because they both referred to the same lady’s undergarment. Yes, because when the word “shift” was used (up until the early 19th century), the garment was usually made of linen and was simpler in cut. As the word “chemise” became standard, variations in pattern and trimming were increasing and the chemise was more often made of cotton.
So much for the term; now was there any significant difference in the French and English methods of making this garment? I haven’t found anything consistently, unmistakably, irrefutably, definitively identifiable. When I examine an old chemise, whether in a book, online, or in person, I can’t raise an eyebrow knowingly and say, Ah yes, English, 1832.
But with the interest and expertise I see popping up in blogs and books, I wouldn’t be surprised if someone has – or will – come up with a list of distinguishing features.
If you are curious (or courageous) and would like to compare for yourself, below is a pattern and description, 1840, from a French periodical. (Please excuse my awkward translation. If you are fluent in French and English, I beg you to let me know and help me correct it!) English patterns and instructions of the same date are available in the Workwoman’s Guide.
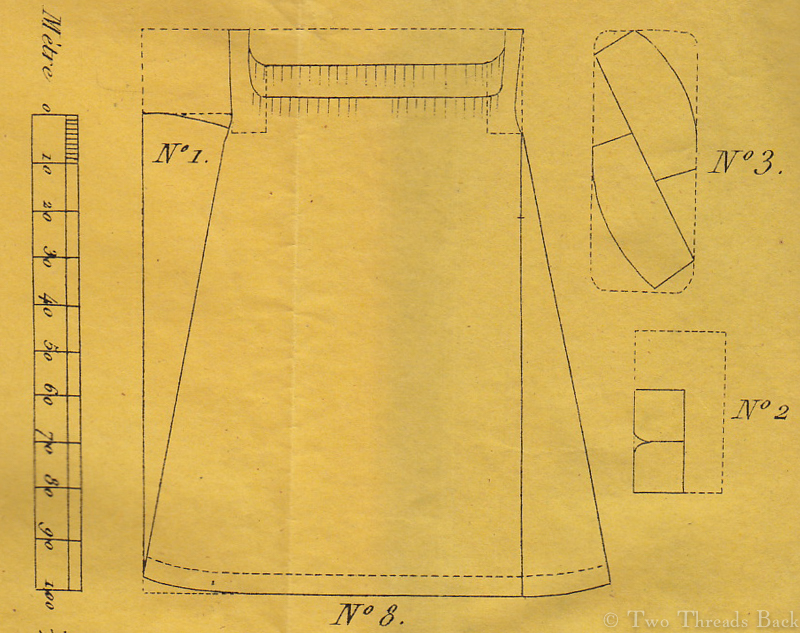
A pattern for a lady’s chemise, 1840.
No. 8 is a woman’s chemise. For ten chemises, purchase 25 meters of percale; take off a meter, and cut the rest into ten pieces; fold these pieces into two; on side No. 1, cut the gore that you add to the other side, cut by a thread as shown in No. 2; inside cut two gussets; indent around the neck; this is shown in No. 3; the sleeves are cut on the bias. Gather slightly on top of the arm and hem the bottom with backstitching. The armholes have to be a little curved under the arm. Take the remaining meter, measure a narrow band along the edge, then cut twenty pieces for double shoulder straps; these pieces are indicated by dotted lines; place a narrow piece of tape between the shoulder strap and its lining, there you insert the sleeve and backstitch, and you fold the lining over; gather the top of the chemise, as indicated, and insert a narrow tape of a meter in length; then cover this piece of tape with a band of percale; using backstitching and hemming, then fold under. Mark the chemise over the left gusset.
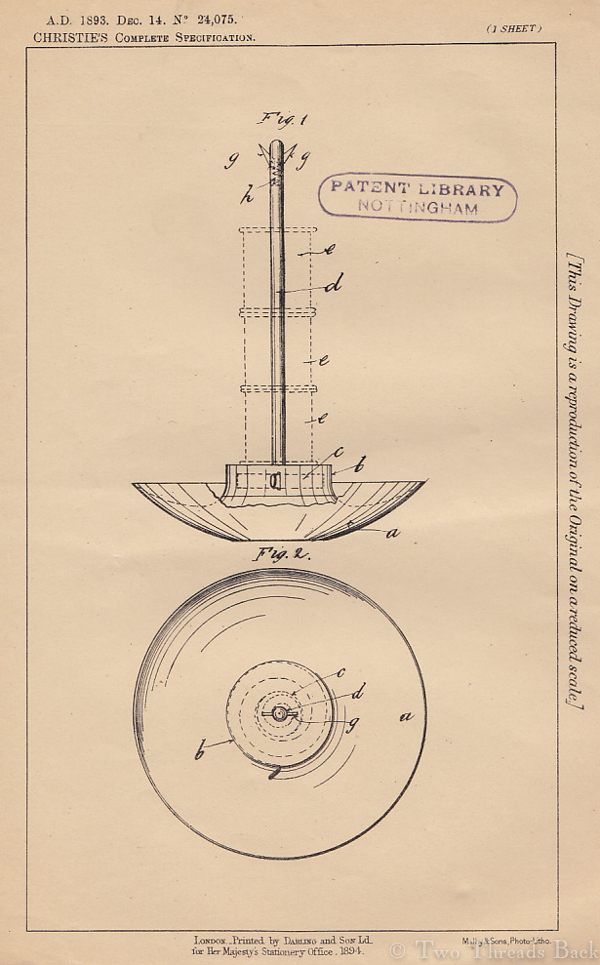
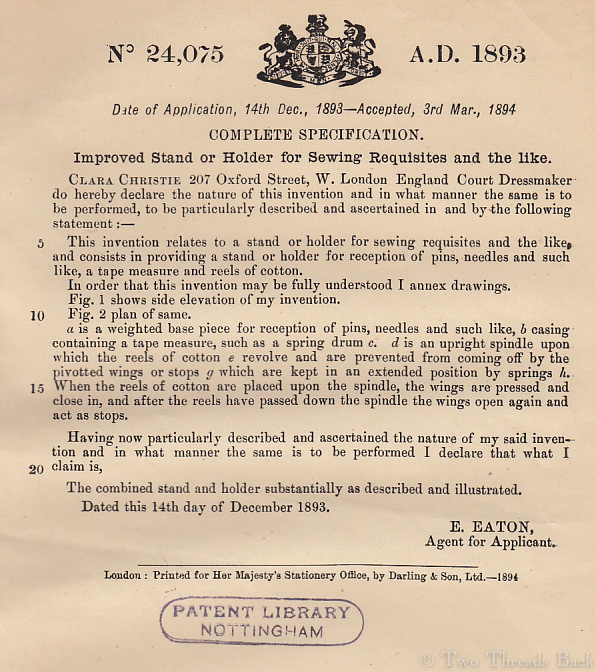
1893 “Improved Stand or Holder for Sewing Requisites and the Like” by Clara Christie, London Court Dressmaker.
Copyright can be horrendously confusing. Most of us who write, sew, craft or create anything strive to be original. Of course, when we historical sewing fanatics are trying to reproduce something very old, whether it’s a pin cushion, a style of writing, or a baby gown, original takes on a whole “‘nother” meaning. We’re trying to be true to the original pin cushion, style of writing, or baby gown. The closer we get to someone else’s original, the greater the achievement!
But what about copyright and patterns? Once upon a time, I sewed things to sell. And occasionally still do. However, I’ve always been terrified of trespassing copyright. For years I’ve heard all sorts of “rules” concerning the use of patterns designed by someone else. You must buy a pattern for every item you make. You must buy a pattern for every five items. You may not sell items made from patterns. You may sell items made from patterns if you buy a license. You may copy a pattern for your own use. You may not copy a pattern for your own use. You may change a pattern X percent and consider it your original. And the list goes on….
I simply avoided the issue by making my own. Rather absurd for someone who collected patterns and squirreled them away (unopened) like acorns before a heavy winter. Or maybe not that surprising. If you’ve read some of my past blogs, you know that I read and write about making things more than I actually do it!
It seems like I may have been overly scrupulous. I recently came across a terrific article on debunking pattern myths, which you can find here, and a follow-up article here. The author makes a clear distinction between selling things made from the pattern (ok) and selling copies you made of the pattern itself (not ok). For even greater detail and Genuine Legal References, see the pages of pattern copyright info here. If you’ve been perplexed by the rules of sewing to sell, you might want to check them out.
I suppose I should follow all that with my own disclaimer: I am not qualified to give professional legal advice (not that anyone ever thought I was). But make no myth-take: do your research and I hope you’ll find you can relax and open those patterns!
Now what about the picture at the beginning of this post? Well, that’s a patent (a cousin of copyright) by Clara Christie for a “Stand or Holder for Sewing Requisites and the like,” which she designed in the 1890s.
It was meant to hold pins and needles in the weighted base, have a tape measure built in, and a spindle for spools of thread. Personally, I think the tape measure is overkill, since it would be pretty awkward to use without making a mess of the pins. But surely as a London Court Dressmaker she knew what she was doing?
As a reward for your fortitude in reading to the end of this post, if you would like to have the patent pages for your own (and live in the US), be the first to write and let me know. I’m cleaning out stuff that needs a new home and will send them to you free!
P.S. To answer a question about the copyright notice on the images on my blog – feel free to pin them, that’s what the button is there for. And to make it official, you may save them for your personal study as well. Want them for something else? Send me an email!
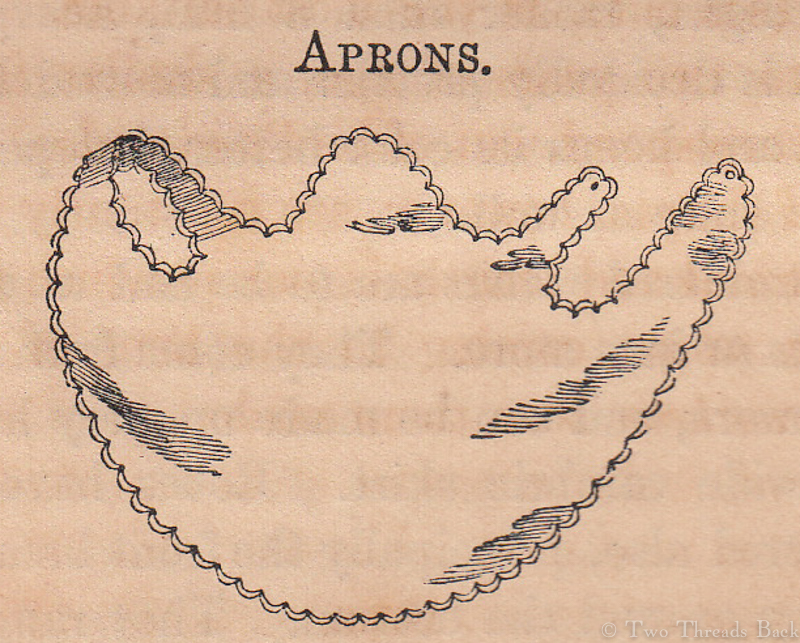
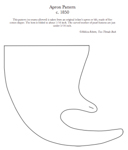
An apron pattern, c.1850 for the 19th century layette.
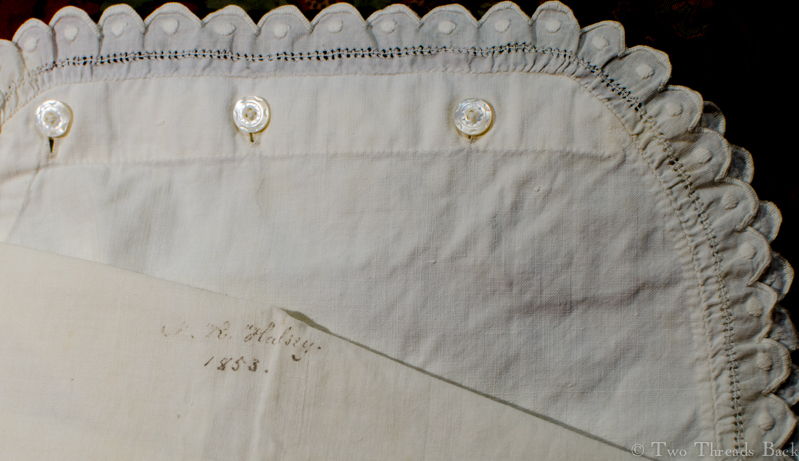
At three months old, it is usual to commence the use of aprons, which are made of bird’s-eye diaper, or, just now, brilliante, a firm, close-figured cambric, which will wear nearly as long. These last are bound with cambric, in solid colors, as pink, blue, buff, &tc. Bird’s-eye linen is usually trimmed with tatting or anything that wears well. At present, button-hole scollops, either plain or filled with dots, eyelets, &tc., are much used; they are made in this way ornamental, as well as useful. For an infant, the “bib-apron,” round front, coming a little below the waist, with a little shoulder strap buttoning around the arm (see cut), is the most suitable. From six months to two years of age, a similar front, with back to correspond, cut of bird’s-eye also. A large variety of shapes, however, are constantly to be had. The material and length is our province; no child needs an apron coming to the end of the dress skirt, as we have seen them made.
So says Sarah Hale, in a little instruction book written for new mothers in 1854. It amazes me that such a functional item could survive 150 plus years, but I come across them from time to time. If you’d like an actual-size pattern of the one below, send an email to me, m at twothreadsback dot com, and I’ll send you a pdf – free. Gratis. No strings attached!
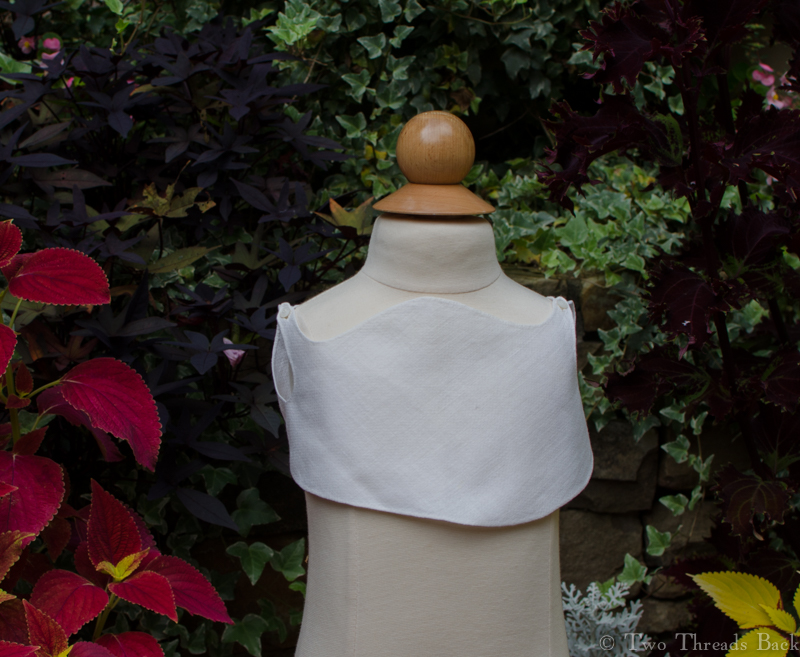
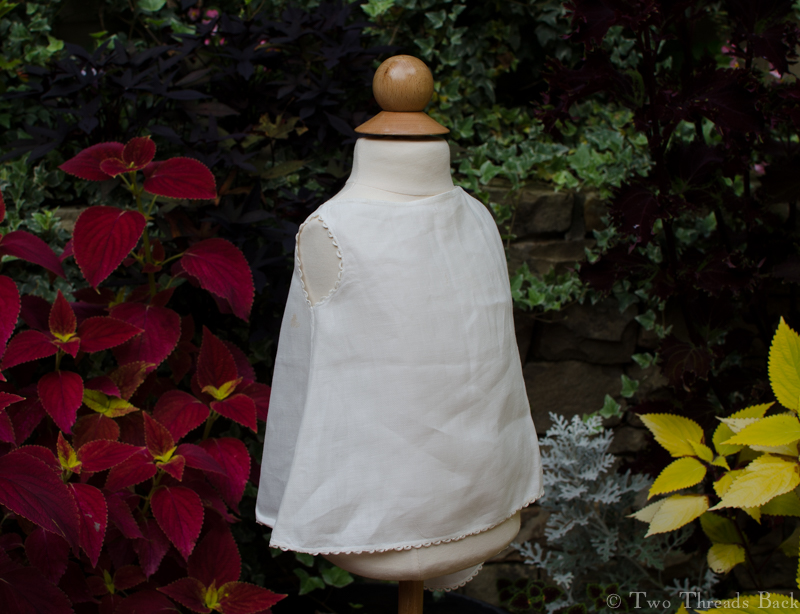
An apron for a very small baby, made of cotton diaper by a mother who was cutting the pattern with one hand and holding the baby with the other.
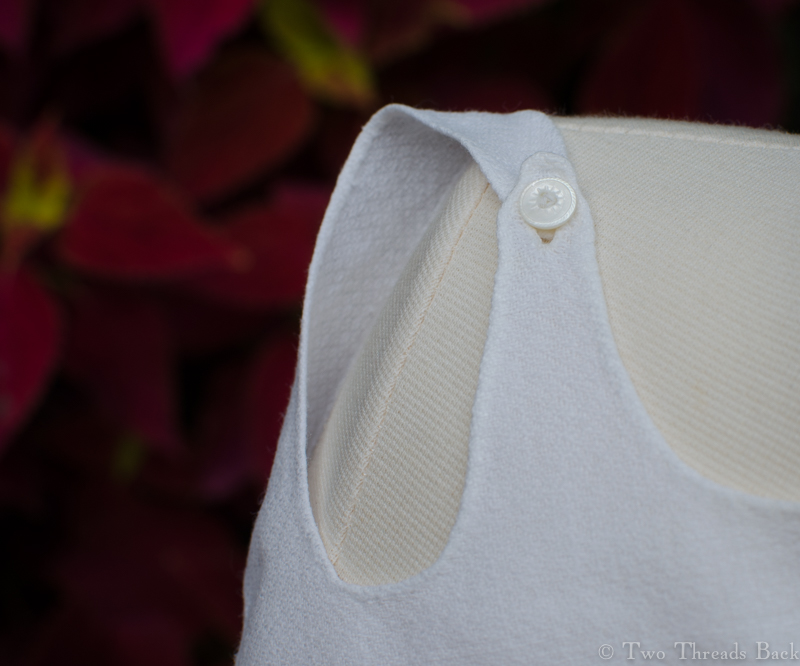
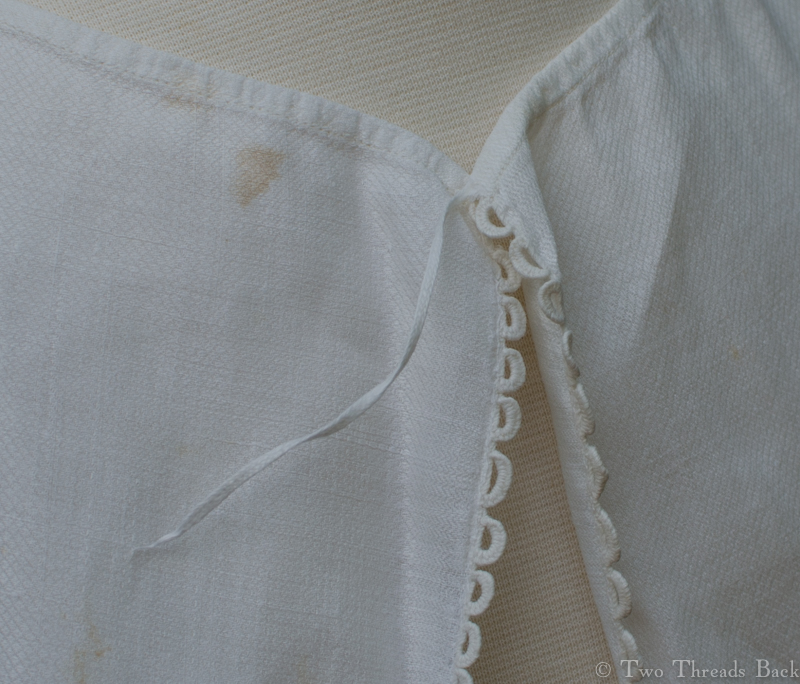
The hems are almost invisible, so I assume Mother was able to use both hands for that. The tiny buttons are made of delicately carved mother of pearl.
A close-up of the buttons and narrow hem.
The photo(s) are slightly underexposed because the apron is so white it’s hard to see.
The fabric is still so strong that the fold-down part in the front refuses to fold down – and I refuse to press it that way. Not a good idea for preserving old textiles!
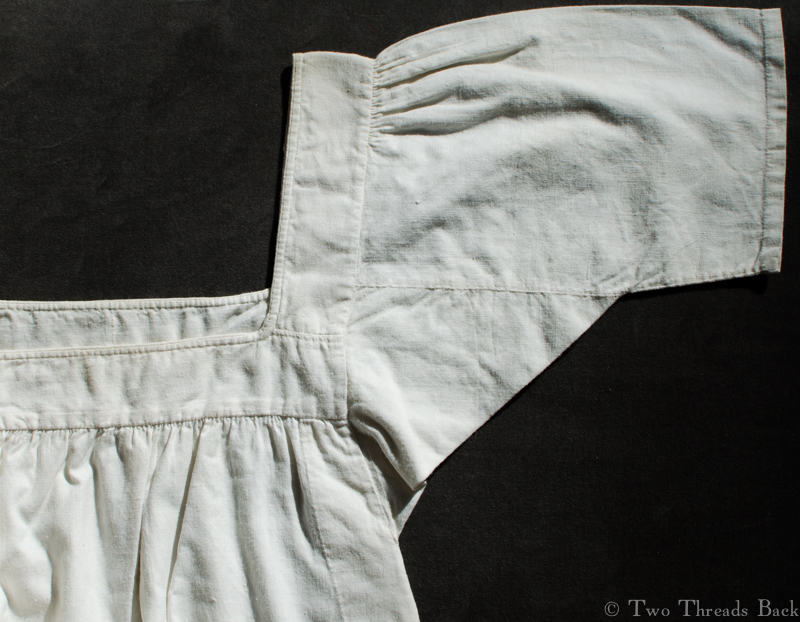
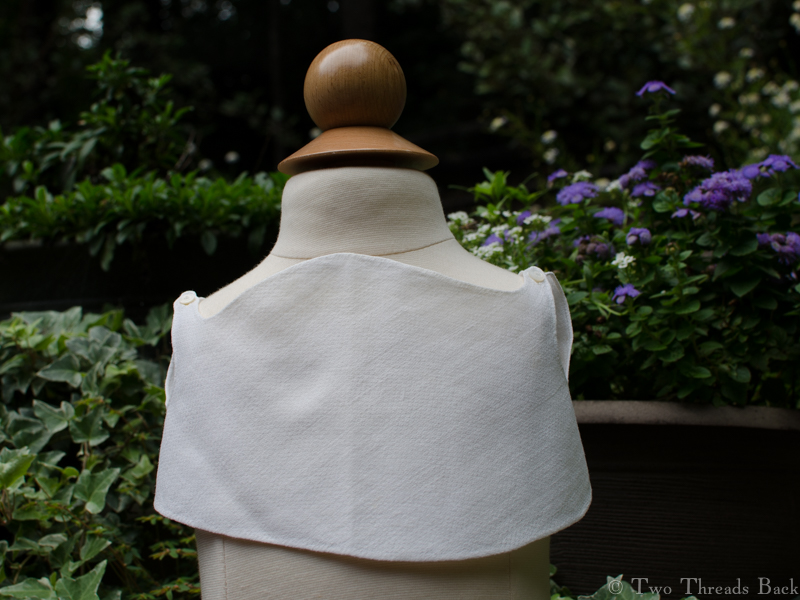
Another common pattern, made for an older child, is like the one pictured below. It’s also made of diaper – but in linen – and trimmed at the armscyes and hem.
This one is less like a bib and more like what we’d call a pinafore today.
A view of the back to show the tape threaded through the neckline and the pretty buttonholed trim.