
Tutorials aren’t usually a feature of this plain sewing blog, but I set out the steps for someone who needed help with sleeve gussets, and thought I’d share for anyone who flirts with insanity when inserting them for dolls or costume. I like pictures in sequence best – except maybe when assembling anything from Ikea!
A gusset is a little piece of fabric inserted to reinforce or to increase the ease of movement in garments like shirts and shifts – you can see in the pictures how it gives more room under the arm. They were used up until mid-19th-century-ish when fashion, fitted patterns, and sewing machines made them pretty much obsolete, though some sewing classes included directions for small ones at garment openings into the 20th century.
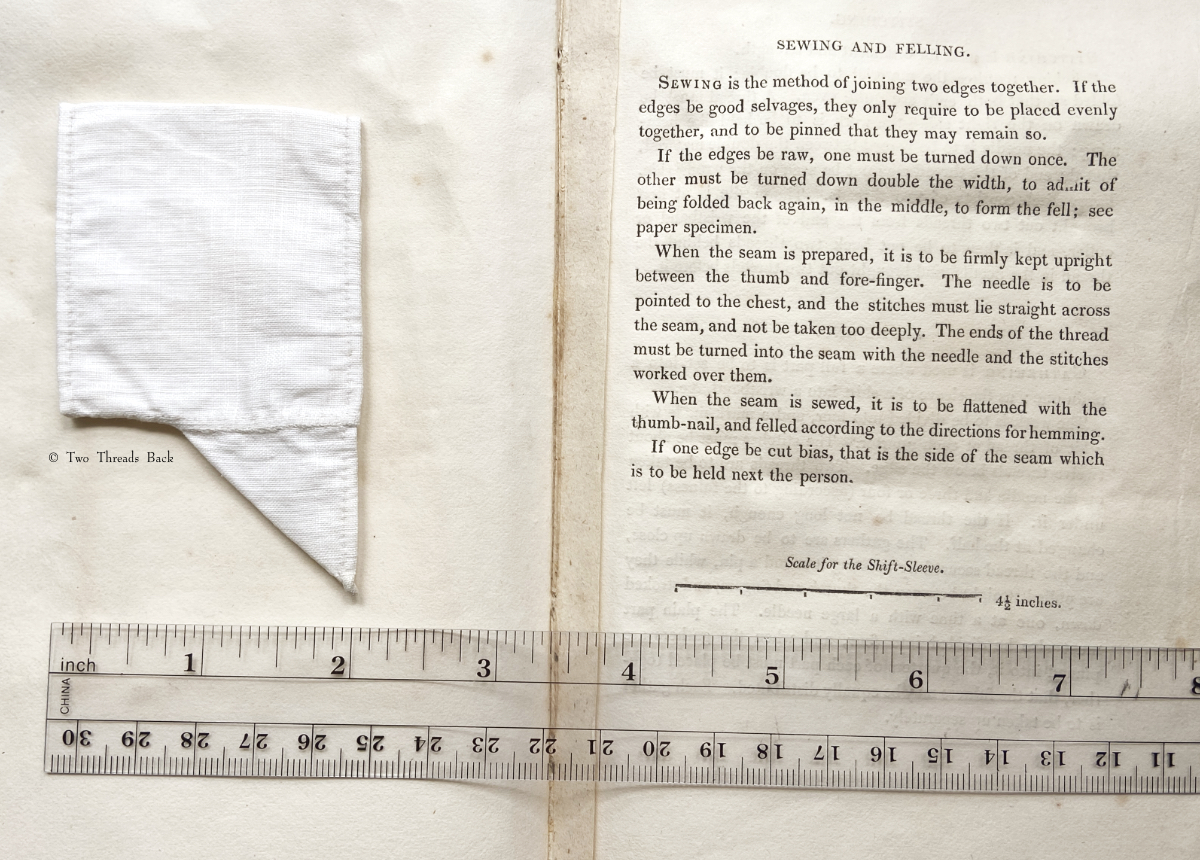
Plain sewing projects might include a sample sleeve gusset, because they used basic stitches like hemming, felling, and sewing/seaming1. A miniature size was practical, saving both time and material; the ones pictured here were pasted in books meant as guides for sewing teachers.

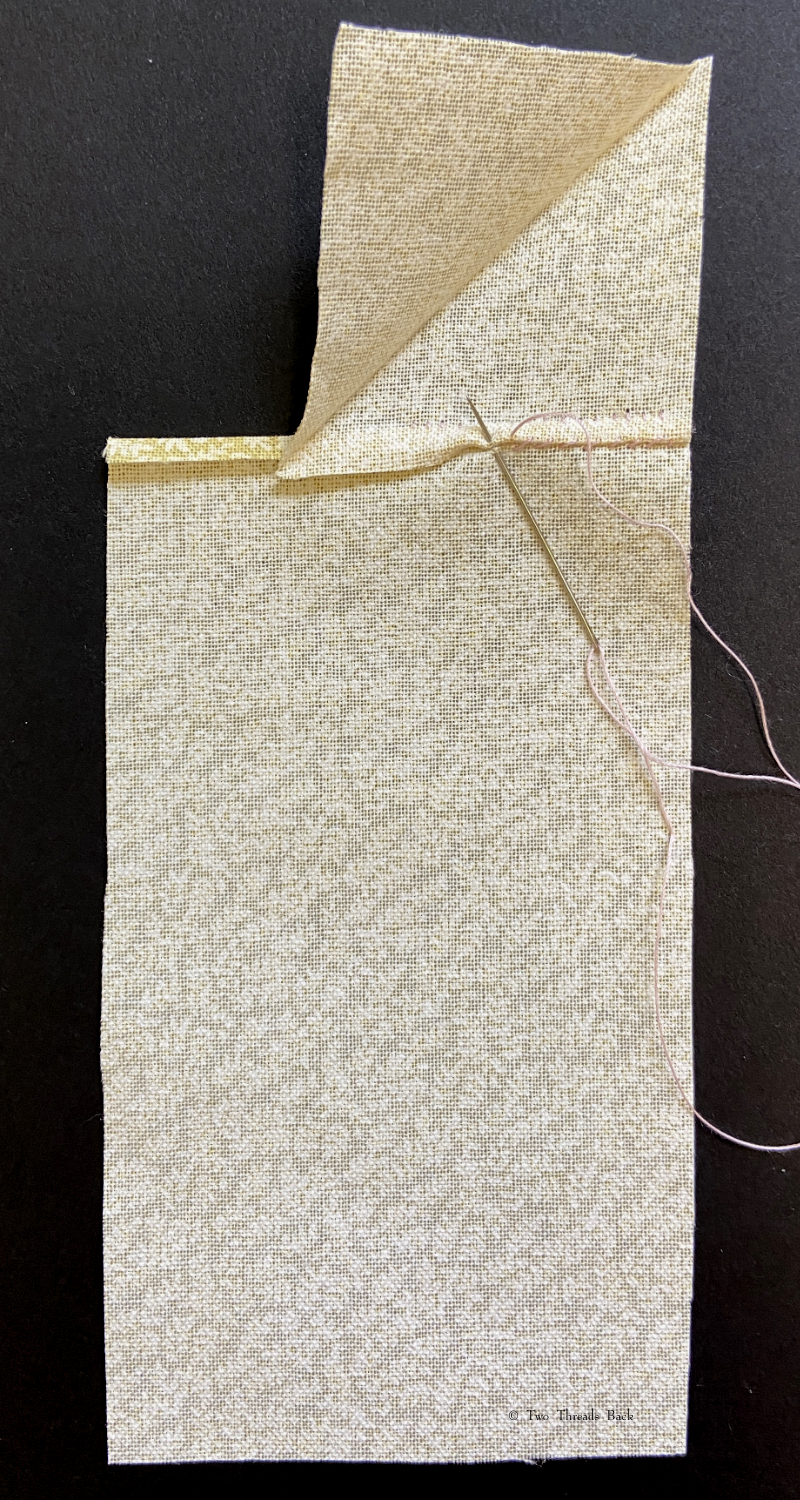
So just how hard can it be to sew straight seams on a little square? Well, if you want all the edges to be neatly enclosed, lie flat, and the right size when finished, it can be a pain in the armpit! The following sequence shows the “sew-and-fell” method, replicating the miniature specimens above. I’ve seen other methods – and I have some examples – but this one set the standard for fine needlework.
Note: In 19th century manuals, the deeper double fold for felling was always completed before any sewing was done. See pics Fig. 50 and 51 here. That’s difficult to illustrate in a photo sequence, so I’ve made the second fold after the seaming is done. I’ve used a coarse cotton printed on one side, contrasting thread, and big stitches (ha!) so that it’s easier to see.


The author of The Workwoman’s Guide (1838) may have been a little impatient with gusseting herself. She suggests simply hemming the gusset evenly all around, hemming the sleeve where it will be inserted, and then seaming the two together. I’ve done that myself! As long as the work is neat….
Gussets – Much depends upon the nicety of the putting in and finishing off, but when well accomplished they have a peculiar charm to a good needlewoman.
Personally, I find peculiar charm in just finishing one with my good humor intact. I’ll save the appreciation of niceties for those glorious gussets worked long ago.
1 Terms used for stitches differ according to time and place. The stitch I’m referring to here, a very shallow overcasting used to “butt” two pieces of fabric together, was called seaming or sewing. The term sewing was more common in the first part of the 19th century in English and Irish manuals. Seaming was more popular later. There are no early American sewing manuals, but in the U.S. over-and-over stitch was frequently used by mid-century and then overhanding was popular later (as distinct from overcasting which was a wider stitch used to prevent edge raveling). I usually call the stitch seaming because calling it sewing would be really confusing (even more than this footnote!) and over-and-over stitch is too wordy to verbify!

I never knew all those different words for sewing!
This is a lovely sample and I wish I had been able to consult it back in the 1990s when I was working at a historic park!
LikeLike
Thanks! It’s so cool to see the specimens since it helps to understand their (often) confusing instructions. Although it could be my confused understanding, hmm…
LikeLike
I am sure all the instructors phrased things in slightly different ways, so that would be confusing! I would have to work it out by looking at an actual piece, I think.
LikeLiked by 1 person
Your tutorial is peculiarly charming indeed! You are right about all the differences in terminology over time and geography.I was taught that Over-and-over stitch was called whip stitch!
LikeLike
Thank you! Yep, terms can be so different and it really doesn’t matter what something’s called as long as long as the referent is understood. That’s why it’s sooo wonderful to have a labeled sample or illustration to go with really old text!
LikeLiked by 1 person
I do rather love the rather temperate enthusiasm implicit in the reference to “peculiar charm”!
LikeLike
You obviously appreciate their subtle wit – which I would expect from someone who knows the Hound of the Doleful Countenance. 😉
LikeLike