Aprons, No Strings

Apron 1854
An apron pattern, c.1850 for the 19th century layette.

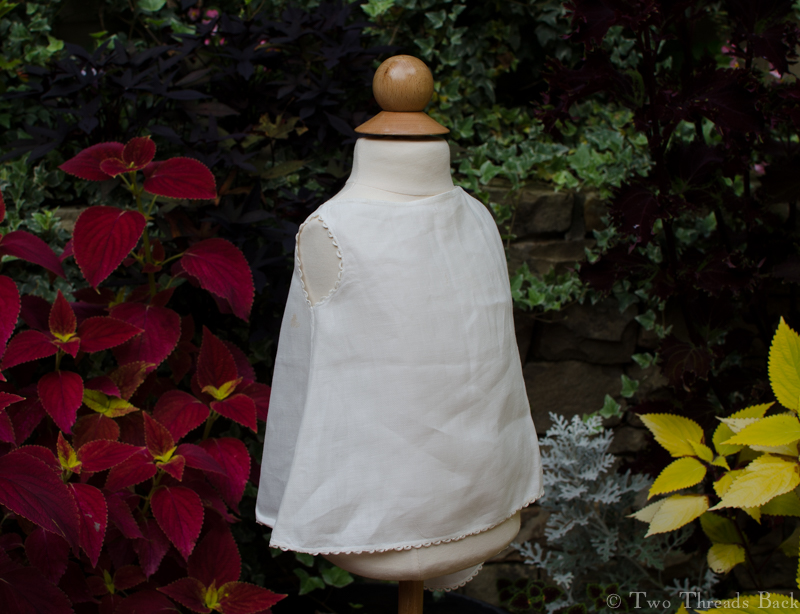
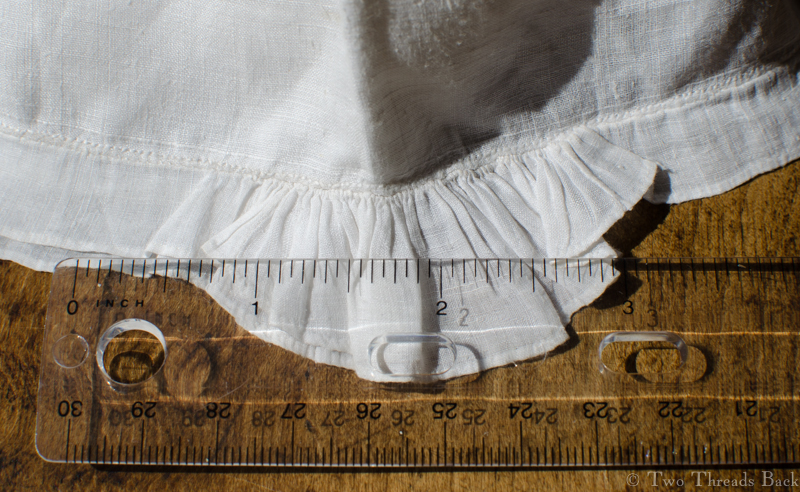
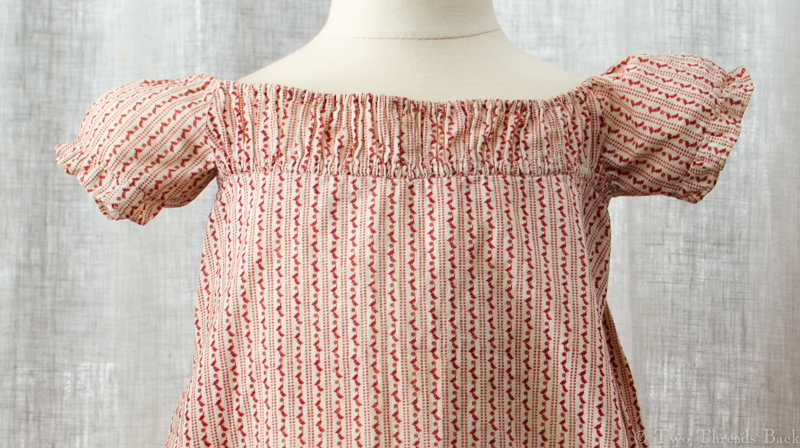
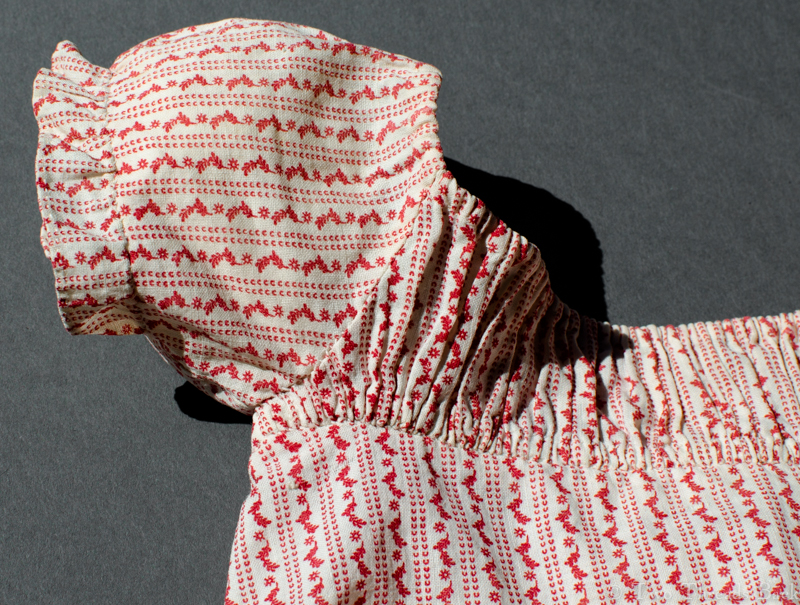
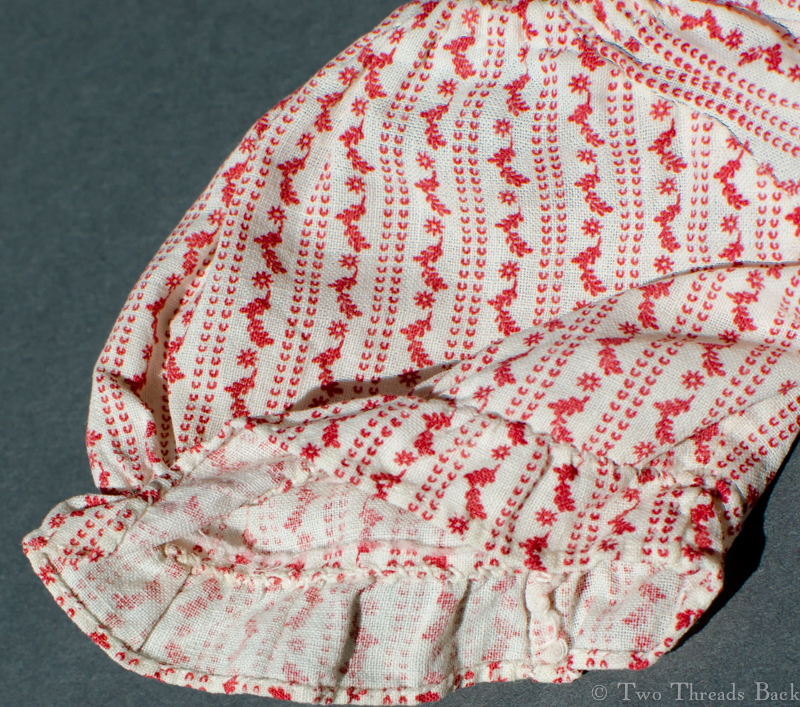
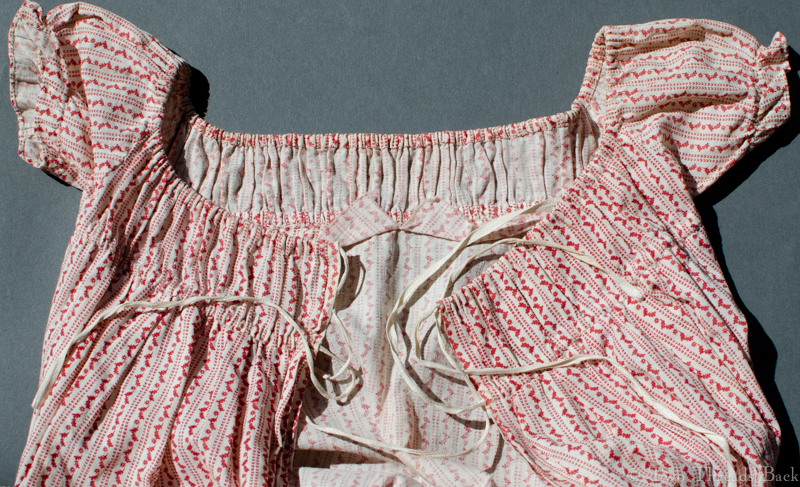
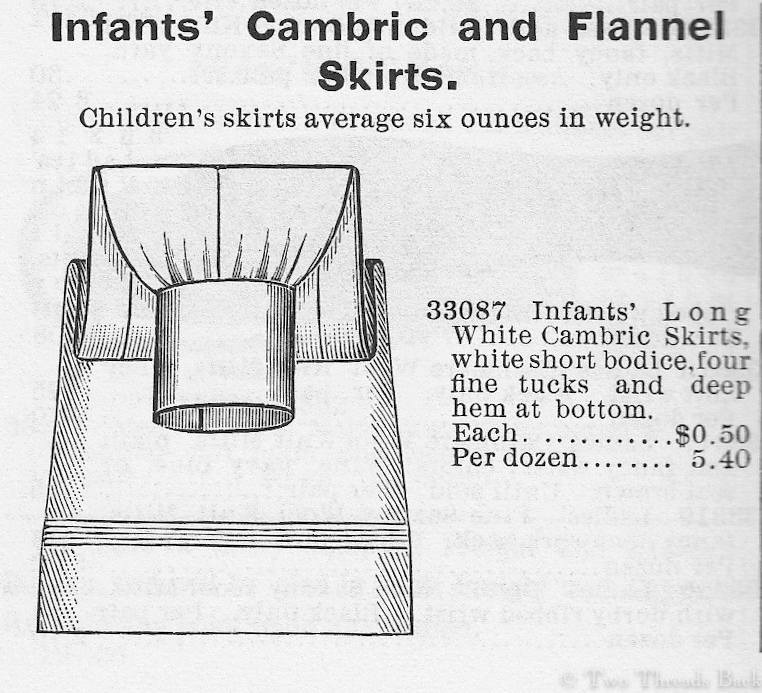
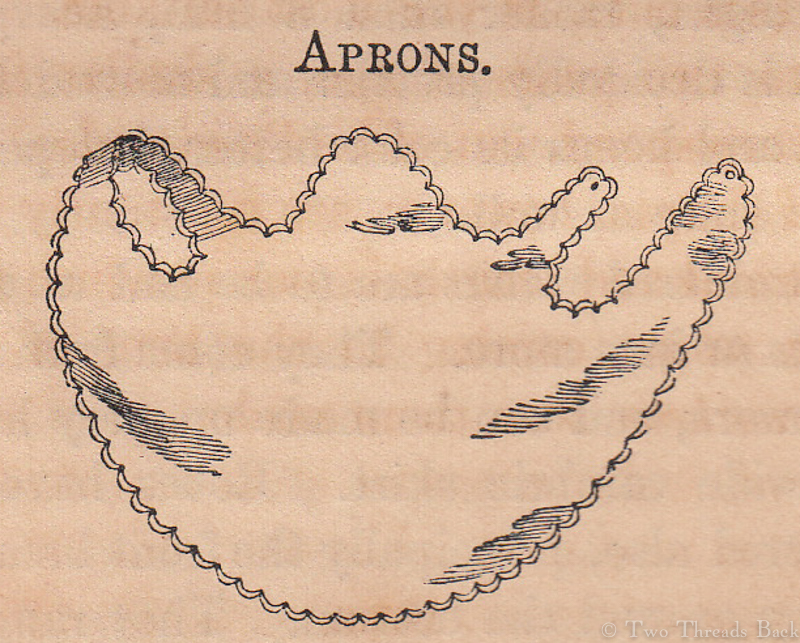
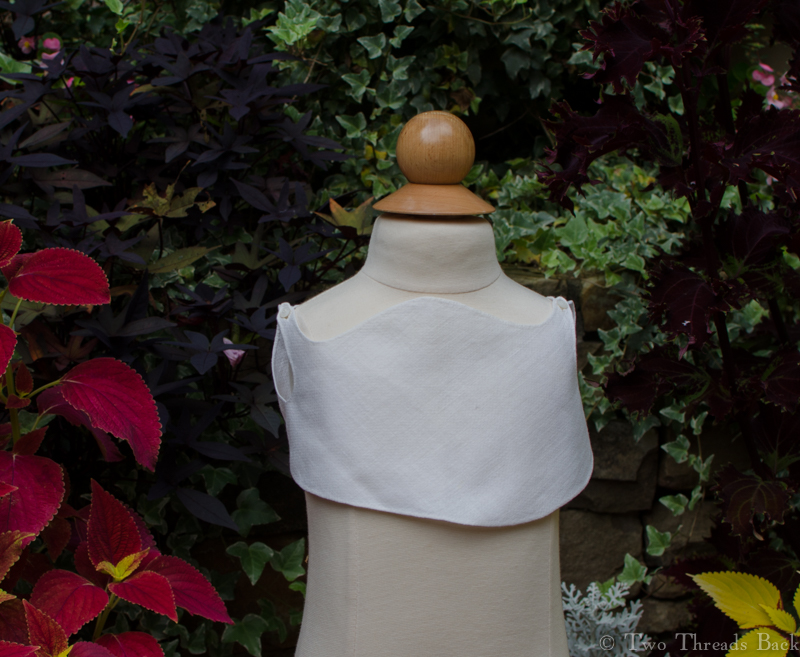
At three months old, it is usual to commence the use of aprons, which are made of bird’s-eye diaper, or, just now, brilliante, a firm, close-figured cambric, which will wear nearly as long. These last are bound with cambric, in solid colors, as pink, blue, buff, &tc. Bird’s-eye linen is usually trimmed with tatting or anything that wears well. At present, button-hole scollops, either plain or filled with dots, eyelets, &tc., are much used; they are made in this way ornamental, as well as useful. For an infant, the “bib-apron,” round front, coming a little below the waist, with a little shoulder strap buttoning around the arm (see cut), is the most suitable. From six months to two years of age, a similar front, with back to correspond, cut of bird’s-eye also. A large variety of shapes, however, are constantly to be had. The material and length is our province; no child needs an apron coming to the end of the dress skirt, as we have seen them made.

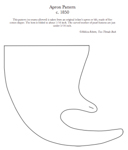
So says Sarah Hale, in a little instruction book written for new mothers in 1854. It amazes me that such a functional item could survive 150 plus years, but I come across them from time to time.  If you’d like an actual-size pattern of the one below, send an email to me, m at twothreadsback dot com, and I’ll send you a pdf – free. Gratis. No strings attached!

Apron 1A
An apron for a very small baby, made of cotton diaper by a mother who was cutting the pattern with one hand and holding the baby with the other.

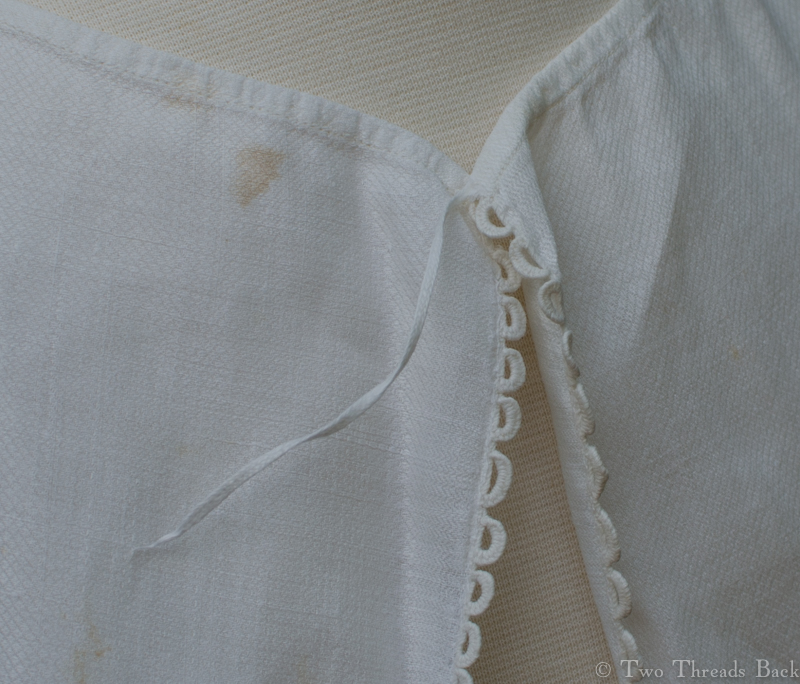
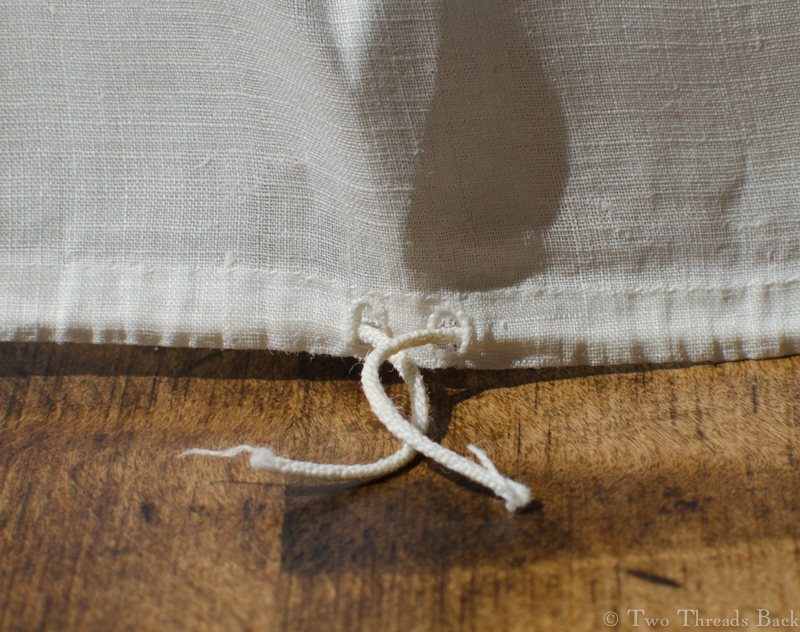
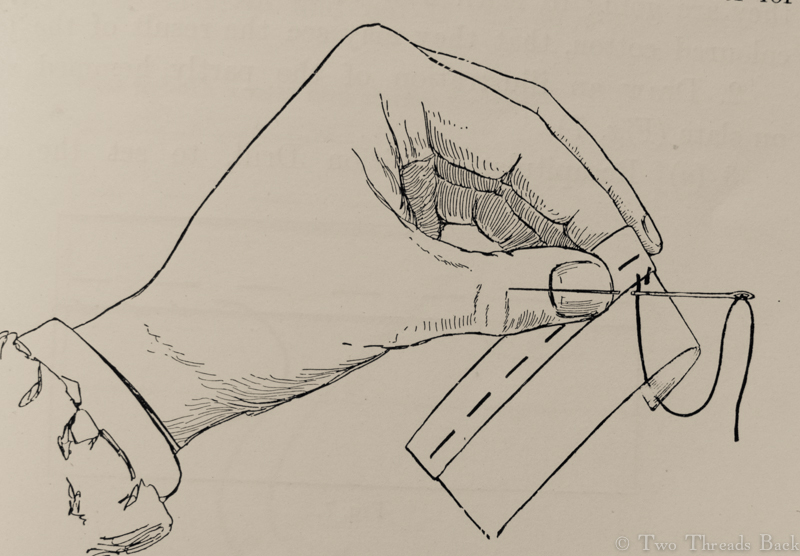
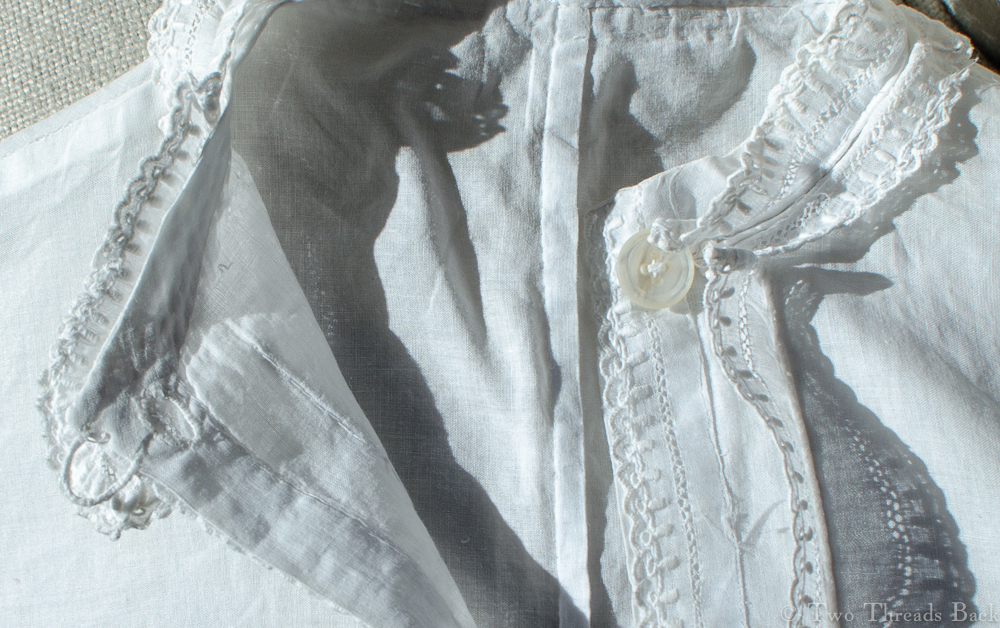
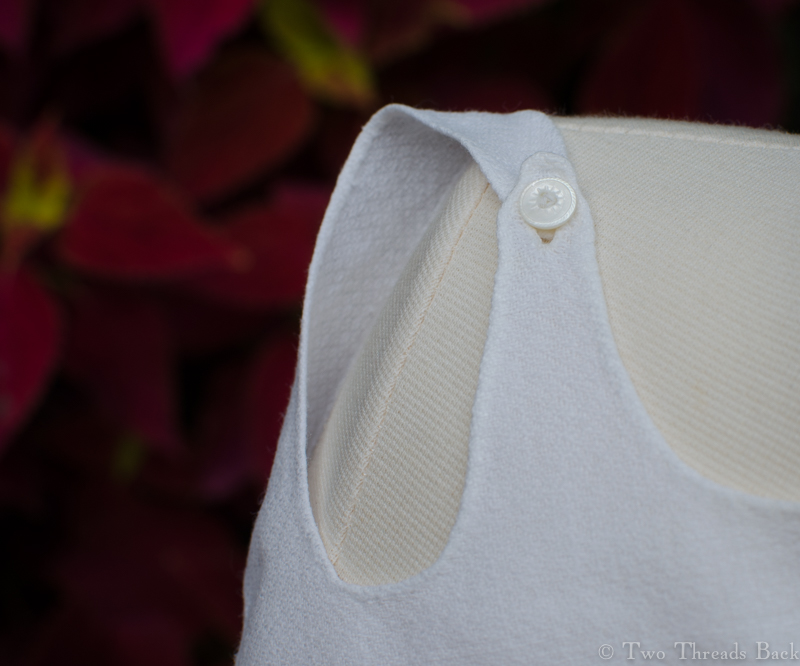
The hems are almost invisible, so I assume Mother was able to use both hands for that. The tiny buttons are made of delicately carved mother of pearl.

You can see the tiny mother of pearl buttons.
A close-up of the buttons and narrow hem.
The photo(s) are slightly underexposed because the apron is so white it's hard to see.
The photo(s) are slightly underexposed because the apron is so white it’s hard to see.
Apron 1D
The fabric is still so strong that the fold-down part in the front refuses to fold down – and I refuse to press it that way. Not a good idea for preserving old textiles!

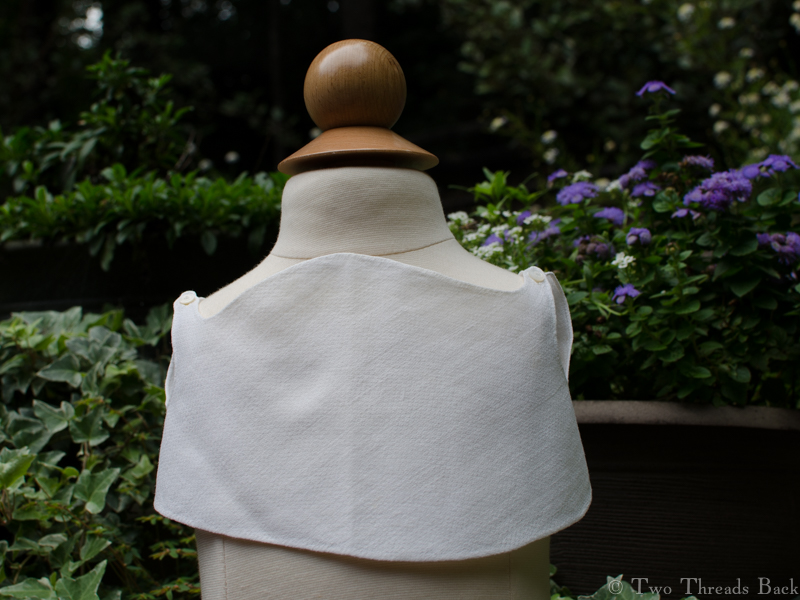
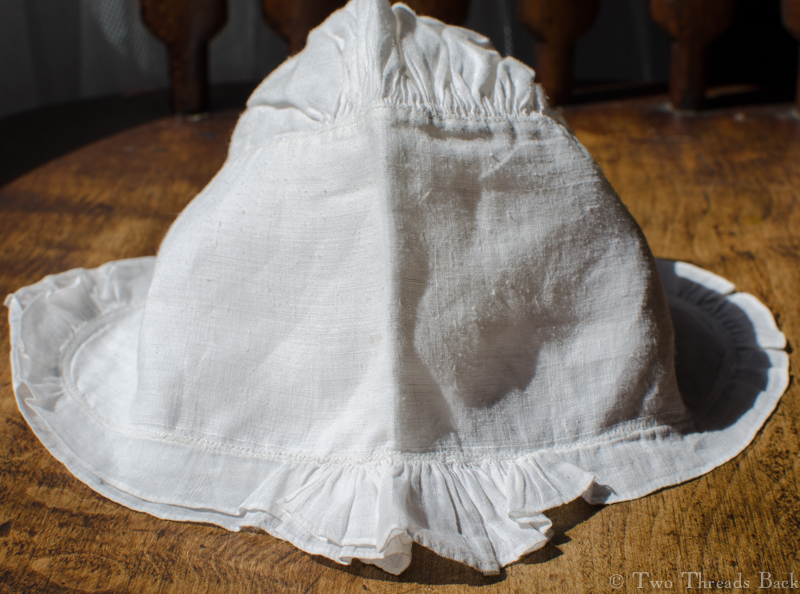
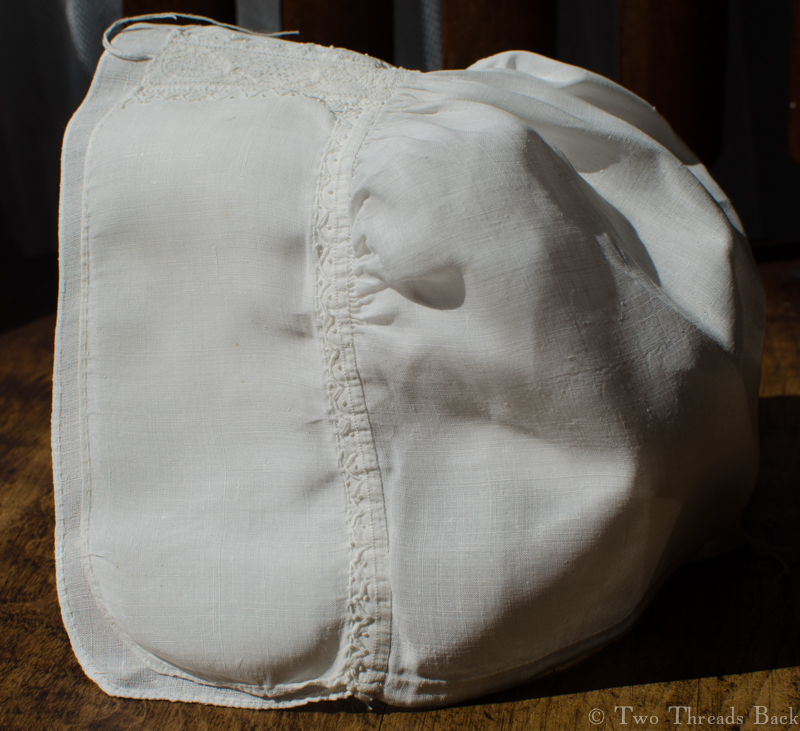
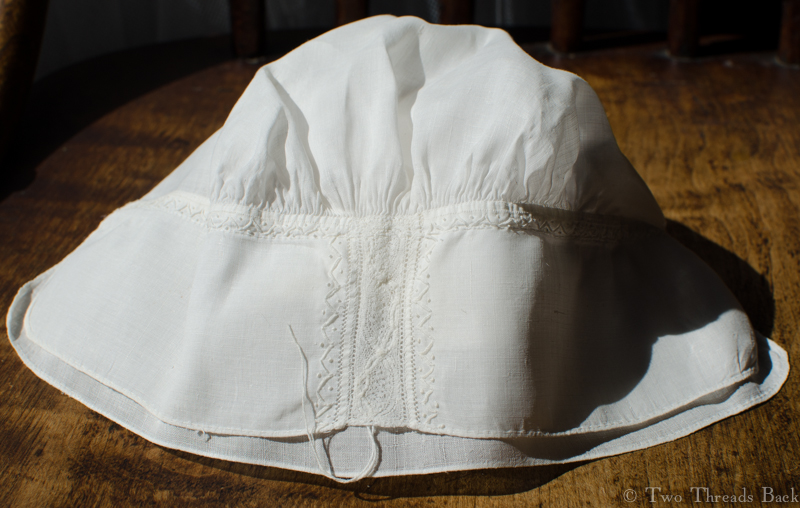
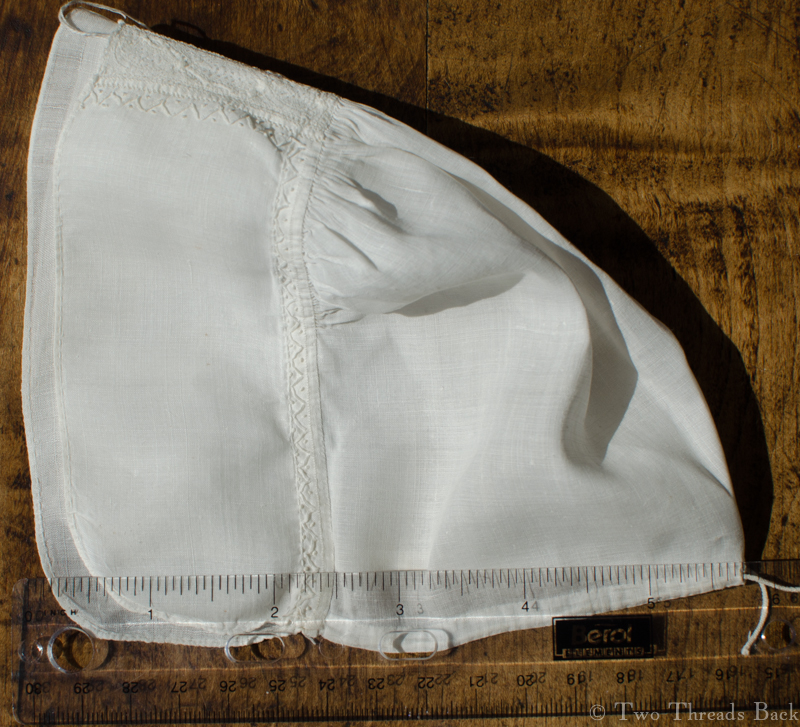
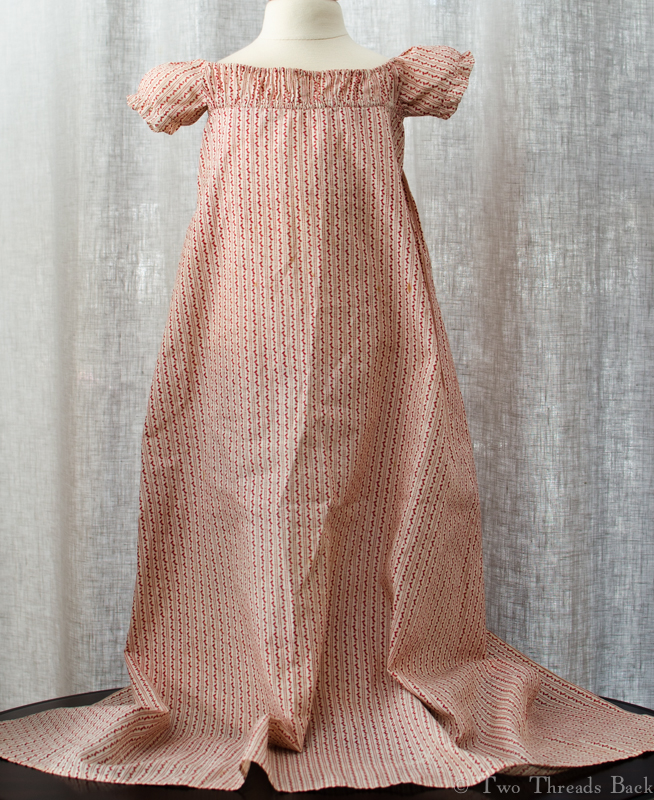
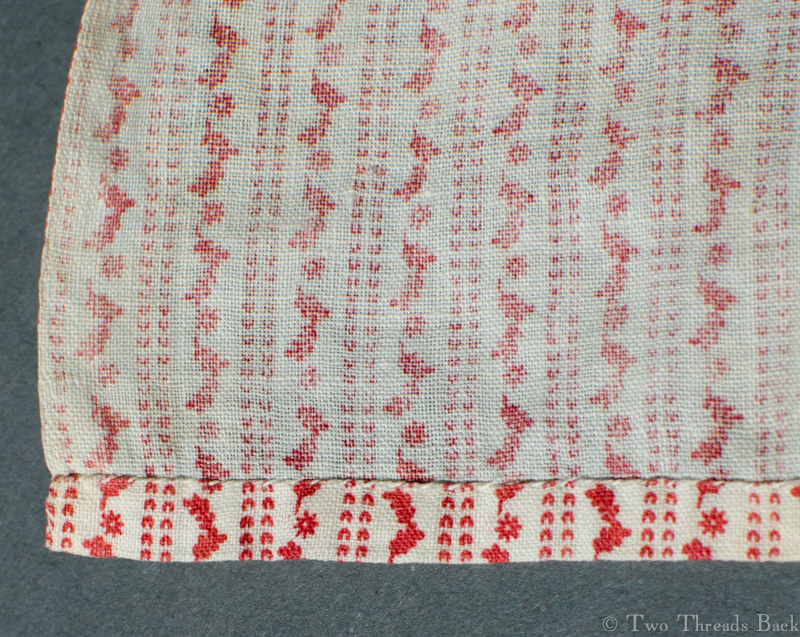
Another common pattern, made for an older child, is like the one pictured below. It’s also made of diaper – but in linen – and trimmed at the armscyes and hem.

Apron 2A
This one is less like a bib and more like what we’d call a pinafore today.
Apron 2B
A view of the back to show the tape threaded through the neckline and the pretty buttonholed trim.

Apron 1854 Thumb

Little Biggin Two

18th C Cap 2a
Another 18th century baby’s cap – with frills.

This little cap is a favorite. Yes, the linen is coarser than the lovely smooth cambric in most of the other really old baby things I’ve found. The slubs are noticeable, and they show even more due to washing and wearing. But there’s just something about that little ruffle around the brim. And the extra gathers right in the center – can’t you just see them sticking up, stiff with starch? Rather like a little plume or crest!

18th C Cap 2b
A perfect frame for a baby’s face.

The measurement around the brim, including the ruffle, is about 12 inches; the center front to the back is about 9 inches.

18th C Cap 2f
Baby’s cap with the two-part brim folded open.

It seems like every time I examine a garment to write about it or list it for sale, I find something I’d overlooked before. And sometimes it’s unusual, a feature I haven’t seen before. That happened here, too.

The little crown was stroked and gathered and attached to the upper brim with backstitches, the same way cuffs or collars were attached to shirts. Then the under-layer-brim was hemmed to the crown from beneath. That does make the technique look like “setting in,” a construction process taught from (at least) the 18th to the early 20th centuries – if you’re one of the rare people who’ve seen my book Plain Needlework, you know what I’m talking about.

The strangest thing though, is how the upper layer is hemmed. It’s backstitched! But not securely on the folded hem itself; instead the stitching rests along the very edge. In fact, I really don’t see how it holds. I’ve looked at it with magnification because it’s so different from what I’m used to seeing. But that’s right. The hem is barely caught with the backstitches.

The under layer is normal – if you can call a 1/16 inch hem normal; it’s simply hemmed. Then the ruffle is whipped and gathered on both. The back of the cap is gathered and set in a narrow band, also with backstitching.

18th C Cap 2c
A closer view of the “plume” – and you can see the backstitched hem.

Like last cap I wrote about, this one is in remarkably fine condition and there are no vestiges of ties. Unlike many other fine linen bits, it’s lost its starch. I think the wearer would have approved. Floppy ruffles are more comfortable.

18th C Cap 2e
A back view of the cap.

18th C Cap 2d

Little Biggin

18th C Cap 1a
18th century linen cap for a baby.

Babies look so sweet in caps, and once upon a time they wore them from the time they were born. They wore a lot of things actually, as Thomas Jarrold wrote in this 1736 excerpt:

18th C Cap 1b
Infant’s linen cap, lace insertion on brim.

Formerly, the dress of an infant was cumbersome and oppressive, it is now much simplified, but still it admits of improvement; many parts are unnecessary, and even injurious, and require an experienced person to adjust them, and, in dressing the infant, so much time is consumed and so much toil occasioned as must greatly exhaust and weary it; to this it ought not to be subjected, that cannot be proper which distresses the child …. its dress should be light and warm, and so constructed, that the time occupied in dressing may not be greater than the capacity of the child to bear it.

18th C Cap 1fIndeed! The Foundling Museum’s record books also list a great variety of garments, and those for the head include cap, bonnet, biggin, forehead-cloth, and head-cloth – not necessarily worn simultaneously. I’m particularly fond of these little caps because they show such exquisite stitching. I don’t think anyone today does plain sewing so fine and dainty.

18th C Cap 1e
A measure to illustrate just how fine the work is – can you see the backstitching?

This elegant example is made of linen, and it measures about 10 inches across the double brim. From the front to the back hem is about 8 inches. The lace insertion is on the upper brim only. (If you can identify the lace, please let me know!)

The embroidery worked along the edge of the insertion and where the crown is gathered to the brim is typical of 18th century whitework on infant clothing.

Closeup of lace insertion on cap.

One puzzling feature is the running thread along the hem of the brim. On the under layer, it terminates a couple of inches short of the center on each side. It appears to function as the familiar “stay stitching” of today. However, on the upper layer, it continues from both sides, meeting in the middle. And the threads are left hanging!

The back is finished simply, with two tiny cords to draw for a closer fit. There are no ties (or pin marks) on the cap, another feature that was common into the early 19th century. Does that suggest that another head covering was worn with it? I don’t know of a baby today who could keep such a hat in place.  And “that cannot be proper which distresses the child!”

18th C Cap 1d
Little ties to adjust the fit of the back.

A One Stitch Wonder

Calico Full

I’ve always loved order and simplicity. That sounds awfully smug, but I shouldn’t commend myself since it’s probably because my brain can’t handle very much at one time. This craving for minimalism is getting worse as I get older. Try googling the minimalist lifestyle and maybe you’ll see the attraction! Or not.

A conversation the other day started me thinking about simplicity in plain sewing. Hmm. What was the most basic stitch? Well, anyone who uses old sewing machines knows you can do just about anything with a straight stitch, which is closest to a backstitch in hand sewing.

But backstitching wasn’t the primary stitch in 19th century sewing manuals, nor was running, as I learned when I studied plain needlework instruction. It was hemming. That’s the little slanted stitch that you would use to (surprise!) hem something. Once your hemming was neat enough, you could learn to work other stitches.

Hemming
“Simple hemming is the first step on the road to proficiency in needlework.”

By the way, I’ve noticed that most costume historians, or at least ones I’ve heard and read, call this same stitch “whip” instead of “hem.” For example, “the edge is folded back and whip stitched in place.” But then, why shouldn’t they? I understand perfectly what they mean. If you’ve seen my post on muslin you’ll know I’ve come to terms with terms!

Getting back to simplicity. I decided to go closet diving for something that used only that one stitch, hemming, to construct a garment. And I found it! A Regency era calico baby dress. Granted, it didn’t have enough pattern pieces to warrant many stitches. But the whole gown was made by hemming!

Calico Baby Gown, c 1815.

Or was it? Well, in my eagerness to find what I was looking for, I didn’t look close enough, and I didn’t think it through.

The skirt was made of one piece and hemmed, check. The casings for the strings were hemmed, check. The tiny ruffles on the sleeves were hemmed, check.

Calico Hem
Hem.
Calico Sleeve
Casings for drawstrings.
Sleeve ruffles.
Sleeve ruffles.
Calico Back
Back opening.

The bodice was hemmed to the skirt – whoa! Wait a minute. That wasn’t right. Things were unraveling. I mean my clever discovery, not the little frock.

Yes, the stitches looked the same at first glance, but any experience (or a practical mind) would tell you that you have to hold those two pieces face to face and sew them together. That makes it seaming, as they would have said, or overcasting, as we’d say today. Same thing for the ruffles attached to the sleeves.

And there was more. The tiny bodice sides, all three-quarter inch of them, were running stitch. As were the sleeves to the body – and then overcast!

So much for that, no single stitch here. I confess it doesn’t really bother me too much that it’s not pure minimalist stitching. I’m learning to slow down and look closer. And it’s still a wonder of simplicity!

Plain Meets Fancy

Infant Sacque
An infant’s sacque: a miniature version of Mother’s.

If I kept my attention only on plain work, I suppose I would be very limited indeed. And truly, the impulse to add ornamentation seems timeless and universal. Often the pretty pieces I study reveal high standards in the basic plain stitches, but also have considerable fancywork on them.

Infant Sacque, left
The profile reflects women’s styles of the same era.

Here is one example which just seems to shout Baby Version of Mommy’s 1870 Upholstered Look! Notice the dropped shoulders, two-piece sleeves and sort of tabbed lower edge, with its allowance for a wee bustle? I doubt baby wore one, but the cut of the sacque would have suited it! The pattern is a match for women’s garments of the late 1860s and early 1870s.

The Look, c1870
Pretty fussy back! But I love it.
The Look, c1870
The Look, c1870

It’s made of a very fine muslin – a previous owner must have bleached it white again – and uses basic hemming, running, and stitching (called backstitching today).  It shows some of the earliest use of (what we call today) a french seam on the sides and shoulders. The sleeve seams are overcast.

Infant sacque, right
I’d love to see this with a poofy baby bustle! Not likely, sigh.

The sacque has a high collar with hand-embroidered trim and fastens with a single mother of pearl button and thread loop. There’s a buttonhole hiding under the trim on the collar, but Mother must have decided it was too tight or difficult to fasten. The same trim edges the front, hem, and cuffs. There’s even a bit of piping.

Infant sacque collar
Close up of the collar & fastening.

The cuffs were taken up with a hidden tuck to fit shorter arms, and they also have tiny thread tassels. I thought at first the threads were drawstrings for the cuffs, but closer examination shows them to be attached separately and knotted around… a bit of wool? …held with glue? I can’t see it well enough to tell, but it has yellowed over time.

Infant sacque, cuffs
Close-up of the little cuffs – you can just see the tassels.
Infant sacque, back view
A view of the back, showing the pattern.

The trim down the front is turned toward the center, the opening.  This is typical of 19th century clothing, although my modern expectation is to see tucks or trims folded or facing outward (toward the arms).

In all, it’s plain made fancy. And enough to make me swoon over the tiny confection!

A Grief Preserved

Because most plain sewing items (at least those I study and collect) are white, I confess I sometimes get weary of plain white! I love the variety of early cotton prints, the charming patterns and colors. Children’s dresses from the early 1800s are a good example of garments that could be very simple to make with only plain sewing skills. In fact, there is a very early book called Instructions for Cutting Out Apparel for the Poor; Principally Intended for the Assistance of Patronesses of Sunday Schools and Other Charitable Institutions, but Useful in All Families that describes the process.

For those who would like more detail and patterns that they can easily use today, there is another book, The Lady’s Economical Assistant, which has been reproduced after the 1808 edition, available from Kannick’s Korner.

I came across this one day while surfing for children’s print dresses.

John Marsden Dress

It is a simple child’s gown dating to 1803 that has a story, one I could never imagine. Made of a shabby, sweet calico print, it is typical for its day: simple in cut, with a little frill around the high collar. The tragedy lies in the last day it was worn. John Marsden was two years old when he died after being scalded in an accident at home.

The Marsden family were among the earliest to arrive from England to live in New South Wales and the Powerhouse Museum website has more information on the family and this collection.

I don’t need to create imaginary stories for this dress, since his mother said enough, “The loss of those I have parted from weighs so much on my mind that at times I am as miserable as it is possible to be – outwardly I may appear cheerful but I am very far from being happy – indeed happiness and me seem long since to have parted and I have a presentiment that peace will never more be an inhabitant of my bosom.”

The UFO

UFO
The UFO

I am referring to an Unidentified Fabric Object. From eBay to flea markets, mystery objects abound, and this one is often misidentified. No wonder, it’s not something that is used today, and it was probably a bit of a nuisance to the wearer in its own time!

Take a small rectangle of cotton or flannel, and gather or pleat a much longer rectangle to it, neatly finish the edges and there you have it: a tiny apron/skirt/slip/unfinished sleeve for a skinny short person! Or not. What you really have is a barrow, barrie-coat, barra-coat, barrar coat, pinning blanket, night flannel, or petticoat.

These skirts were worn by babies in days gone by, layered somewhere between the shirt and diaper (clout or napkin) and outer petticoats or gowns.

UFO Catalog Illustration
From an 1895 Montgomery Ward Catalog

According to The Nursery Basket, published in 1854, the night petticoats

“are nothing more nor less than the old-fashioned open pinning blanket, or the English barrar coat. In the simplest form, a night petticoat has a skirt of one breadth, three quarters of a yard in length. Turn a hem as shown above, of two inches, at the bottom, less than half an inch or the sides, and cross-stitch, as on the bands, with white silk. Gather it slightly into a double linen waist (waistband fashion), 22 inches in width, and 6 in length, which will allow for seams.

Choose the same quality as for the bands, finer rather than coarser, as it comes next to the shirt and at first completely wraps the delicate limbs of the infant. The real flannel petticoat is not usually put on until the child is six weeks old. The pinner is then used for the night, six weeks longer, when most babies of spirit kick themselves fairly out of its narrow limits.

We have found this sufficient for all ordinary purposes. There is another style, now in use, where the band and skirt are made to lap at the side, and the skirt is tied over by tape strings, instead of being pinned up, as in the first instance. This will require two breadths, of flannel, a yard in length, to keep the child’s feet and limbs sufficiently warm, and is more cumbersome to infant and nurse. The waist can be made in the same fashion as the second band, to tie over.”

The author, Sarah Hale, goes on to describe possible trimmings and ornamentation, but suggests that “as the garment is only for transient use, it would seem a waste to expend much time or labor upon it.” And after all, most “babies of spirit” wouldn’t appreciate it.