In This Corner

LM Embr 5
And in this corner we have the challenger: an 18th century pattern of a floral sprig from the Lady’s Magazine, 1776!

When I read about the Great Lady’s Magazine Stitch Off a few weeks ago, I knew it was something I wanted to do. Firstly, because I love early women’s magazines; secondly, because of the Jane Austen connection; and finally, because I could suit my project to my skill level – dabbler seems fitting.

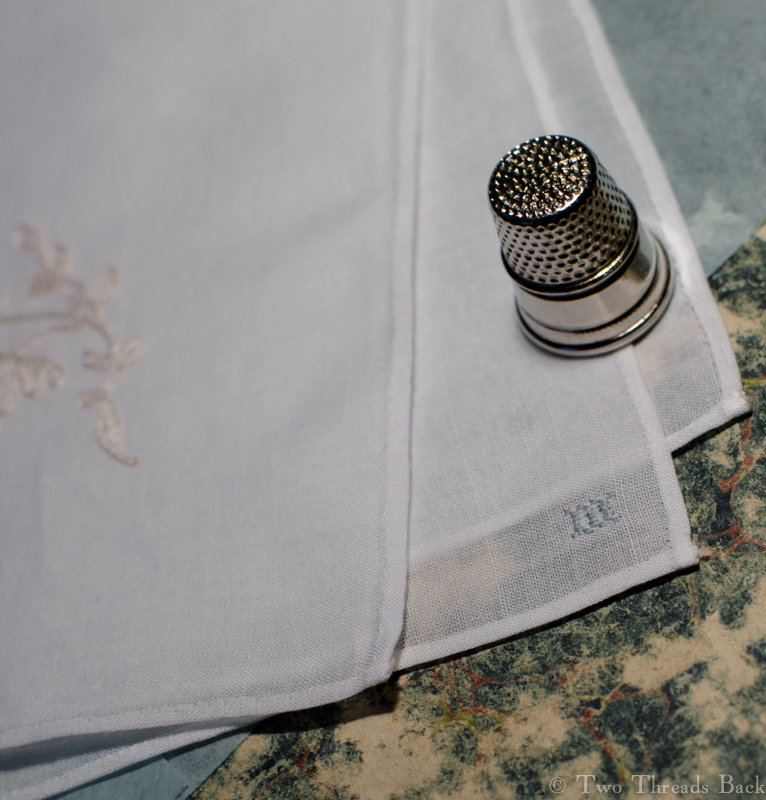
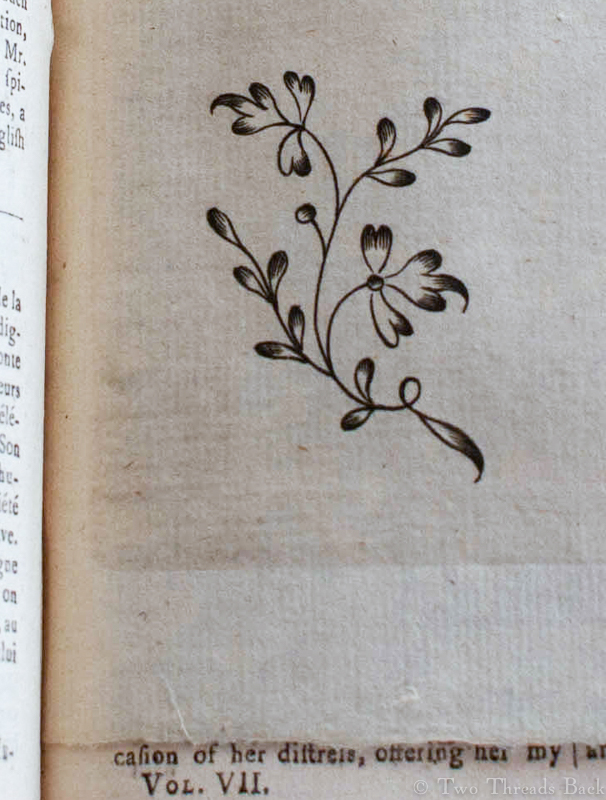
A two-inch flower on a plain muslin pocket handkerchief, worked in a simple chainstitch with some wonderful Au Ver à Soie, would be just right. And perhaps some historical touches to set the mood.

I had visions of myself sitting at my worktable to pounce the pattern, then deftly working the little sprig with an elderly tambour hook. That might occupy me for an hour or two, then I’d pop it in the mail to the Chawton House Library “Emma at 200” exhibit. How hard could it be?

LM Embr 1
Here’s my fantasy, what I wanted to happen. Note the 18th century embroidery I was looking at for inspiration – carefully folded so the damaged areas don’t spoil the effect.

Well, Fantasy was introduced to Reality fairly soon. I realized that the pouncing powder I’ve had (unopened) for 20 years required a little more research and practice to use than I wanted for such a small project. What’s so bad about using a disappearing marking pen after all?

LM Embr 2
Here’s the reality, modern day all the way. Notice anything glaringly wrong here?

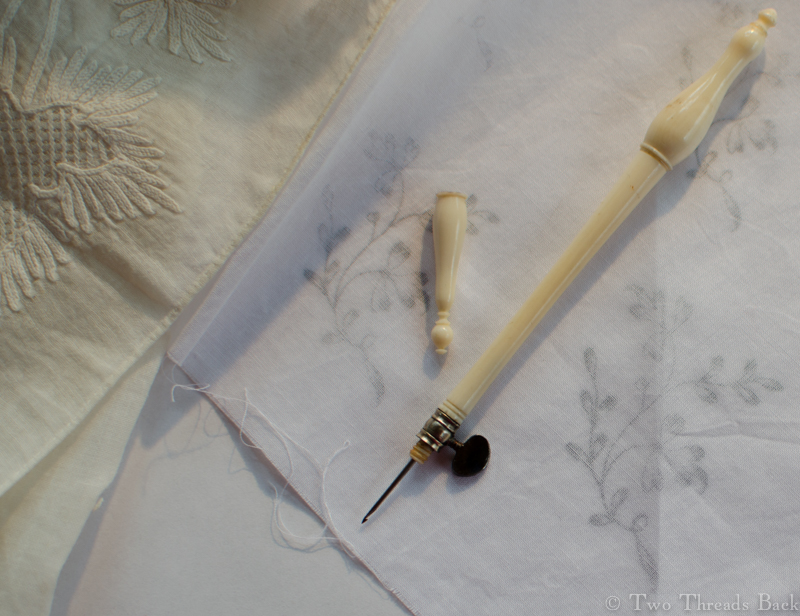
So next came the tambour hook I’d been dying to try. It seems there’s more to using one than just picking it up and poking it in and out. Not to mention that the ancient point had a tendency to shred a few threads along the way. What’s wrong with using a needle?

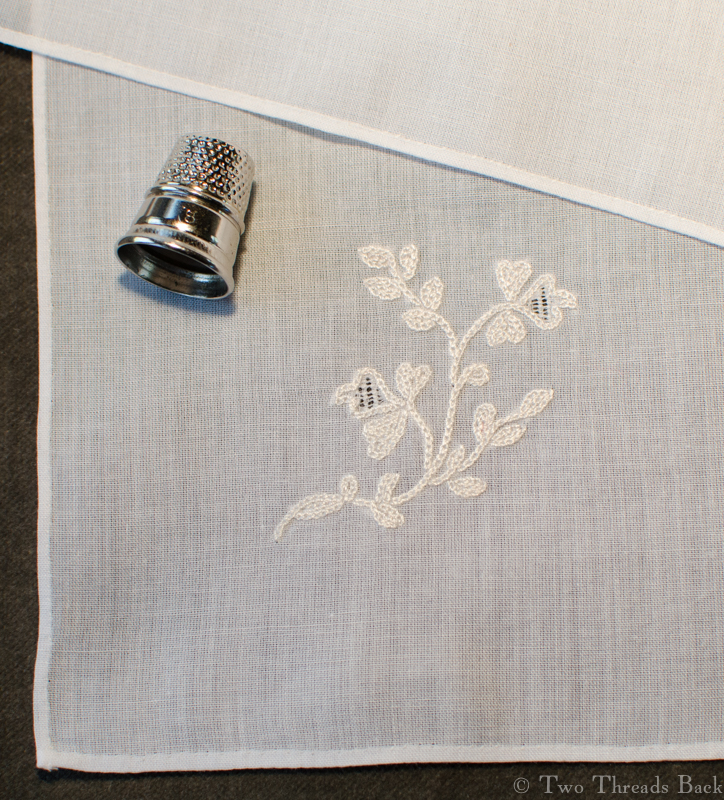
Ok, I started with the needle and made it about halfway before I thought: ick! No two chainstitches were alike. I picked it out and decided to try a sort of running/darning stitch, also common on period pieces. Bleh. It looked worse than the first attempt, so I picked all that out and decided it would have to be chainstitch after all.

Well, I did better on the third try. But when I was almost done, I felt something didn’t look right. Maybe you spotted it already? I had put the muslin back in the hoop underside up. And there it would remain. Six hours into this two-inch project, I was not doing it over.

The hemming went better than the embroidery. I didn’t really mind that one side had a wider hem than the other three. But the flower centers looked a little plain. I thought I’d try some microscopic drawn thread work. Isn’t it amazing how fearless ignorance can be?

LM Embr 4
You can barely see the drawnwork in the flower centers. At least I hope you can barely see it!

Another six hours later I was done. Then I remembered my calling. Plain needlework! I could not send this handkerchief out into the world without marking it. A silk monogram was beyond my ability, and turkey red thread would be out of place on this mouchoir de poche. So I used blue cotton (I’ve seen real examples) and started on my initials in the opposite corner.

LM Embr 3
A mono-(in the most literal sense)-gram letter “M” worked in cotton from a period pattern. Most early marking charts I’ve seen had letters seven X’s tall.
It hurt. Not just squinting to see the threads, but to realize I’d placed the “M” too close to the corner to add my other initial. It kind of looks like I meant it to be that way, so I won’t tell anyone.
P.S. Check out the Stitch Off Facebook page too, you’ll see some gorgeous examples of embroidery by people who really know how. In color, no less! Maybe you’ll be inspired to participate?

So Pretty!

SK Pincushion
A lovely seashell pincushion, crafted by Sherry Key, from 19th century instructions.

Sherry sews seashells, too! I was tickled to hear from a reader who sent a photo of her seashell pincushion, and couldn’t resist sharing. She did have to add another layer of fabric to make the “bag” for it, since the directions (unsurprisingly) left a little to be desired.

Little Biggin

18th C Cap 1a
18th century linen cap for a baby.

Babies look so sweet in caps, and once upon a time they wore them from the time they were born. They wore a lot of things actually, as Thomas Jarrold wrote in this 1736 excerpt:

18th C Cap 1b
Infant’s linen cap, lace insertion on brim.

Formerly, the dress of an infant was cumbersome and oppressive, it is now much simplified, but still it admits of improvement; many parts are unnecessary, and even injurious, and require an experienced person to adjust them, and, in dressing the infant, so much time is consumed and so much toil occasioned as must greatly exhaust and weary it; to this it ought not to be subjected, that cannot be proper which distresses the child …. its dress should be light and warm, and so constructed, that the time occupied in dressing may not be greater than the capacity of the child to bear it.

18th C Cap 1fIndeed! The Foundling Museum’s record books also list a great variety of garments, and those for the head include cap, bonnet, biggin, forehead-cloth, and head-cloth – not necessarily worn simultaneously. I’m particularly fond of these little caps because they show such exquisite stitching. I don’t think anyone today does plain sewing so fine and dainty.

18th C Cap 1e
A measure to illustrate just how fine the work is – can you see the backstitching?

This elegant example is made of linen, and it measures about 10 inches across the double brim. From the front to the back hem is about 8 inches. The lace insertion is on the upper brim only. (If you can identify the lace, please let me know!)

The embroidery worked along the edge of the insertion and where the crown is gathered to the brim is typical of 18th century whitework on infant clothing.

Closeup of lace insertion on cap.

One puzzling feature is the running thread along the hem of the brim. On the under layer, it terminates a couple of inches short of the center on each side. It appears to function as the familiar “stay stitching” of today. However, on the upper layer, it continues from both sides, meeting in the middle. And the threads are left hanging!

The back is finished simply, with two tiny cords to draw for a closer fit. There are no ties (or pin marks) on the cap, another feature that was common into the early 19th century. Does that suggest that another head covering was worn with it? I don’t know of a baby today who could keep such a hat in place.  And “that cannot be proper which distresses the child!”

18th C Cap 1d
Little ties to adjust the fit of the back.

Plain Meets Fancy

Infant Sacque
An infant’s sacque: a miniature version of Mother’s.

If I kept my attention only on plain work, I suppose I would be very limited indeed. And truly, the impulse to add ornamentation seems timeless and universal. Often the pretty pieces I study reveal high standards in the basic plain stitches, but also have considerable fancywork on them.

Infant Sacque, left
The profile reflects women’s styles of the same era.

Here is one example which just seems to shout Baby Version of Mommy’s 1870 Upholstered Look! Notice the dropped shoulders, two-piece sleeves and sort of tabbed lower edge, with its allowance for a wee bustle? I doubt baby wore one, but the cut of the sacque would have suited it! The pattern is a match for women’s garments of the late 1860s and early 1870s.

The Look, c1870
Pretty fussy back! But I love it.
The Look, c1870
The Look, c1870

It’s made of a very fine muslin – a previous owner must have bleached it white again – and uses basic hemming, running, and stitching (called backstitching today).  It shows some of the earliest use of (what we call today) a french seam on the sides and shoulders. The sleeve seams are overcast.

Infant sacque, right
I’d love to see this with a poofy baby bustle! Not likely, sigh.

The sacque has a high collar with hand-embroidered trim and fastens with a single mother of pearl button and thread loop. There’s a buttonhole hiding under the trim on the collar, but Mother must have decided it was too tight or difficult to fasten. The same trim edges the front, hem, and cuffs. There’s even a bit of piping.

Infant sacque collar
Close up of the collar & fastening.

The cuffs were taken up with a hidden tuck to fit shorter arms, and they also have tiny thread tassels. I thought at first the threads were drawstrings for the cuffs, but closer examination shows them to be attached separately and knotted around… a bit of wool? …held with glue? I can’t see it well enough to tell, but it has yellowed over time.

Infant sacque, cuffs
Close-up of the little cuffs – you can just see the tassels.
Infant sacque, back view
A view of the back, showing the pattern.

The trim down the front is turned toward the center, the opening.  This is typical of 19th century clothing, although my modern expectation is to see tucks or trims folded or facing outward (toward the arms).

In all, it’s plain made fancy. And enough to make me swoon over the tiny confection!