Poofy, Floofy, and Slightly Goofy

poofy-01

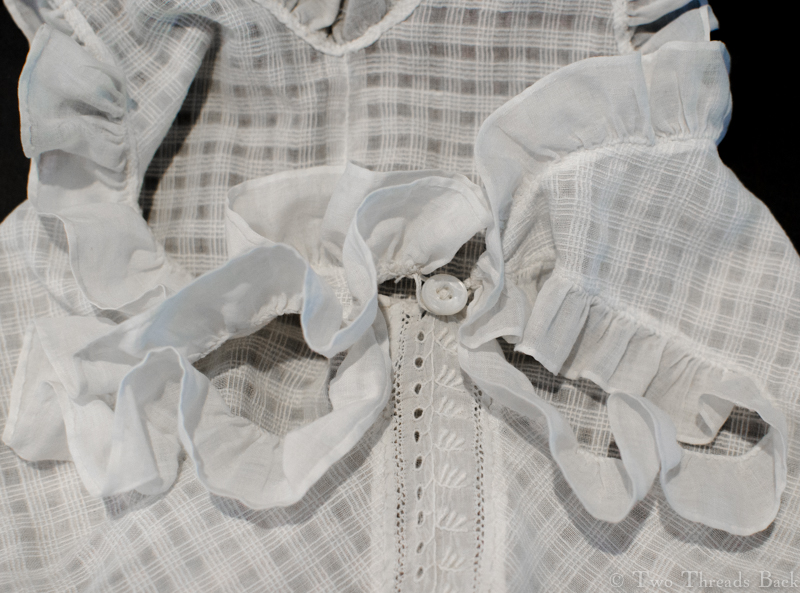
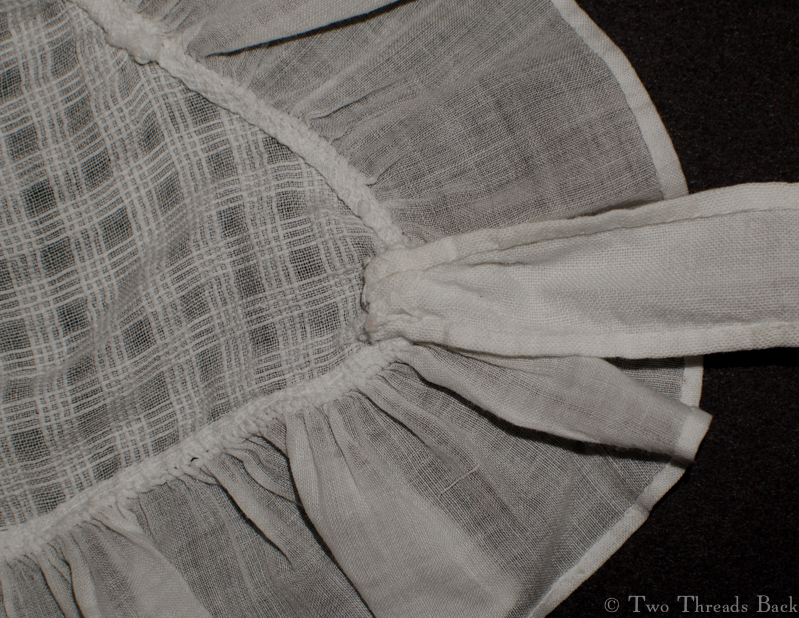
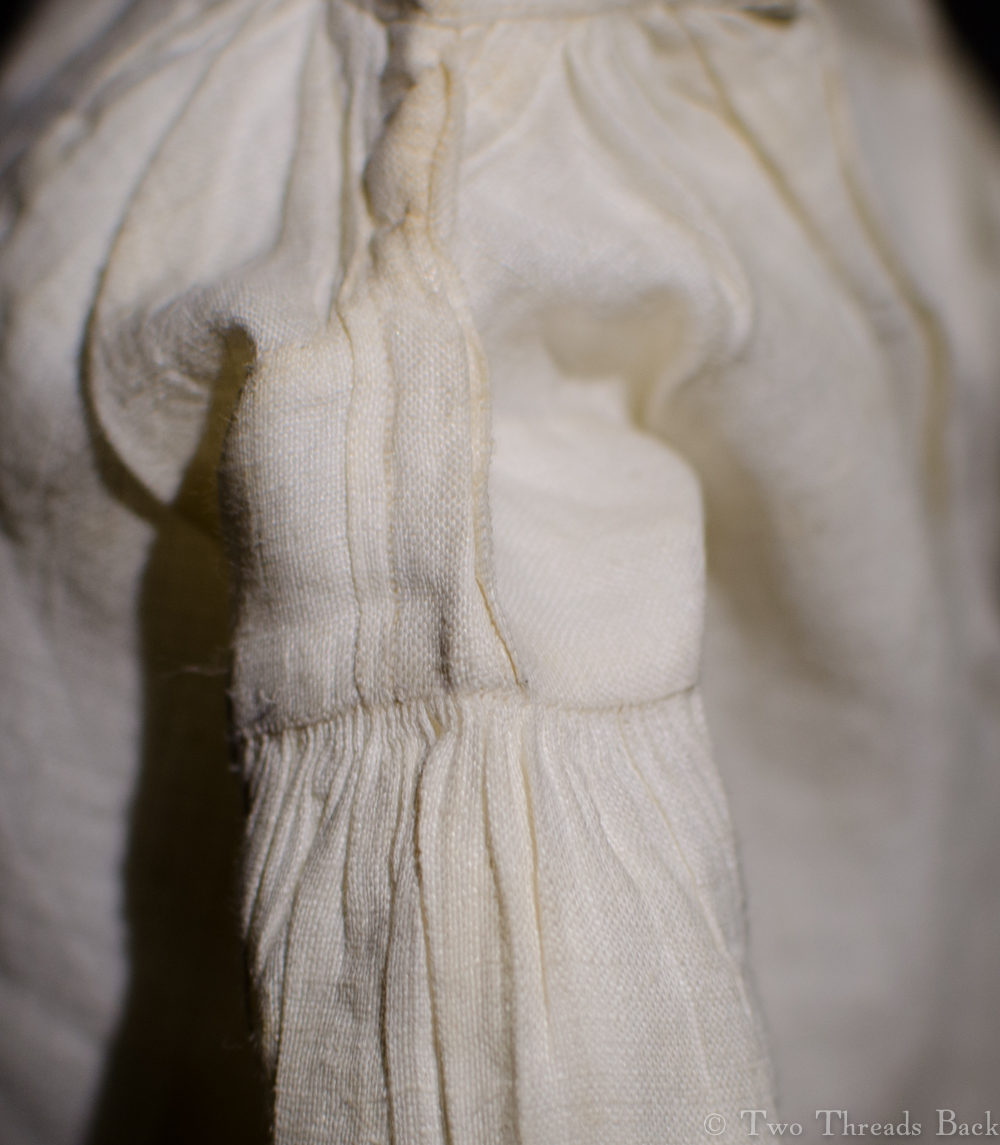
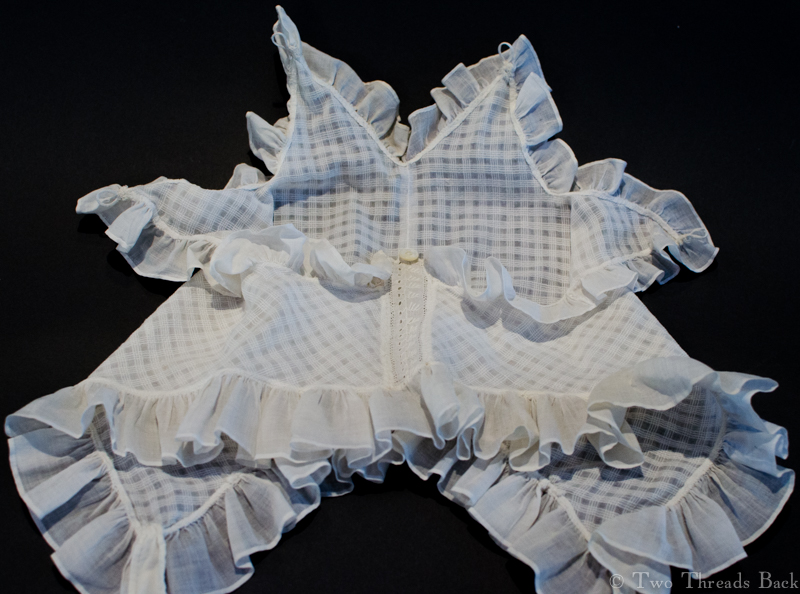
What on earth is it? This wildly ruffly confection that conforms to no known human shape? Where would you wear it, on your person or on your lampshade? How? Why? Take a look at the photo above and see if you know.

Fashion history lovers might recognize it right away, but if you haven’t, here are some hints. It’s cotton (obviously), it’s hand sewn (of course), and it’s old (or it wouldn’t be of interest here).

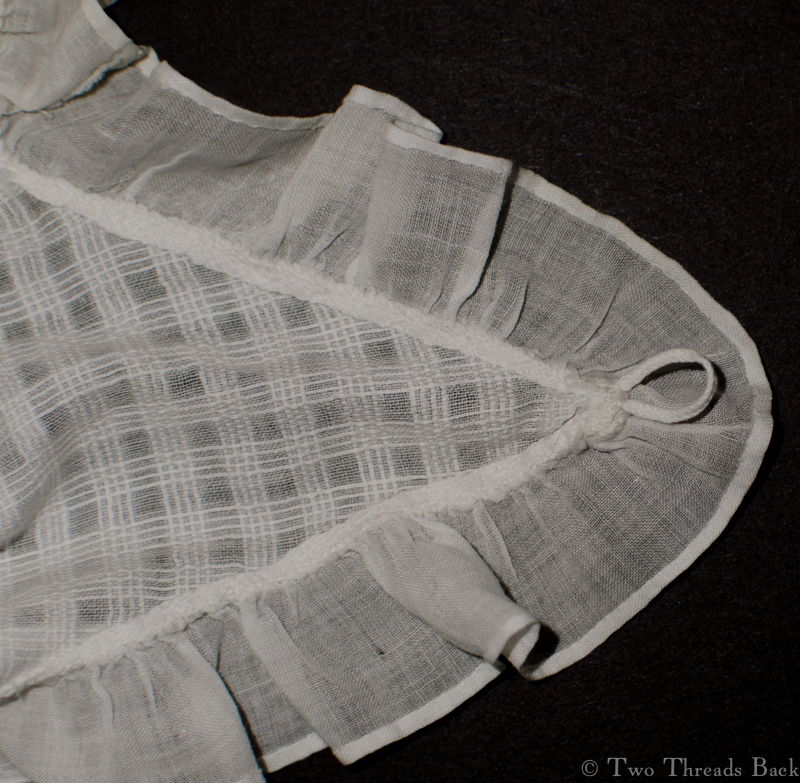
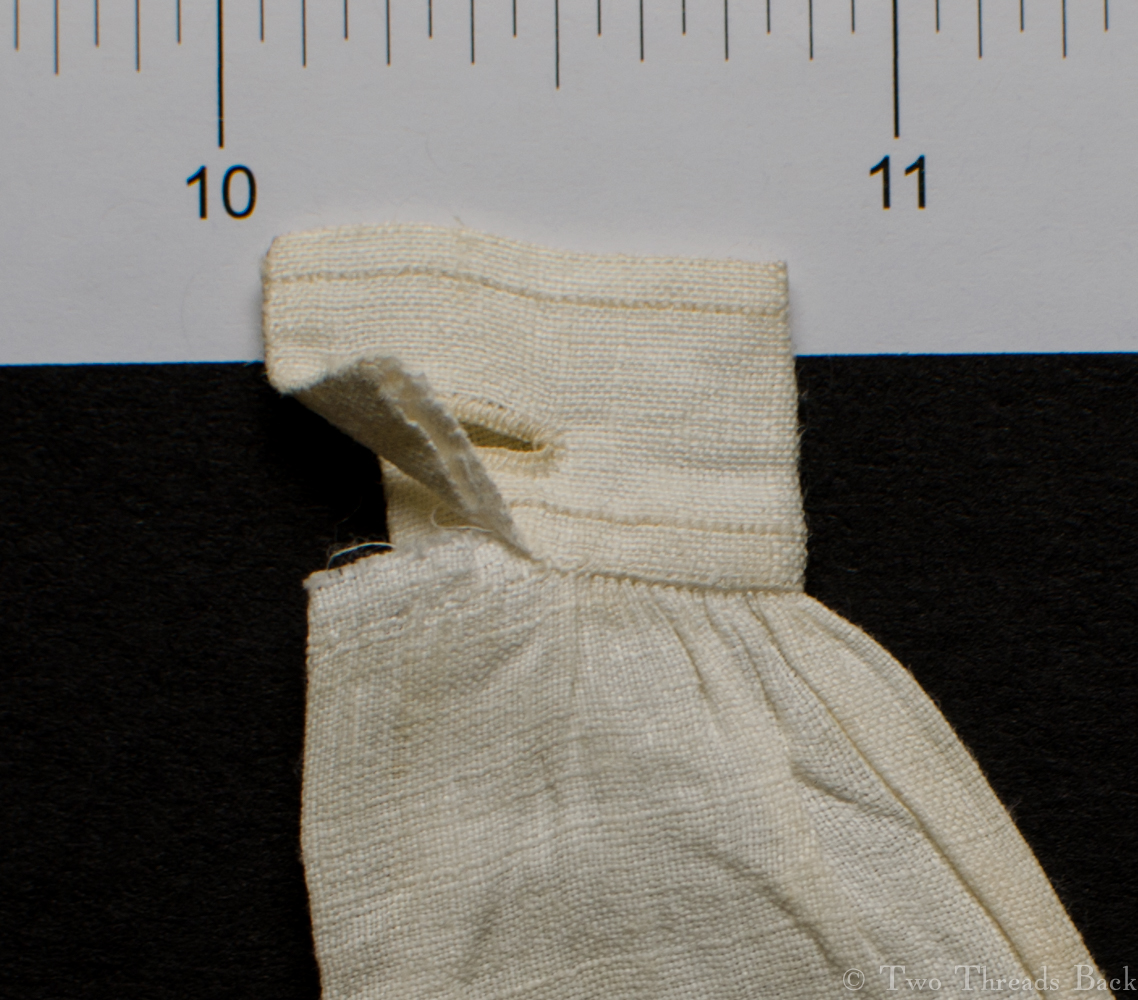
It measures about 10 x 11 – in certain positions, anyway. I mean, how do you measure something shaped like that? It has one button and four loops, and it uses three basic plain sewing techniques: hemming, seaming, and whipping.
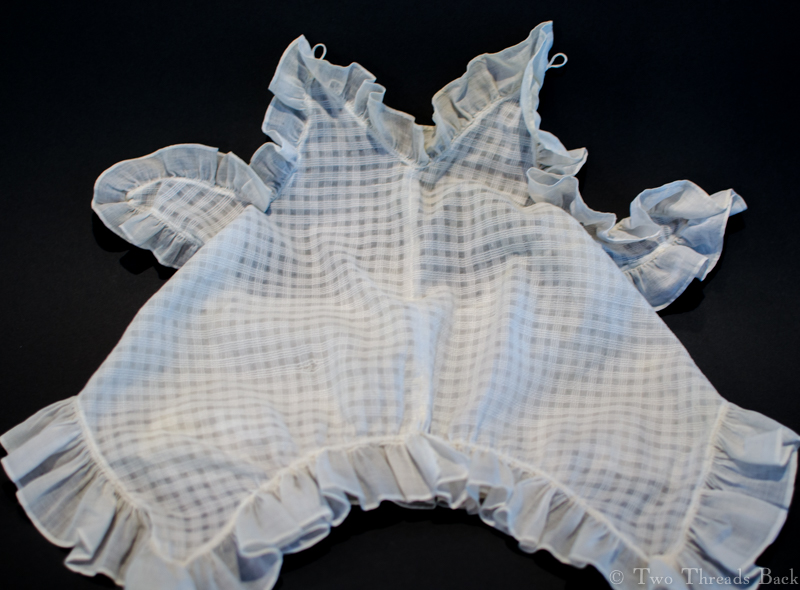
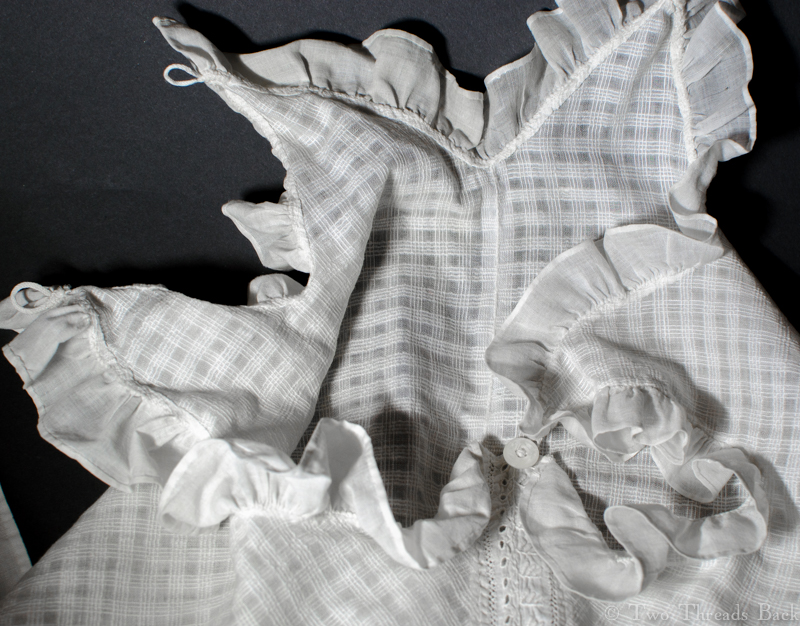
A view from the rear.
With one loop & button fastened.
With one loop fastened to the button.
With two loops fastened. Like we're doing a strip-tease in reverse here.
With two loops fastened to the button. Like we’re doing a strip-tease in reverse.
A peek at the loop.
A peek at the loop.
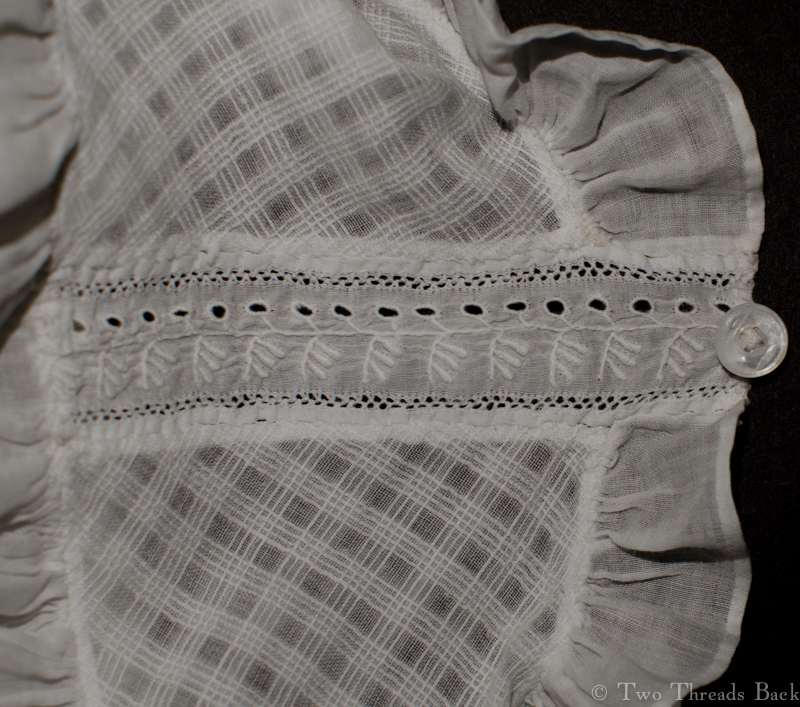
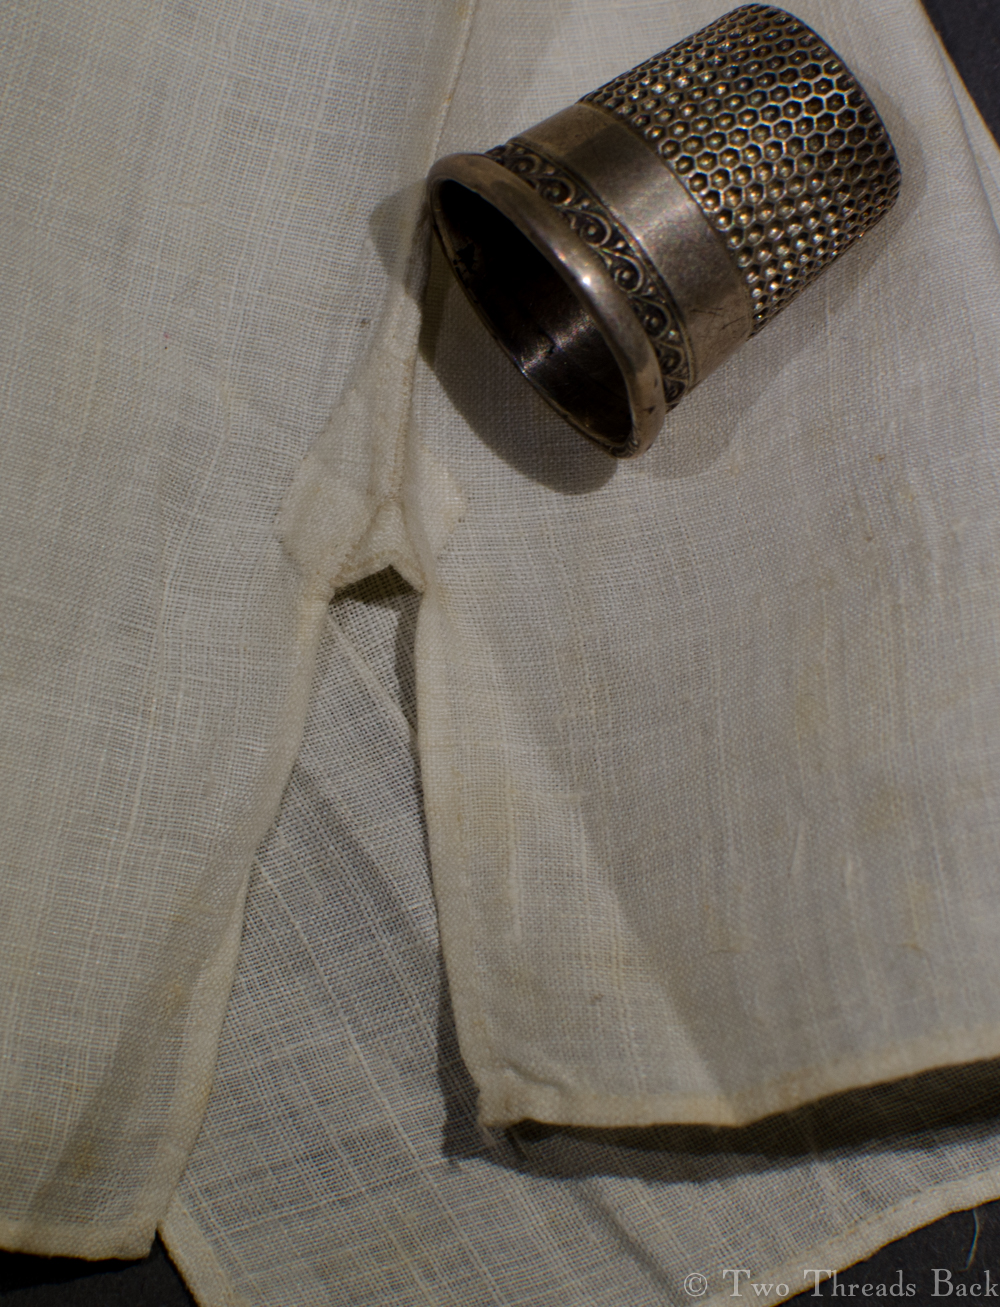
A peek at the insertion. Notice the embroidery was meant for an edge rather than the center of a pattern. You use what you've got, right? Or maybe she had one of those "Aarrgh!" moments once she sewed it in. I'm familiar with those.
A peek at the insertion. Can you tell that the embroidery was meant for an edge rather than the center of a design? You use what you’ve got available, I suppose. Or maybe the maker had one of those “Aarrgh!” moments once she sewed it in. I’m familiar with those.
poofy-05
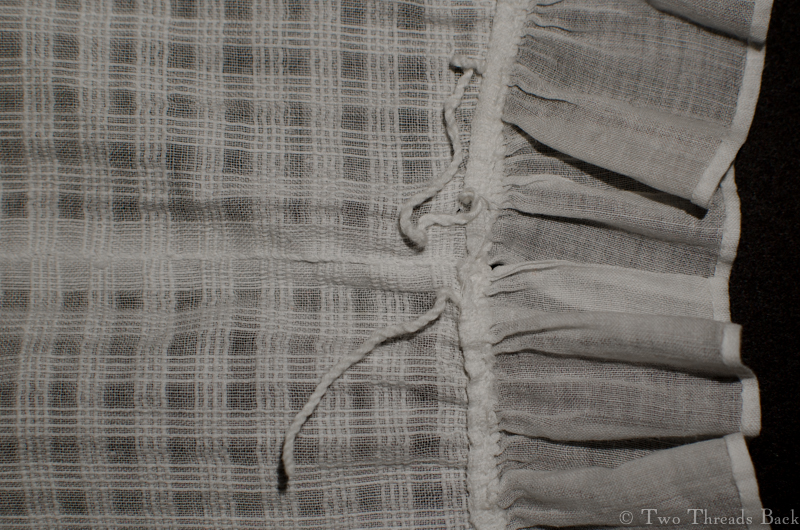
A peek at the gathering cord. It’s different from the tiny flat tapes used for the loops. You can also see the “seaming” (a plain sewing term) where two selvages are almost invisibly joined.
A peek at how the tie is tacked on - and by now, you know what this is.
A peek at how the tie is tacked on – and by now, you know what this is.

Yes, you’re right. It’s one of those crazy caps that were popular during the Regency (to use the term loosely) era, outré beyond belief, and probably subject to a little ridicule. I suspect they were for morning or afternoon wear.

This little cap manages to achieve its frothy excess with an ingenious pattern. There are four points, fairly simple to cut, which are then looped around a single button on the top. The result is lots of muslin bling for the stitching.

And that’s not all. It reminds me a tiny bit of one in the Workwoman’s Guide (see Pl. 9, Fig. 10). The author’s comment reveals its practicality.

This shape is particularly liked by the poor, from the ease with which it is made up and washed, as, upon undrawing the string, it opens readily at the top, and lies quite flat to be ironed.

As an Artifact Rescuer, I certainly appreciate the ease of laundering! But the most surprising thing of all? It doesn’t look so silly, but rather charming when worn. The effect is extremely flattering. So caps off to the creator of this one!
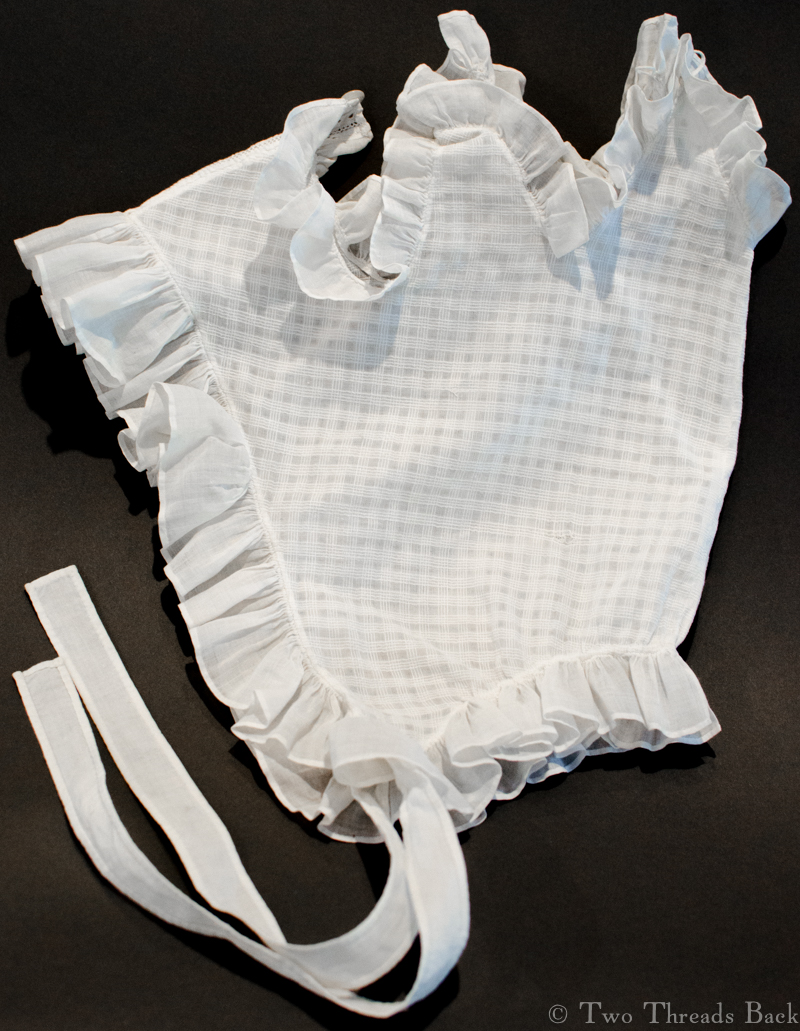
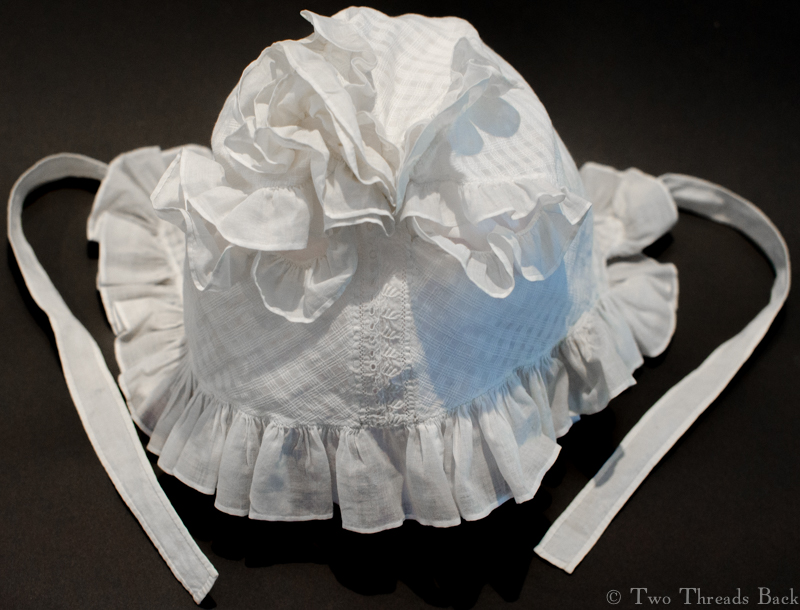
An easy pattern. And that's saying something, coming from yours truly.
An easy pattern. And that’s saying something, coming from yours truly.

poofy-10

Save

Save

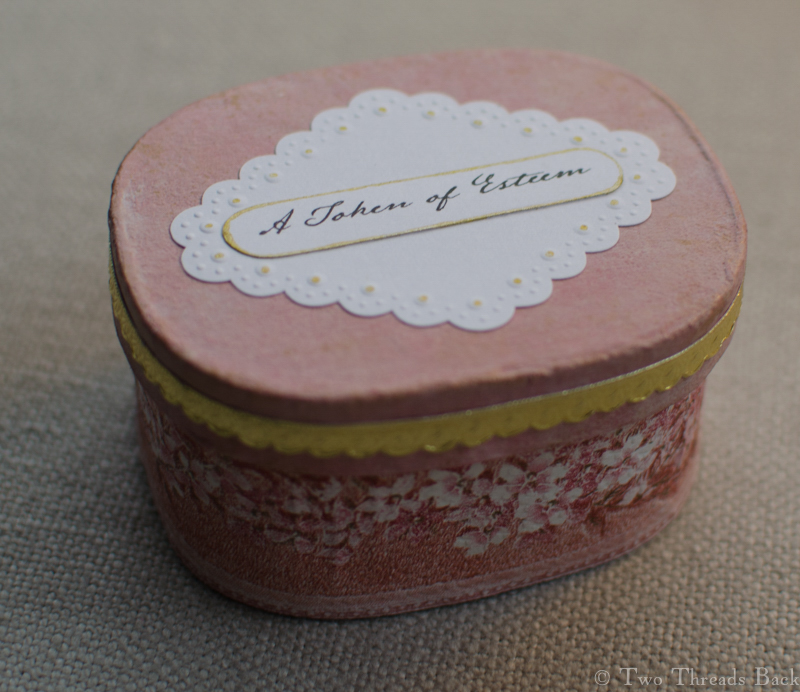
Token of Esteem

Vintage paper from Russia on the outside, and scrapbooking paper on the inside.

Nineteenth century ladies, the ones who were fortunate enough to have time for crafts, didn’t only do needlework. The local “Ladies’ Warehouse” must have been as packed with goodies as our craft stores today. Just scanning a list of genteel amusements is pretty overwhelming: shell work, bead work, feather pictures, seaweed art, leather flowers, potichomanie (I dare you to guess that one!), wax fruit, plaster casting, Japan painting, fern printing, glass staining, and countless other projects kept hands busy.

For this project, I was inspired by the little paper boxes that have survived, usually rather tattered and worn, and the quaint phrases that commonly appeared on souvenirs and gifts. Suitable for buttons, needles, etc., it only required a papier-mâché box, glue, paint, Dresden trim, and patterned paper. Oh, and I used a purchased label, gussied up with a gold pen.

Paper Box MakerAt first I thought I’d hit on something fun to sell at craft fairs, but like all my endeavors, this one took at least five times longer than expected. Assuming I sold any, I’d be making a few cents an hour – probably less than this woman did. The picture is from Harper’s Bazar, 1868, and illustrates various occupations of modern women.

“A large number, 1400 or 1500 females, are employed in the manufacture of paper-boxes. These are mostly very young persons, and the average of wages paid is about $50 per week. The work is simple and requires little practical knowledge, and girls are worth as much to an employer in their second week as in their second year at this work.”

Well, I’d like to think my worth would increase with my practice, but I doubt I’ll find out. This box will serve decorative rather than functional purposes, and express my esteem rather than enhance it – I hope!
Token Box 1
Aiming for pretty rather than practical and now expressing my regard for a friend.


Save

Save

Save

Save

Save

Save

Save

Flower Patches 8 and 9

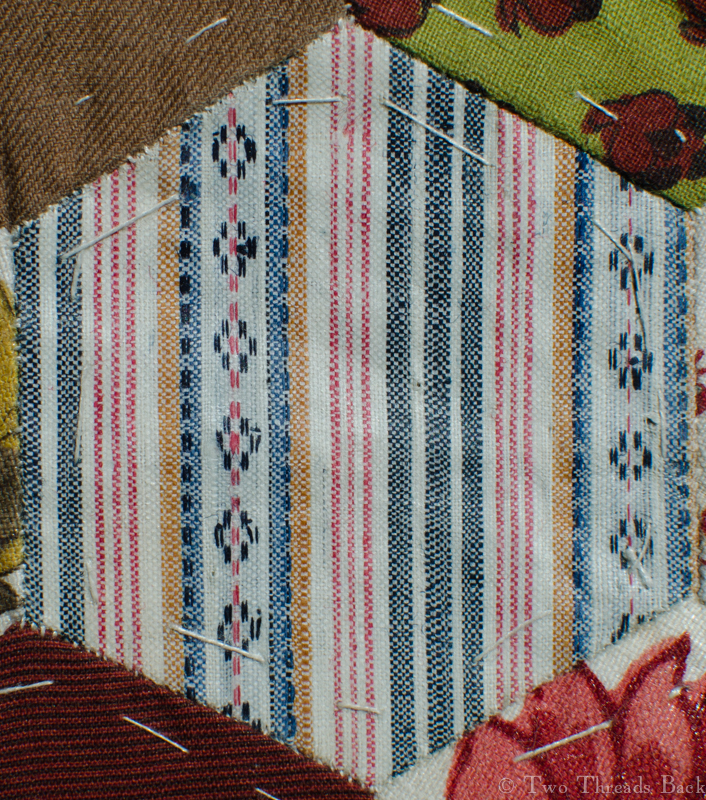
Flower Patch 09
Maybe with a button-down and sport coat?

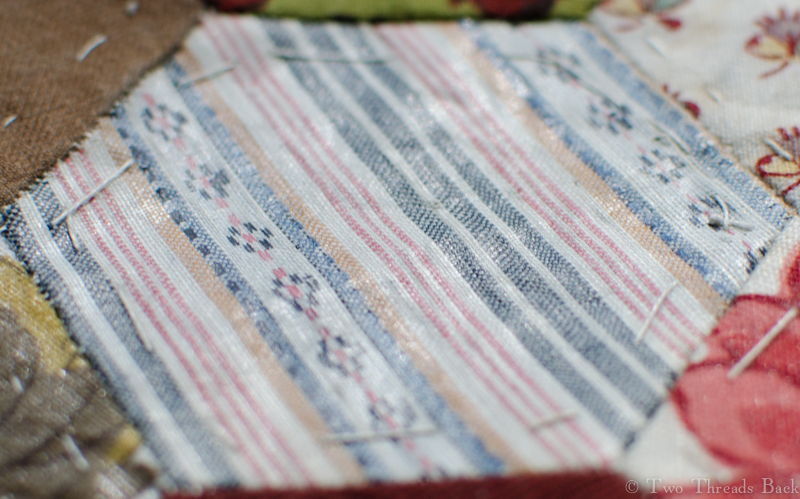
Perhaps I should have titled this “What Do You Do When Old Looks New?” These stripes are from the same early 19th century quilt as all the other Flower Patch samples, but they look so modern to me that if I weren’t completely sure about their age, I’d think someone was sneaking in new fabric. However, I’m convinced that all the different fabrics date to within the same few years. (Any fabric experts passing this way are welcome to call and opine!)

I could easily see this pattern on a man’s shirt today. But what would it have been used for then – gowns, aprons, children’s clothes? These have the same glazed finish that many of the others do, and I’ve added the very last picture to try to show that.

Flower Patch 09 Back
The same piece from the back.
Flower Patch 08
Another very contemporary looking pattern.
Flower Patch 08 Back
How appropriate for a blog: Opinion Opinion Opinion…
Flower Patch 08 Glazed
I’ve tried to show how shiny the sizing is, but you may only see a really bad photo.


Deconstruction

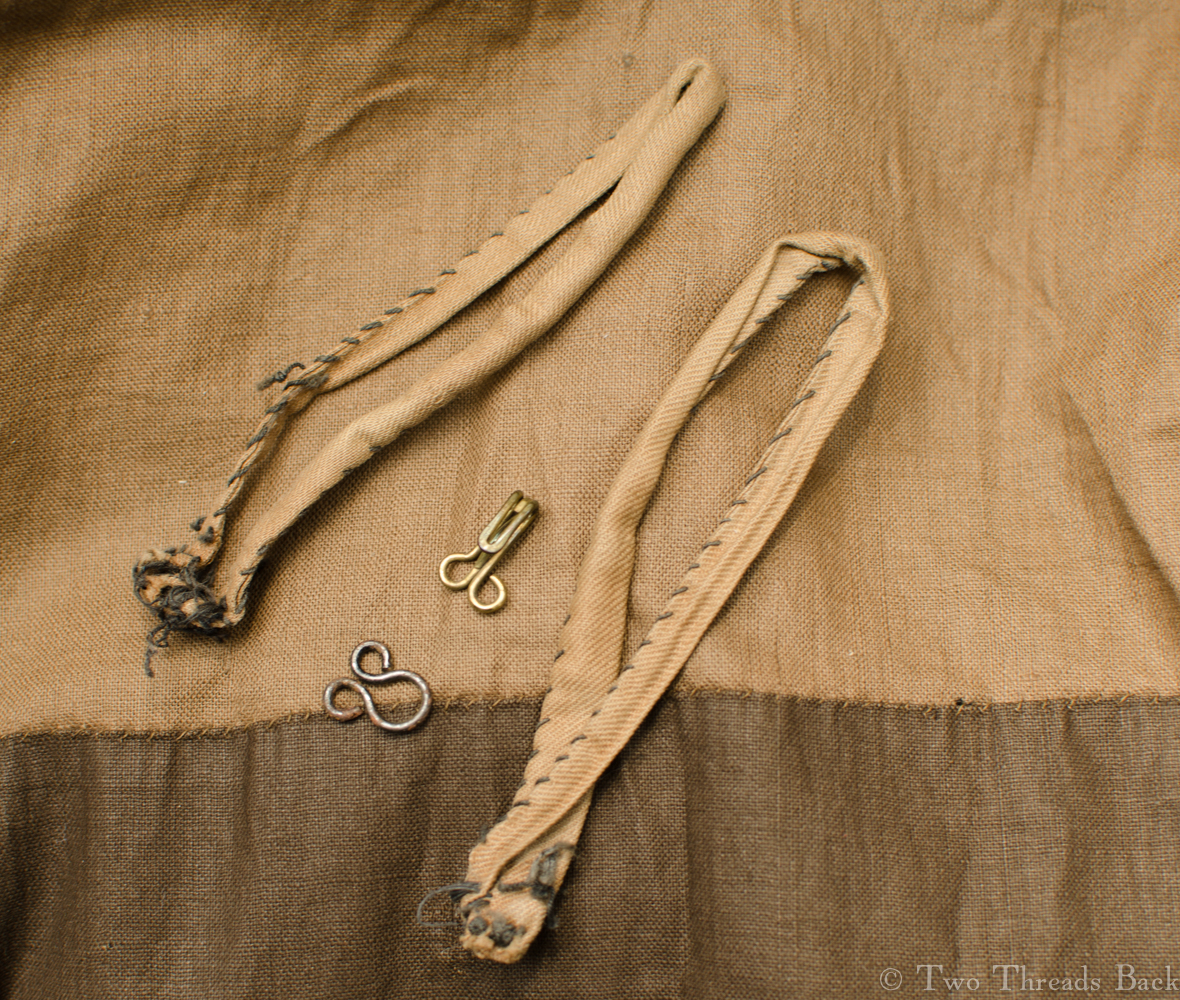
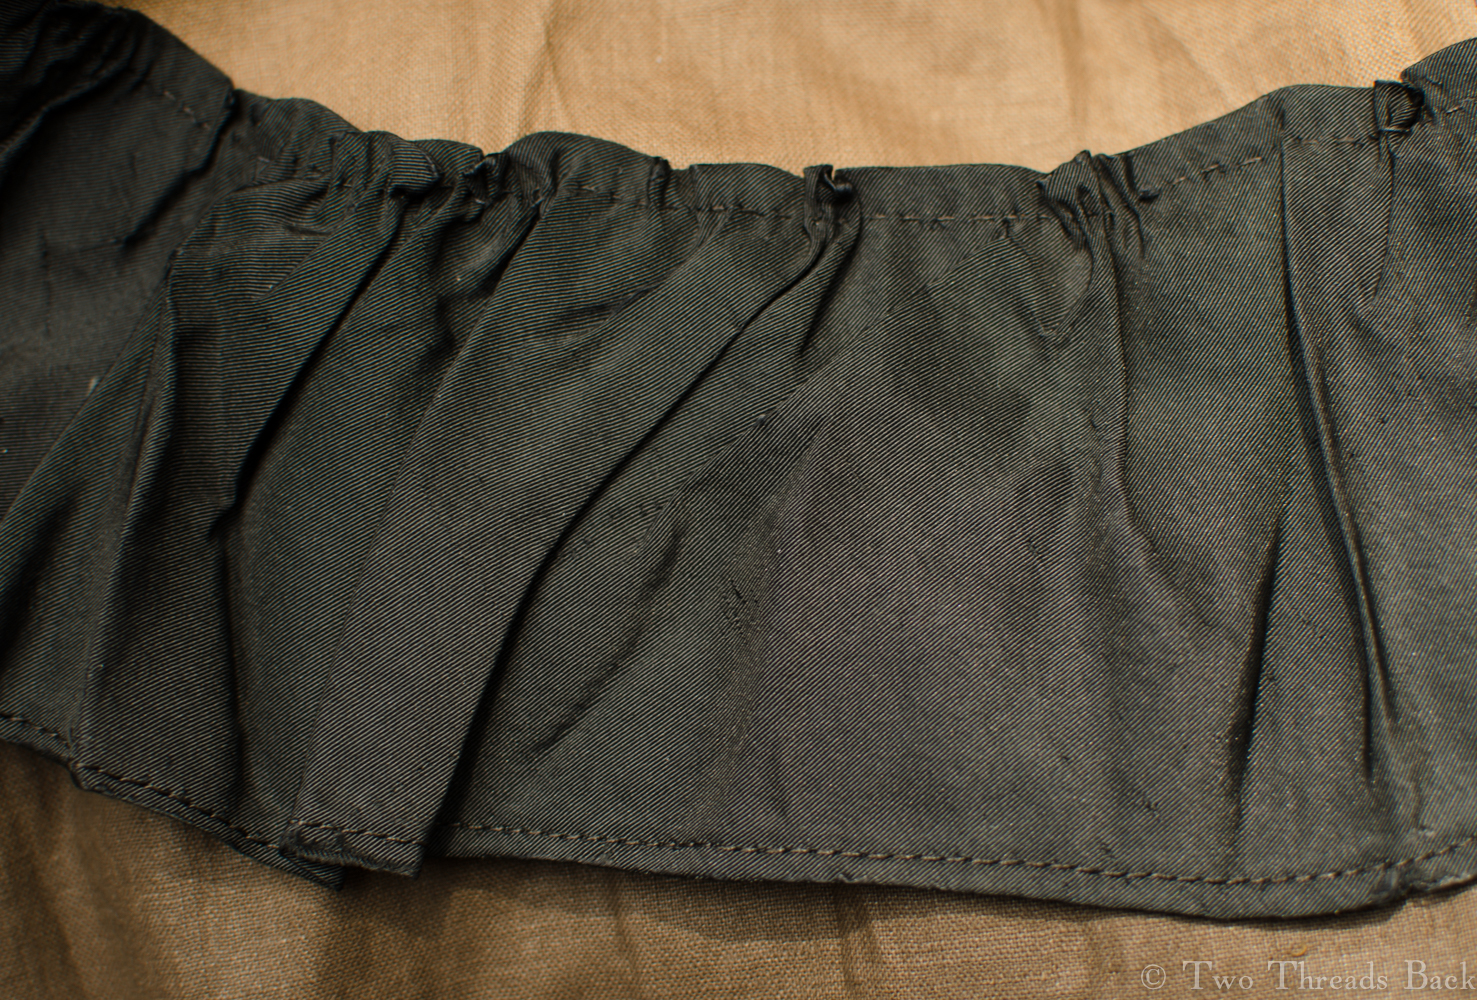
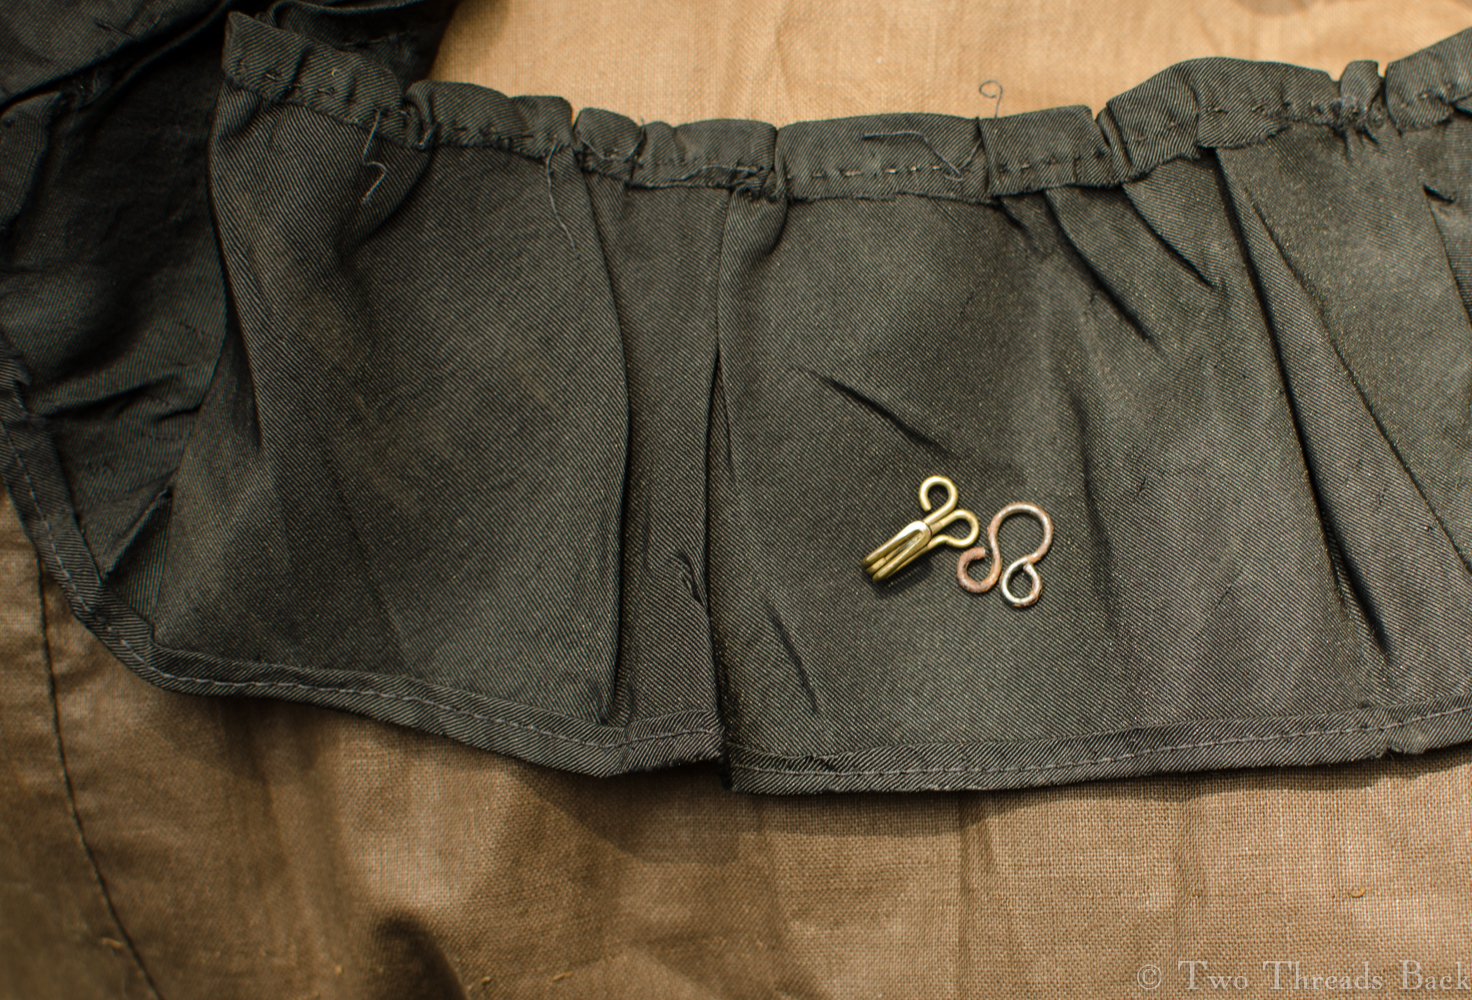
Skirt Hook

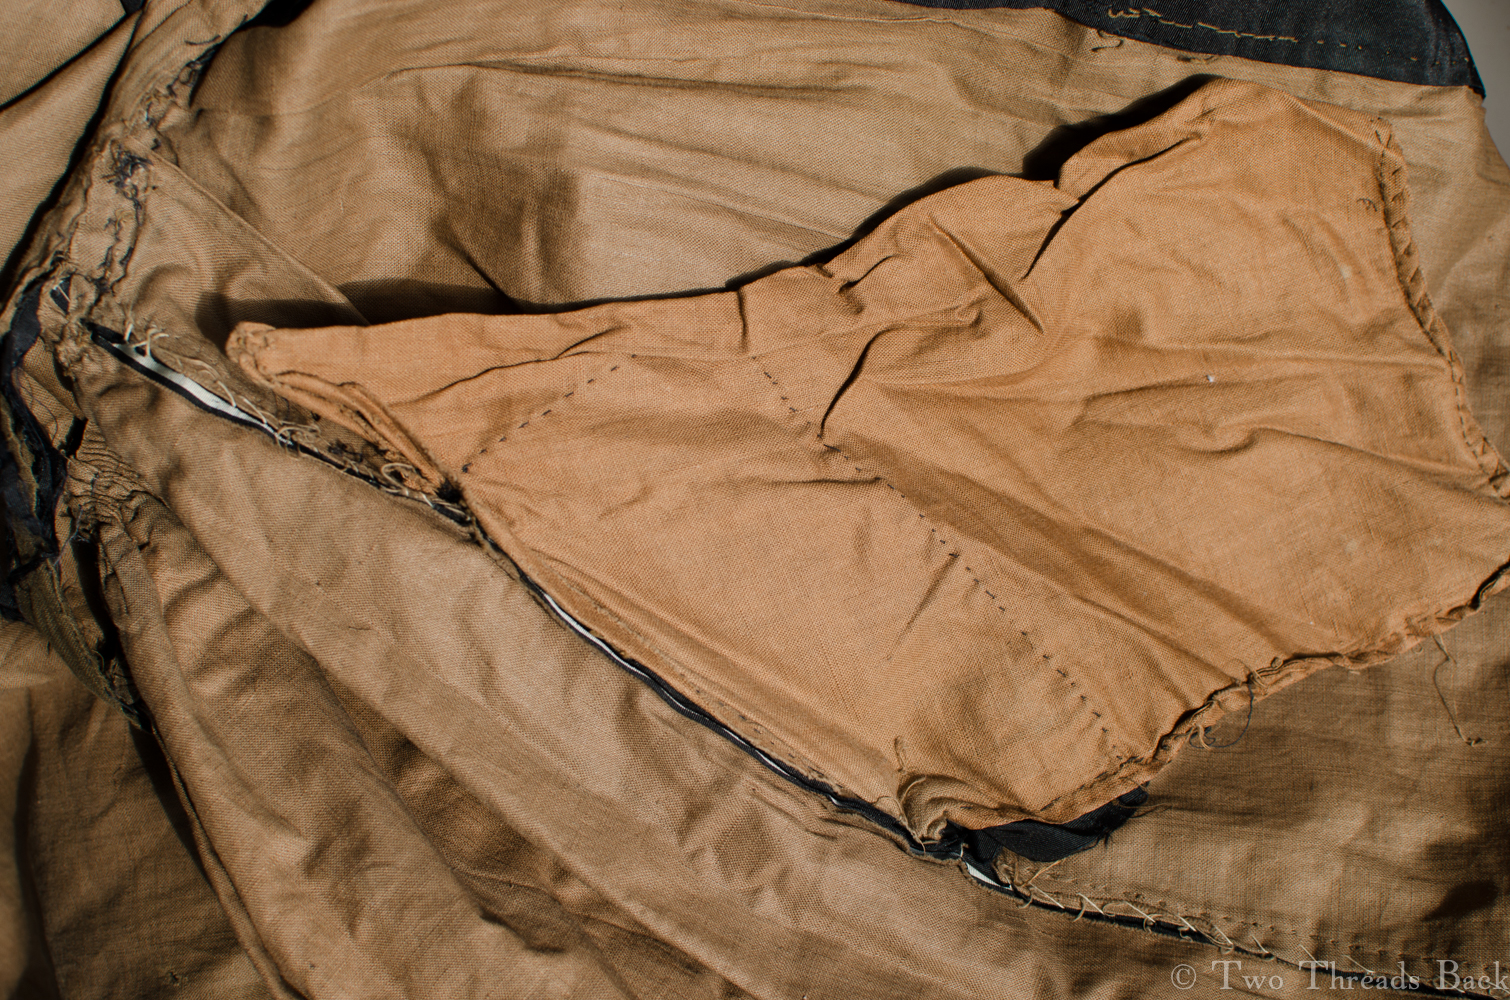
No, I’m not delving into postmodernism here, I’m talking about sewing – and unsewing! I was sitting on my porch last week, relishing the warm spring breezes and taking advantage of the bright afternoon light to salvage a sad old black silk skirt. As I worked, I realized that most of the sewing had been done by hand, and that I might pay tribute to those hands by sharing pictures before it was gone forever.
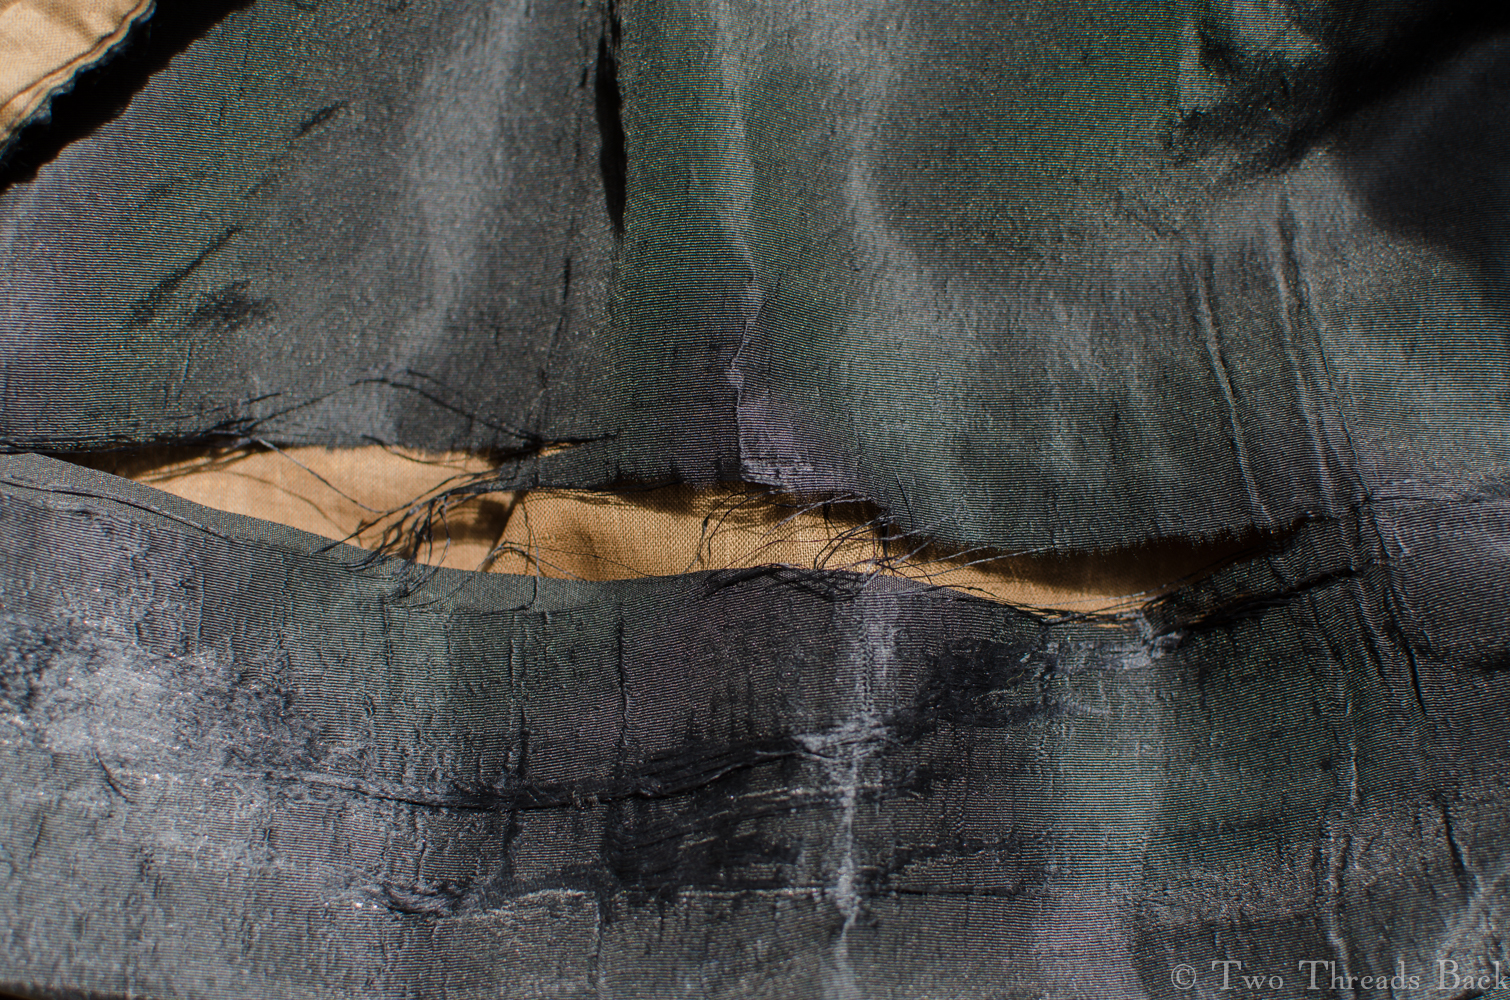
Skirt Damage
Silk damaged beyond repair.

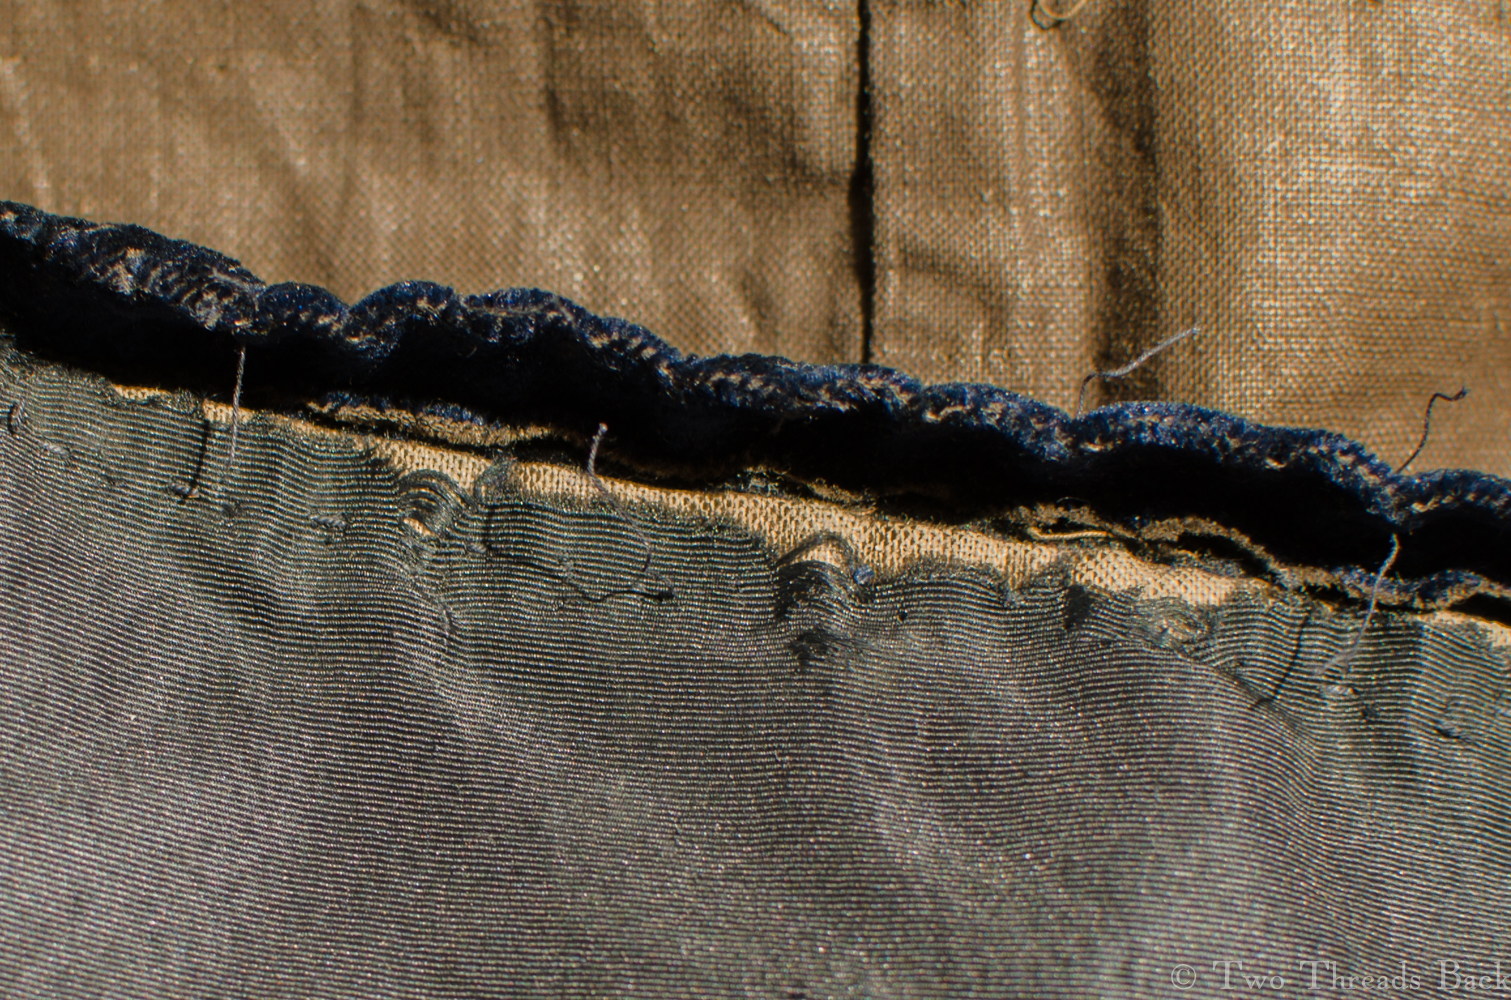
Lest you think I cannibalize antique textiles lightly, let me assure you there was no saving this piece. It was a silk faille gored skirt – of such a generic cut that I hesitate even to date it – which had begun to shred and shatter all over. The lining was in excellent condition though, so I wanted to preserve that for reuse.

Unfortunately, I didn’t think to take a picture of the whole skirt before I began. Although it might not have added much to this post since solid shiny black is notoriously hard to photograph! The cut was smooth and somewhat fitted across the front, tapering slightly toward an “A-line” silhouette, with tight gathers in the back. It had a narrow waistband, and two tiers of ruffles trimmed the hem.

Skirt Seam
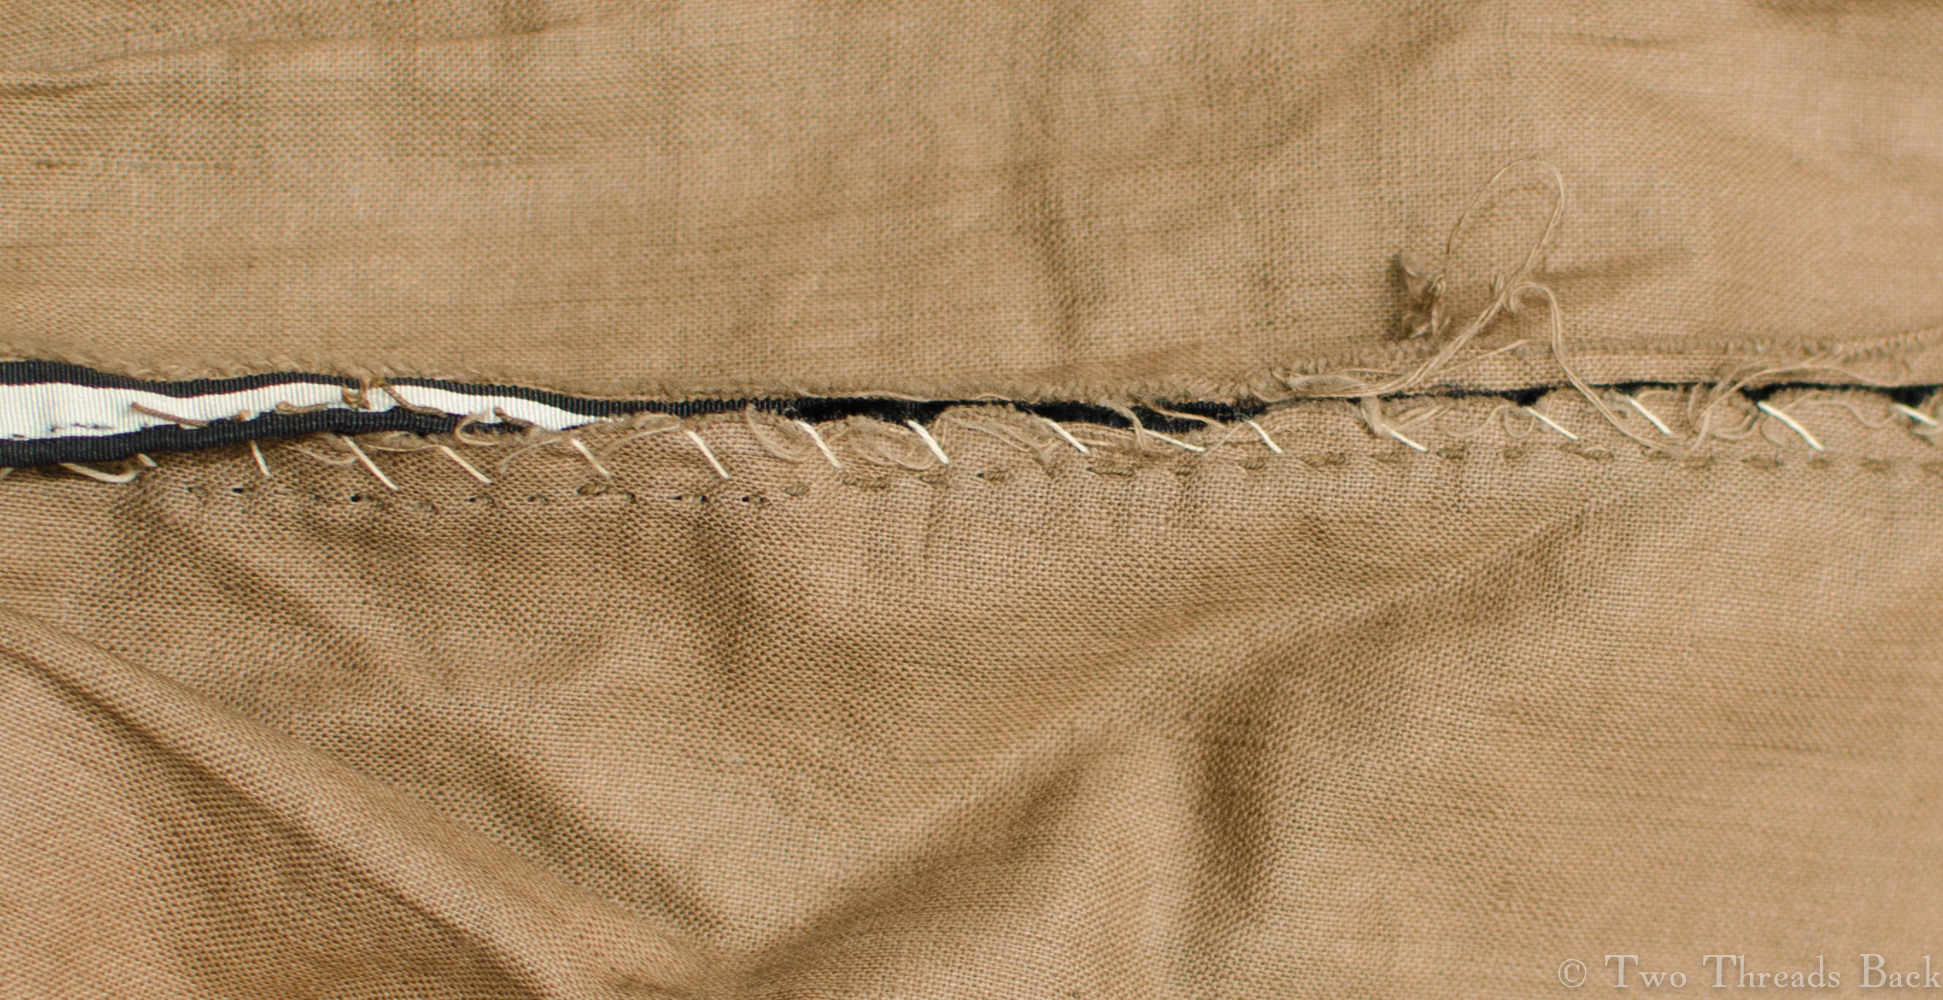
Side seam of skirt, running stitches with a few backstitches piled on for good measure.

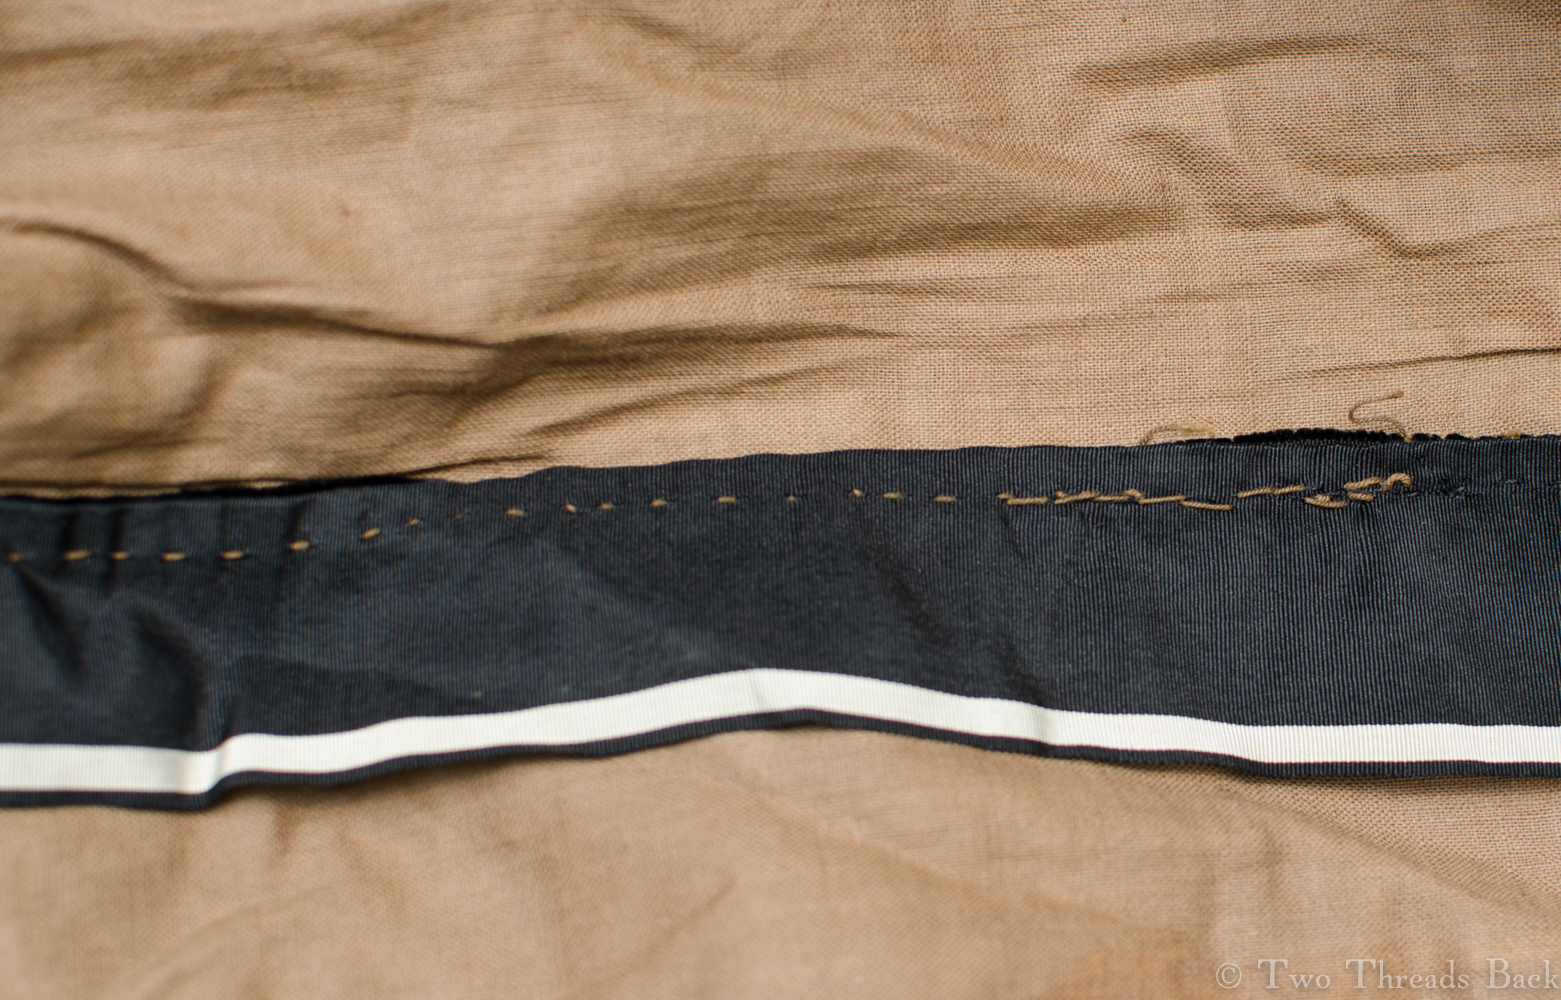
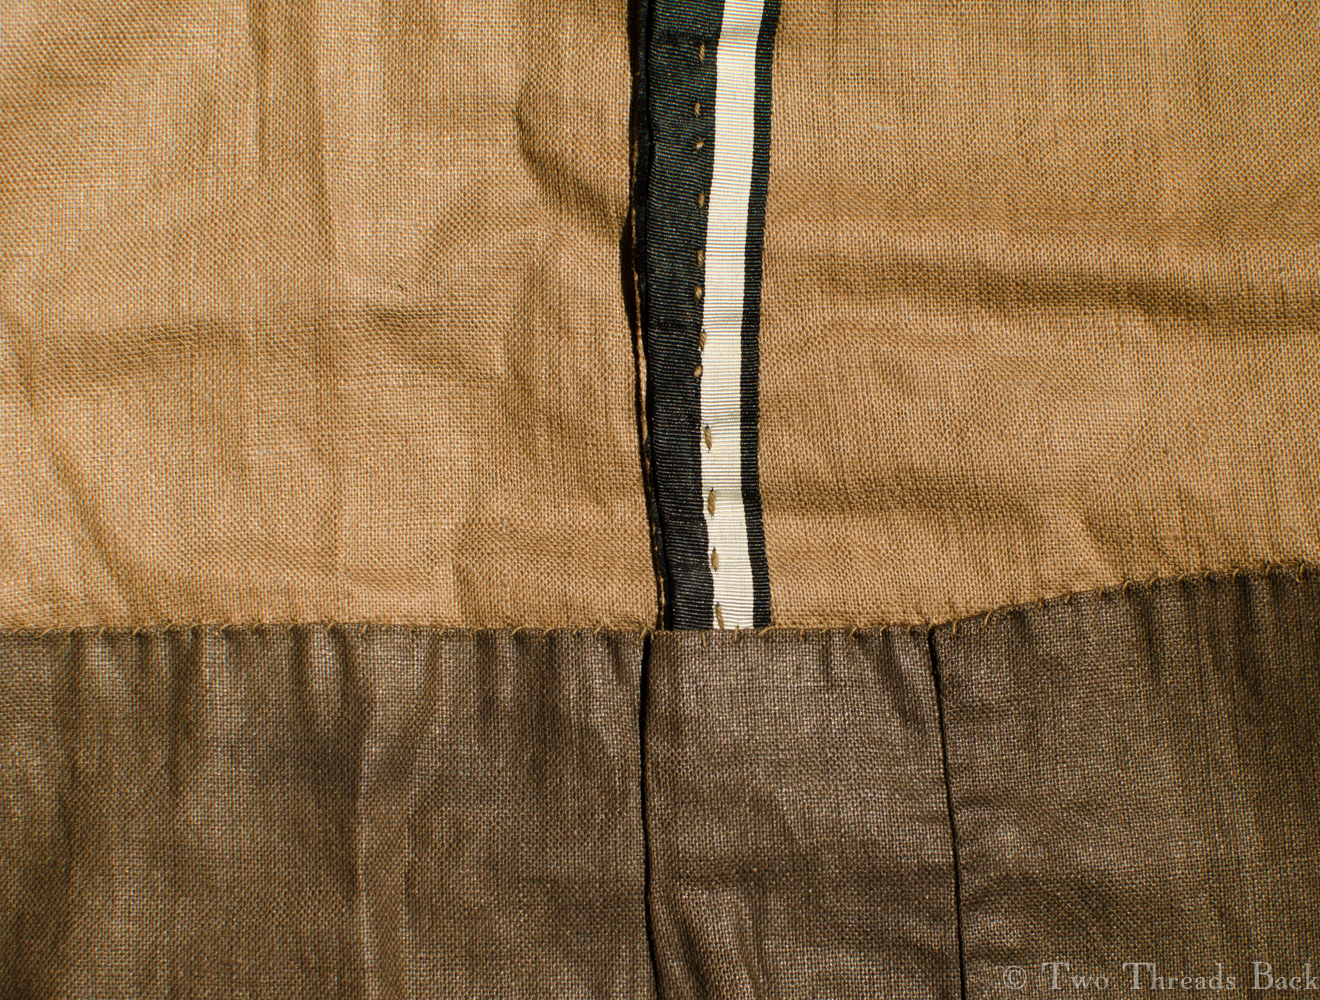
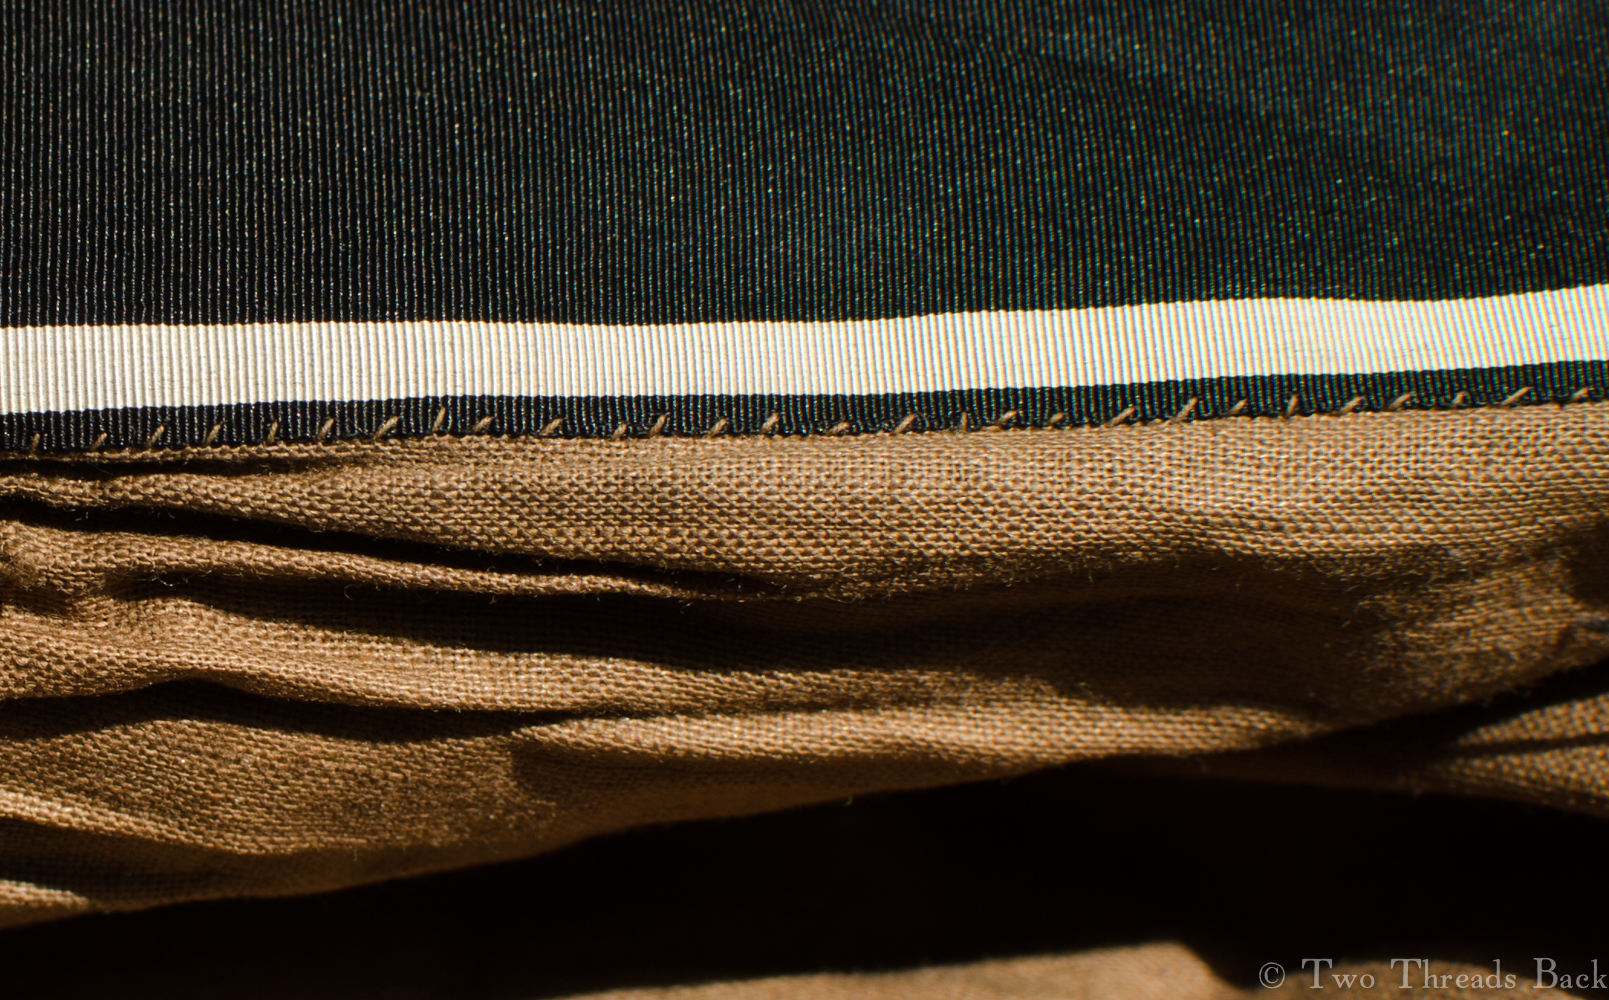
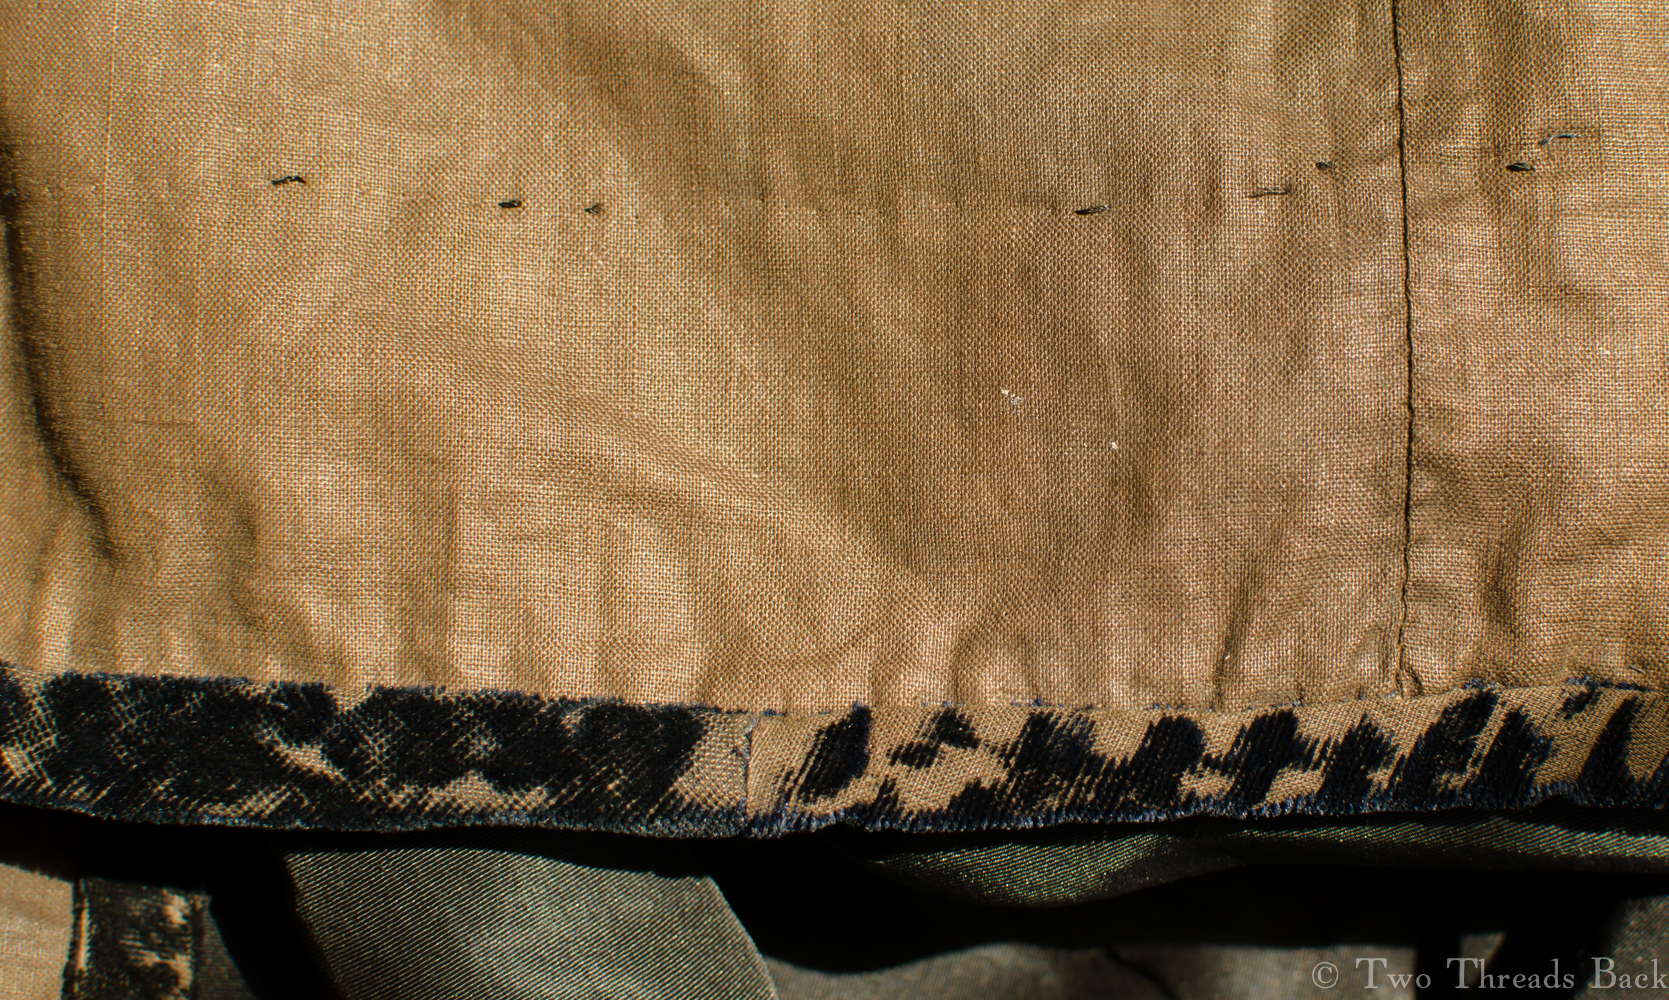
The silk fabric was about 21″ wide with white stripes along each selvage. The skirt was completely lined with the standard brown cotton, and then an extra piece of darker glazed cotton was added to the bottom ten inches. A velvet binding strip protected the edge of the hem. There was one deep pocket which looked like a later, rather clumsy, addition.

Skirt Linings
The extra lining along the lower part of the skirt is neatly hemmed down.
Skirt Pocket
A view of the pocket from inside. Maybe added later?

I hadn’t expected to find hand sewing in this piece, so I was intrigued to note the different types of stitching and thread. The long side seams used a basic running stitch made with a heavy brown cotton thread. Although the finished skirt was nice and sturdy, some of the stitches weren’t particularly neat or even.

Skirt Overcast
The only seam finishing, overcasting, was done where the lining edge was raw. I don’t think the maker was too worried about raveling.

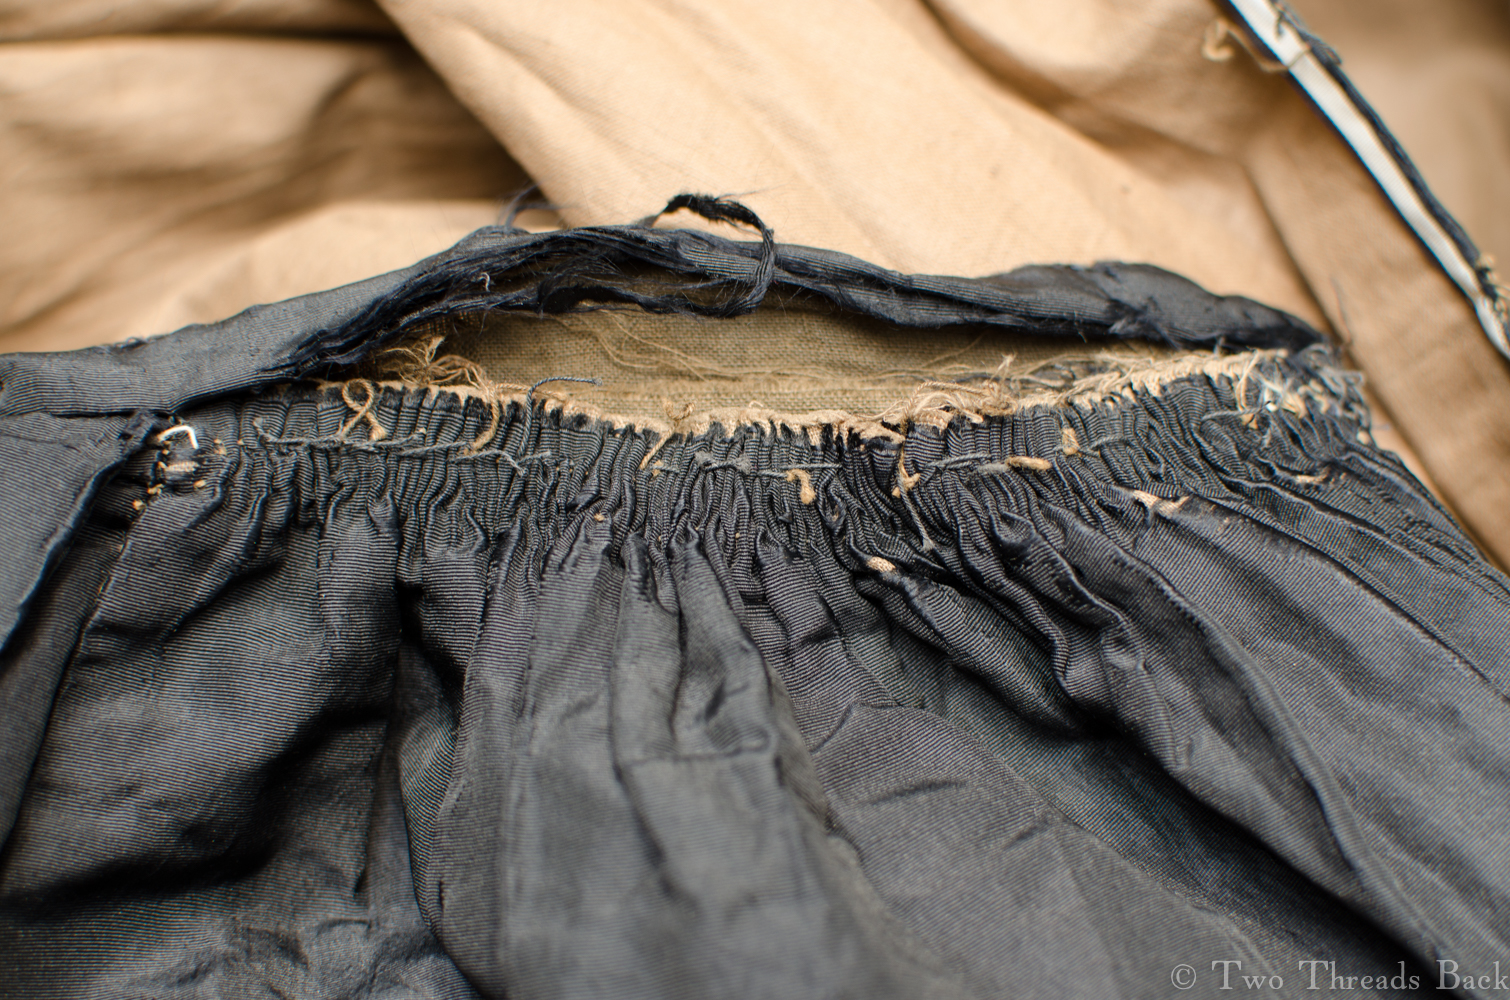
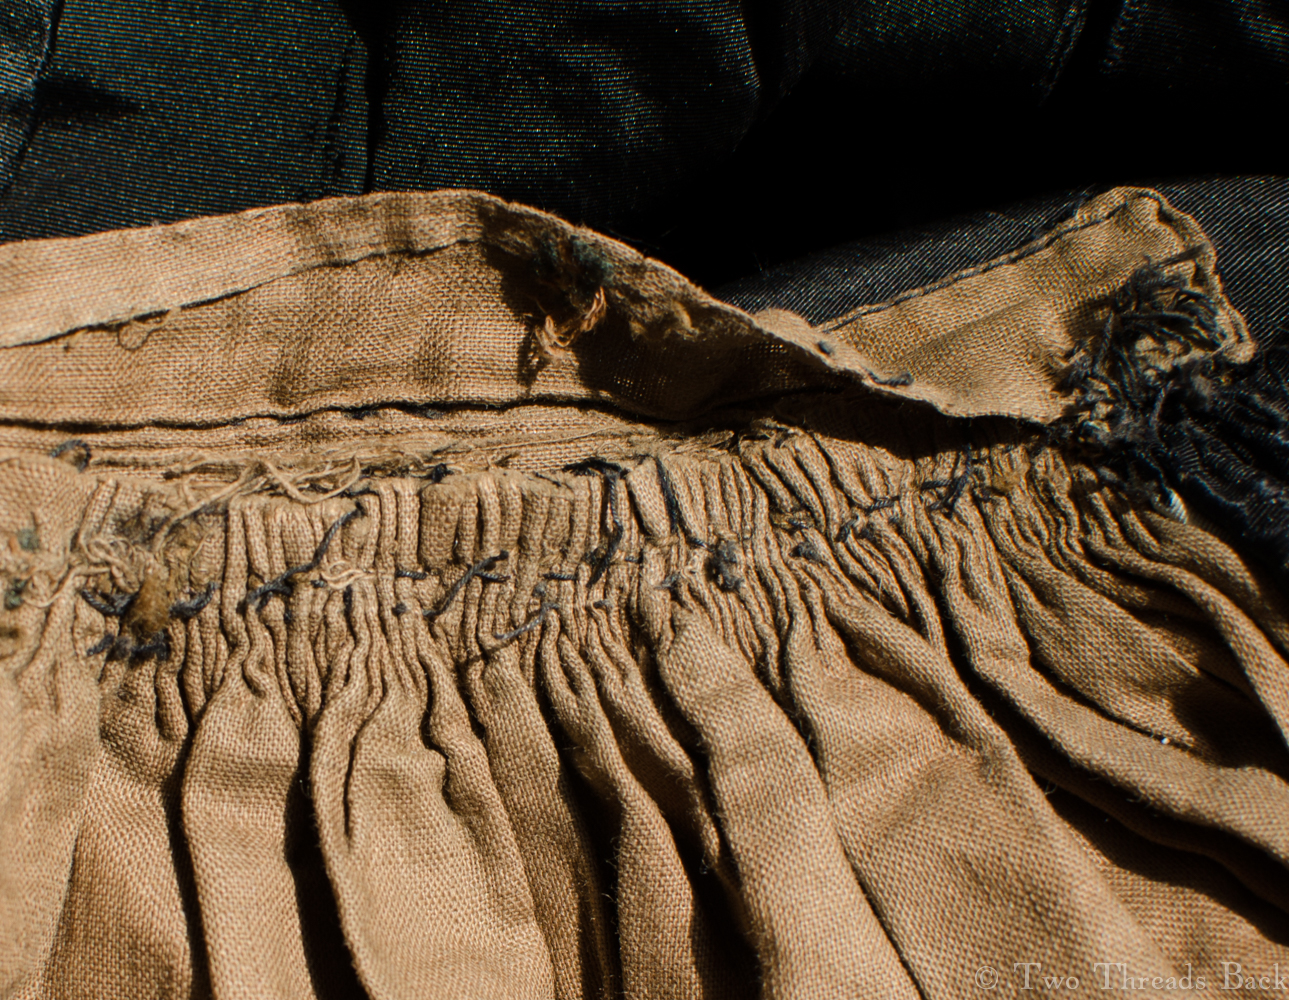
Raw edges of lining were roughly overcast with a light colored thread. The waist was “gauged” in the back. Machine work was limited to the top stitching of the waistband and the hems of the bias-cut ruffles. The only careful handwork was the finishing in some places on the lining. A brass hook and eye were the only fastening, and two loops were attached inside for hanging.

Skirt Gauge Out
The skirt back was tightly gathered using the gauging technique.
Skirt Gauge In
Here’s a view of the gathers from the inside.
Skirt Ruffle Out
The ruffle was hemmed by machine, but gathering stitches were made by hand.
Skirt Ruffle In
And it looks like they were done at high speed!
Skirt Selvedge Finish
The seamstress took extra pains when hemming down the inside of the placket opening with a finer weight thread.
Skirt Velvet Out
It was common in the 19th century to finish skirt hems with a sturdy braid, wool or velvet, to protect them from wear. It could be purchased ready-made, but this velvet strip appeared homemade.

The deconstruction process was predictably tedious, but there was one moment that’s hard to describe. I was working on the old velvet at the hem when out spilled sand and bits of twigs. The debris had obviously been locked inside for a more than a century. It was as if a shadow passed by while I worked. Who was the woman who wore this skirt? Where was she walking, what was she doing, what was she thinking on the day when her shoes kicked up that sand? I don’t suppose I’ll ever know. But I hope her afternoon was as lovely as the one I enjoyed.

Skirt Velvet In
I tried to offer a peek inside the velvet, but it’s too dark to see. I couldn’t hold the crease open with one hand and take a picture with the other!


If Mr. Darcy’s Wet Shirt Shrank

Mini Shirt 01

Yesterday a friend sent me a link to the most exciting news I’ve seen all year. Mr. Darcy’s Shirt is coming to the U.S.! Yes, you can forget Tutankhamun’s treasures or the Beauty of Xiaohe. Mr. Darcy’s shirt outranks them all.

Who can forget the (totally not in the book) scene from the 1995 Pride and Prejudice film where Mr. Darcy rises from the lake at Pemberley after his swim, only to run into the startled and stunned Miss Elizabeth Bennett? Be still my heart.

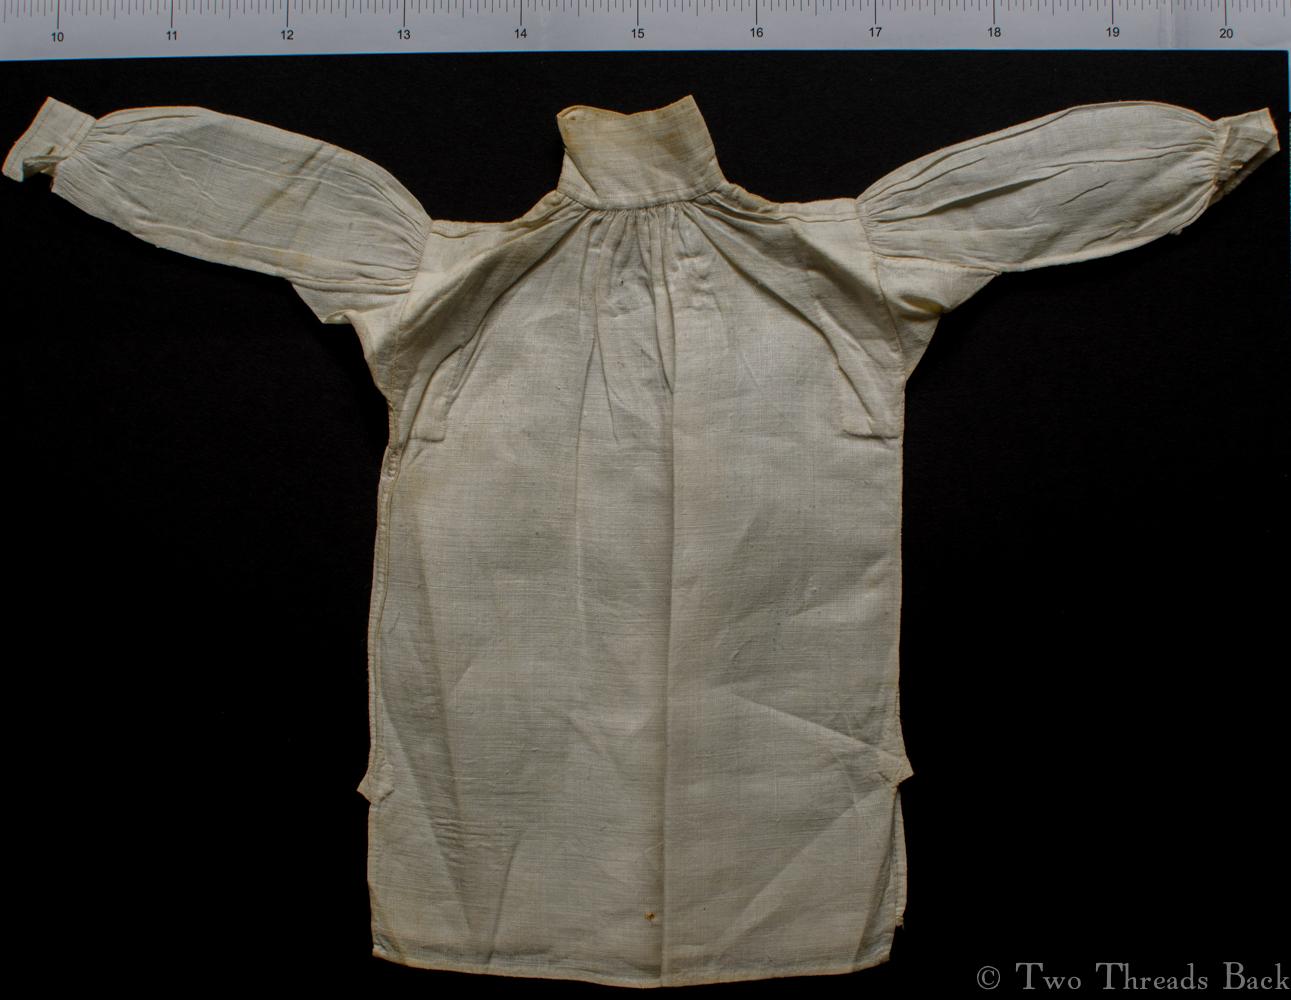
Unfortunately I won’t get to see the celebrity shirt on display, so I’ll have to content myself with a miniature version. This is a tiny “sampler” shirt dated 1838, very much like the square-cut linen one that embarrassed the soggy Colin Firth and melted the rest of us.

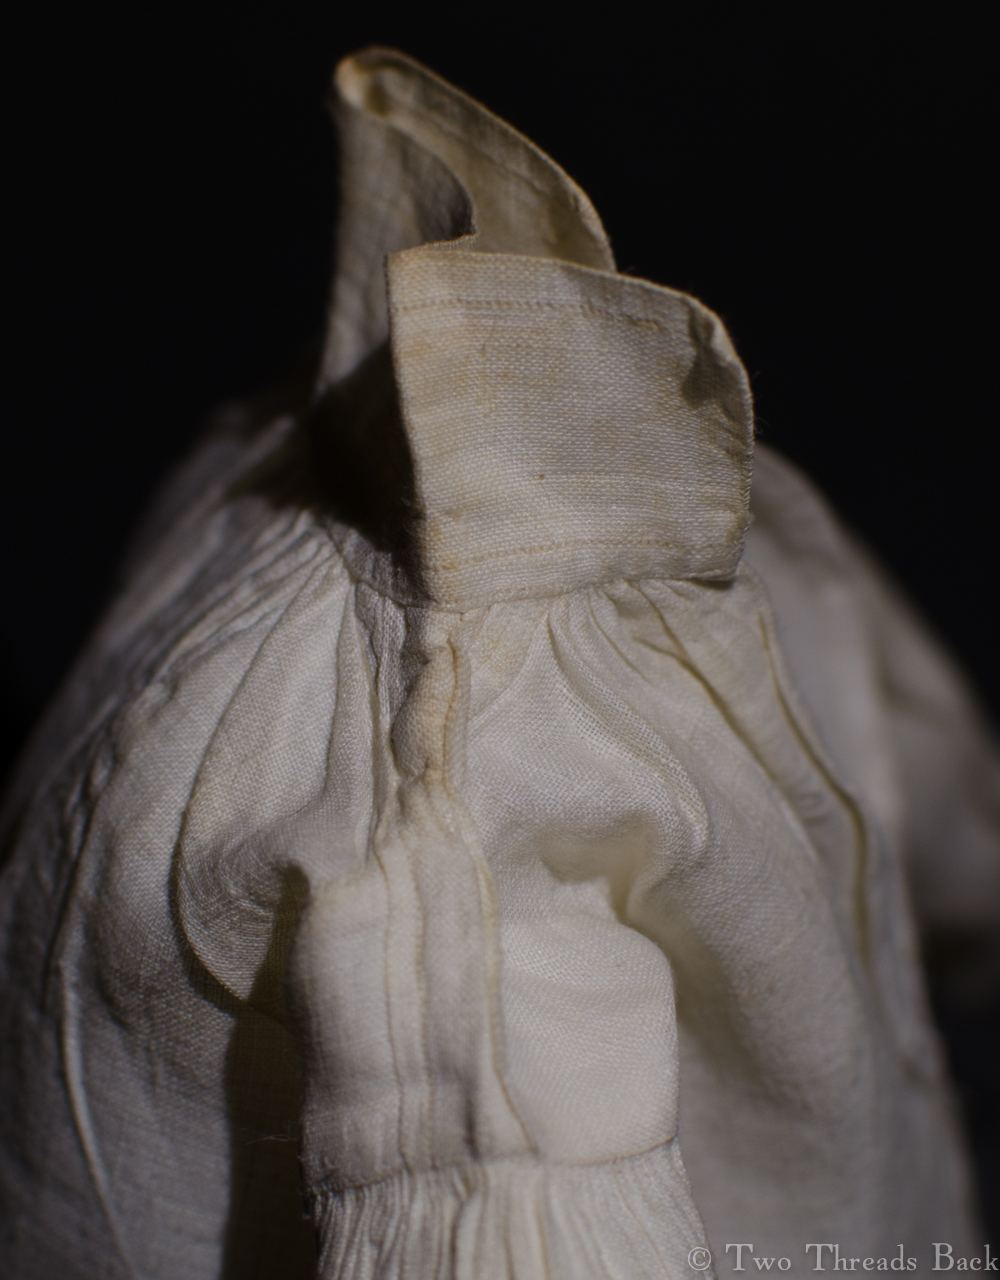
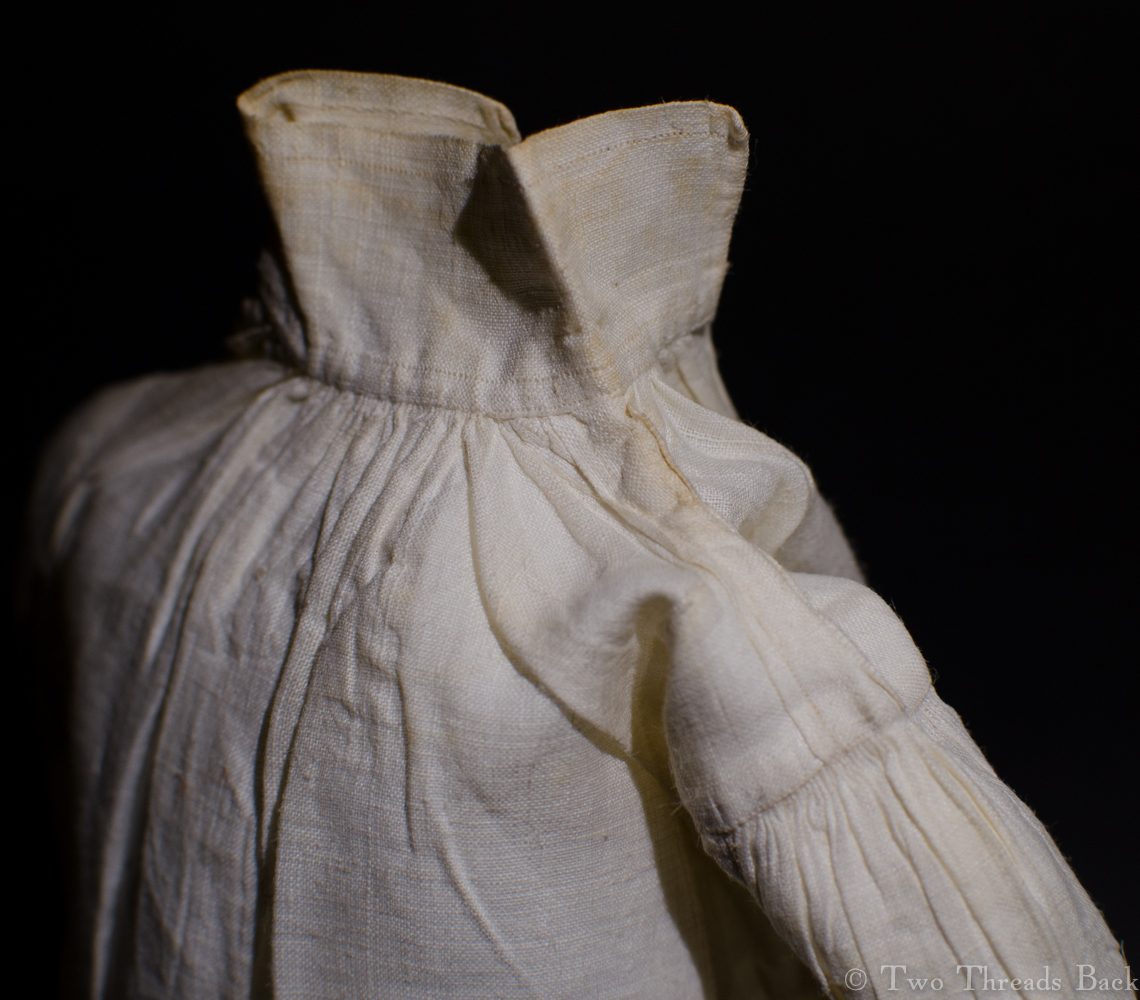
It measures 7 inches from the top of the tall collar to the hem. The cuff is 1 and 3/8  by 1/2 inch. The backstitches per inch are so small that I cannot count them. There are microscopic gussets on the collar, the sleeve openings at the wrists, and the side flaps. Oh, and of course there are the underarm gussets that are a whopping 1 inch long.

Mini Shirt 02
The back – notice the “binders” which line the armscyes inside the shirt.
Mini Shirt 03
Here you can see the tiny collar gusset, over which the “shoulder strap” lies.
Mini Shirt 08
A view of the shoulder strap which is backstitched on both edges.

Mini Shirt 05

Mini Shirt 09
The sleeves are set into the body with gathering and stroking.
Mini Shirt 04
You can barely see the diminutive gusset at the end of the sleeve opening. Its purpose was to allow ease, so the shirt would be less likely to tear at that joined seam.
Mini Shirt 10
This cuff has come unstitched, and you can see how tiny the sewn gathers are.
Mini Shirt 07
Here is a view of the gusset for the side flaps of the shirt, also meant to reduce tearing and the seam.

Colin Firth in a wet linen shirt, or a sampler made by tiny fingers in days long gone? I don’t know which one makes my heart beat faster: the man-sized or the miniature. But who would shrink from a closer examination of either?

Pin Money

Pin Money 3
PIN MONEY – money allowed by a man to his wife to spend for her own personal comforts. When pin money is given to, but not spent by the wife, on his death it belongs to his estate. ~A Law Dictionary: Adapted to the Constitution and Laws of the United States, 1843. (You may detect some irony here.)

Pin Money 1Most of us are familiar with the important social justice issues of the 19th century, causes like abolition and child labor. But there was another one that became quite fashionable to champion: the plight of workers who fashioned fashions. Women who worked as seamstresses, dressmakers, and milliners were vulnerable to exploitation, and as the pathos and romance of their situation caught public fancy, there was a flurry of response in literature, art, “committees,” laws, private philanthropy and even investigative journalism.

The seamstress who sewed shirts was the poster-child for the cause; you can see one period image I used in a post a few years ago here. Shirt-making was tedious and poorly paid, but the pattern was simple and most of the women who could sew knew how to make one. There was also a steady market for the product, at least until the sewing machine and mass production made hand sewn shirts obsolete.

Dressmaking was different. It required greater skill and was more susceptible to the whim of the patron (and employer if a woman worked for a dressmaking establishment) and vagaries of the trade. But it retained some shreds of respectability as a way to earn a living for those women who were not born to the working class, and yet found themselves with no means of support.

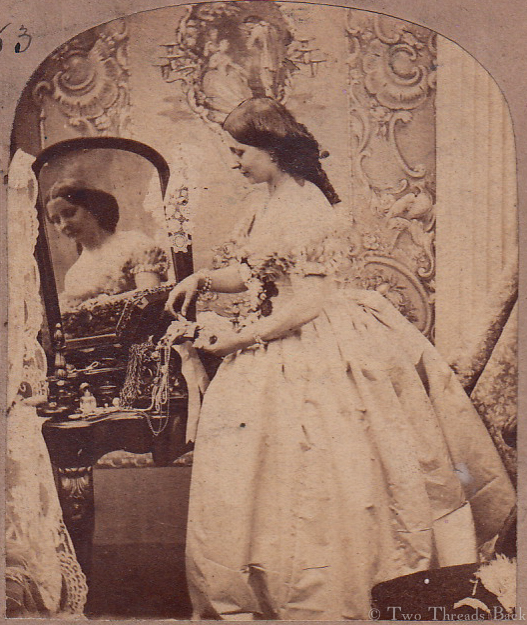
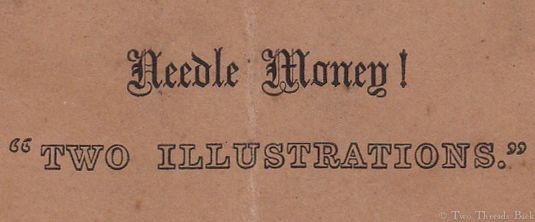
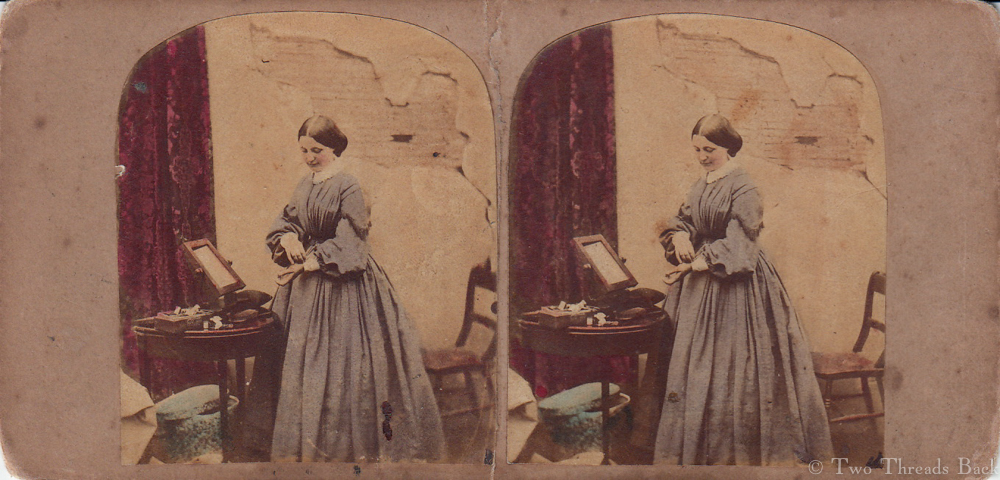
The images here are from a set of stereoviews, the one above titled “Pin Money,” with the model carelessly displaying her wealth of finery. The other is called “Needle Money,” implying that the plainly dressed lady in shabby surroundings must be earning her bread with her needle.

Needle Money 3Needle Money 1

Apparently public sympathy didn’t quite translate into action – or not enough to bring about significant change. A decade or two after Thomas Hood’s famous poem The Song of the Shirt appeared, the image of the genteel but impoverished worker persisted. The poem below was by Francis Charles Weeden, c1860s. It was republished with the explanation:

* These two poems are printed, as written by the author, in juxtaposition, to make the contrast more striking.

Pin Money Poem 1
I haven’t copied the whole poem, since the point and tone are pretty obvious. Victoria was reigning, but so was sentimentality!

Many bloggers have covered the subject, so if you’re interested try a search for “song of the shirt” – it will get you started. If you prefer the old-fashioned-read-a-book way, try The Ghost in the Looking Glass, by Christina Walker – not recent, but fascinating!

Pin Money 2

Needle Money 2
Notice anything about the models?

Sadly, the days of sweatshops aren’t gone forever. If you want to help, here’s one place to start.

Helping Mama Quilt

Helping Quilt 1
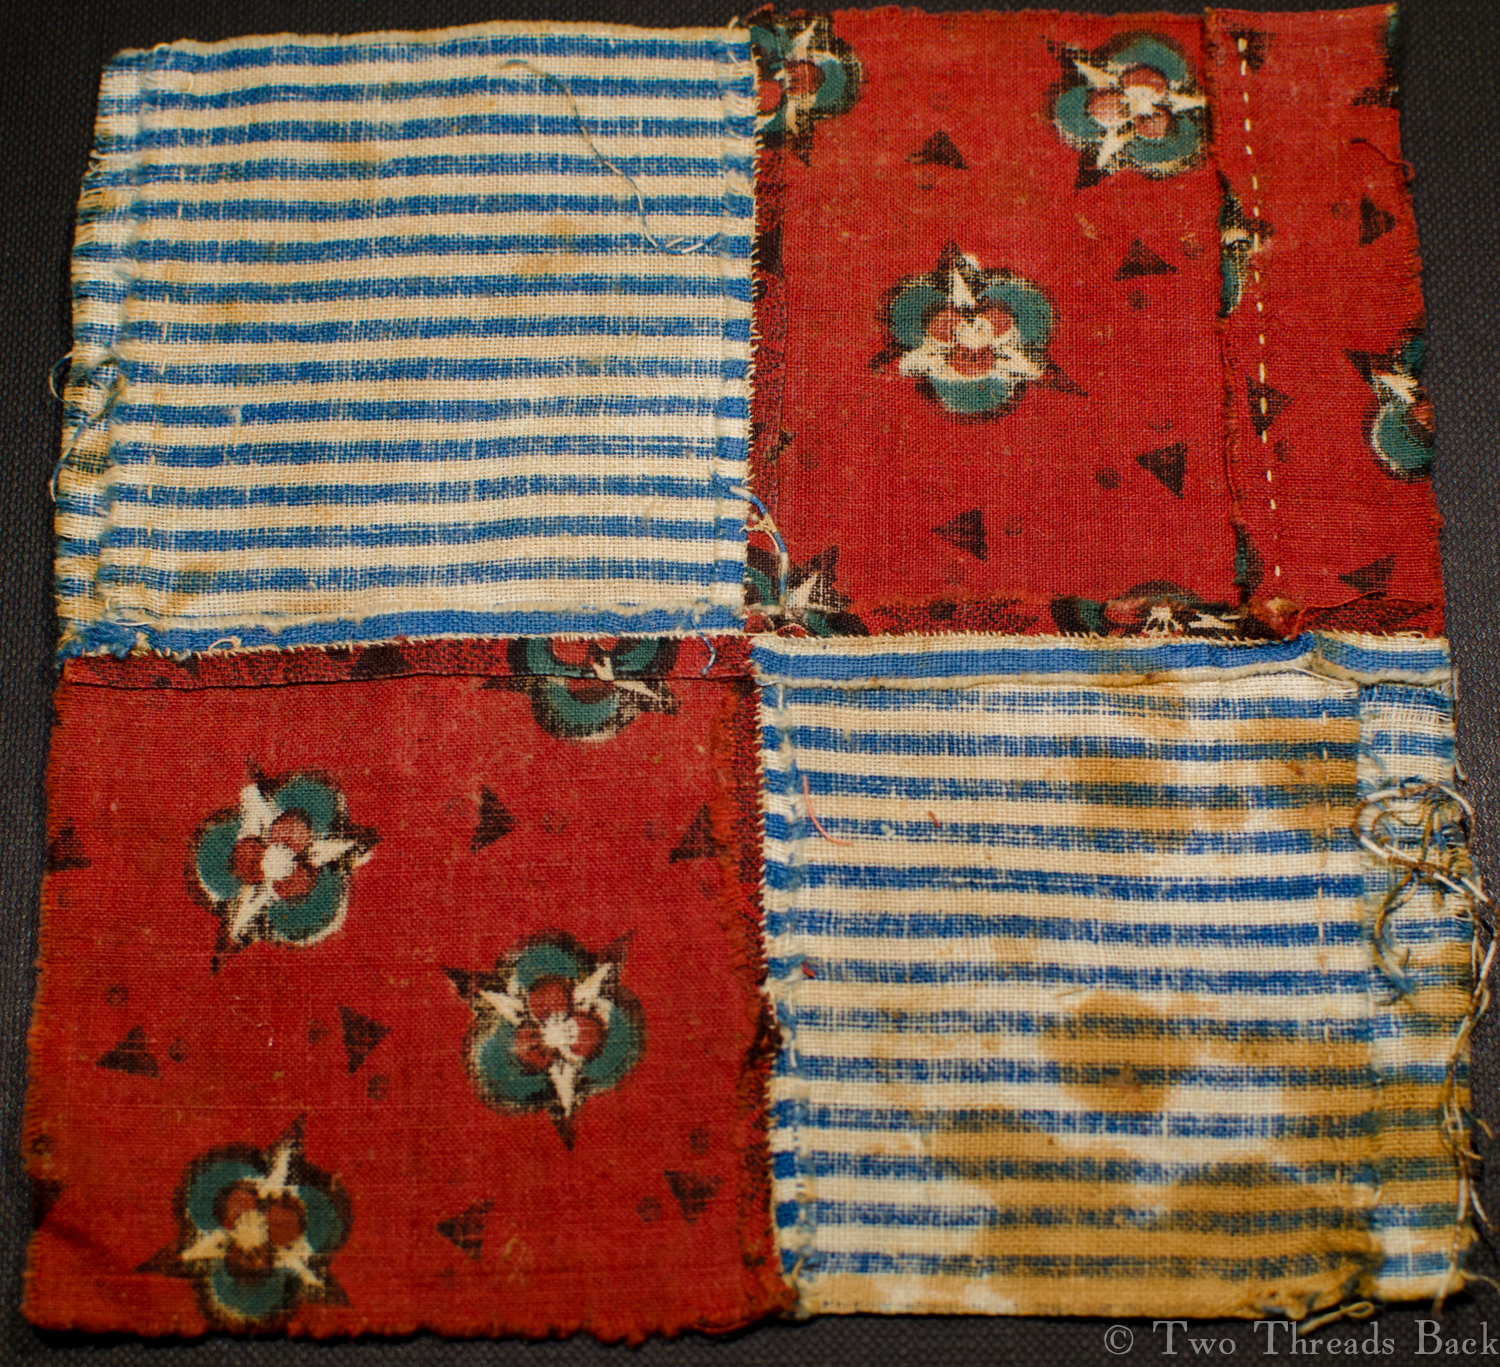
Mary’s neat sewing, with the squares joined by “seaming.” The finished block measures 5 1/2 inches square.

There once was a lady who lived and sewed in New England, way back around 1810. She had a little girl who wanted to help, and so she taught her how.

This lady (I’ll call her Mary because there’s a 27.4% chance that was her real name) was making a simple quilt out of four patch squares. Calico was dear, so she used every teensy scrap she had to make the patches.

Helping Quilt 2
This is a view of the back showing Mary’s careful piecing. The narrowest blue striped bit measures 3/8″ inch, not including the seam allowance.

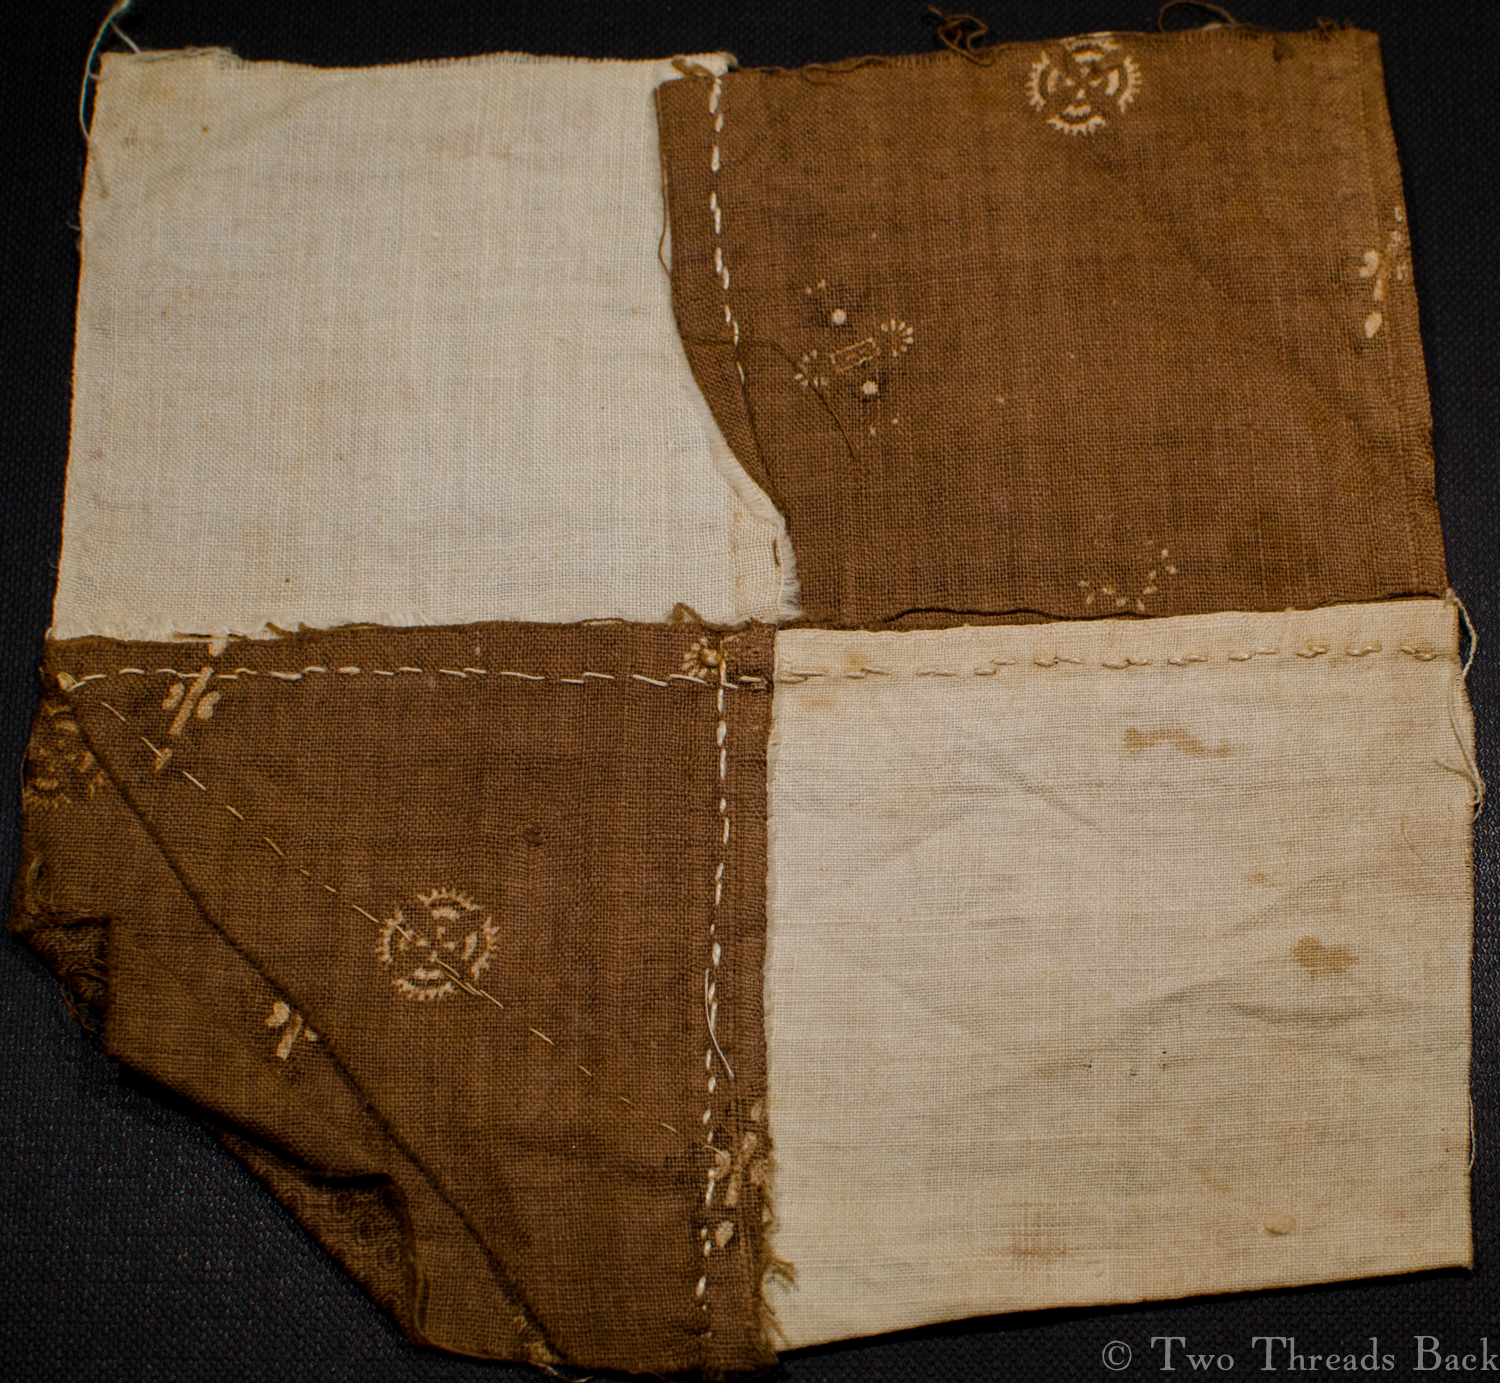
She gave Betsy (I’ll call Mary’s daughter Elizabeth because there’s a 14.3% chance that was her real name) some squares to practice on. Betsy wanted the pretty patterns to work with, but Mary was reluctant to use those for lessons, so she compromised. One print, one plain.

Helping Quilt 3
Betsy’s finished square. Do you notice something a little odd here?

Well, Betsy finished her block, and Mary finished 89 others. Then she packed them all away. They were never made up, but remained in a box in the attic for 200 years. Don’t you wonder why?

Helping Quilt 4
Betsy’s work from the back. Yes, her stitches are a little clumsier than Mary’s, but she was learning. And they’re straighter than mine – go Betsy!

Helping Mama

Helping Mama 1

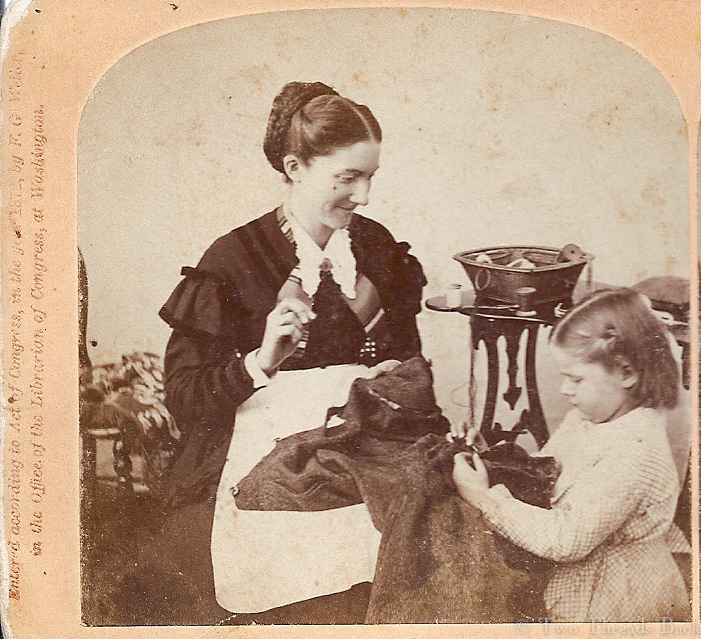
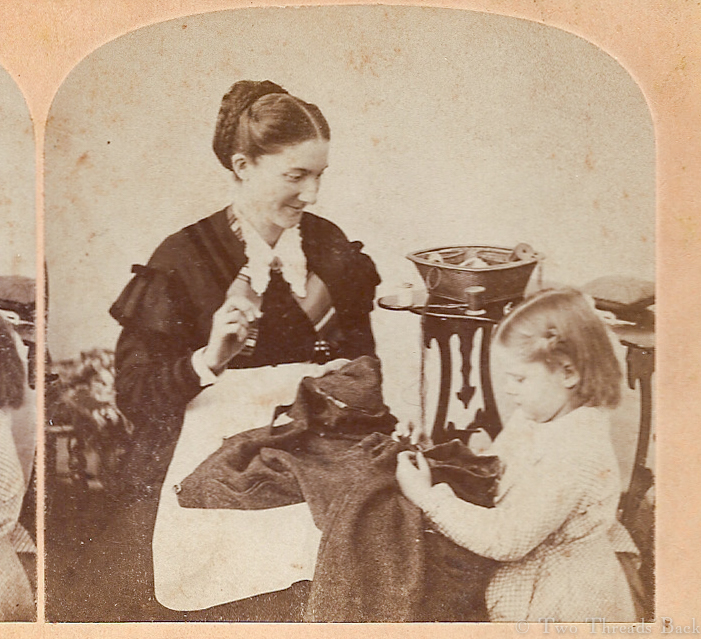
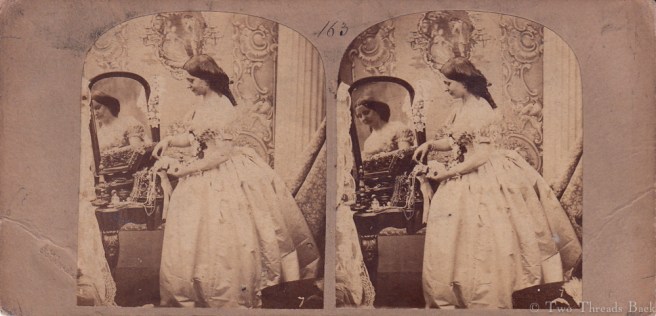
It’s time to jump forward a hundred years from the subject of my last post. Here’s a peek at a pleasing, albeit staged, scene of domestic happiness. I love these old stereoviews because the photographers often took such pains with the props, trying to tell a story. And if the subject is sewing or 19th century domestic life, that makes me very happy!

Helping Mama 2
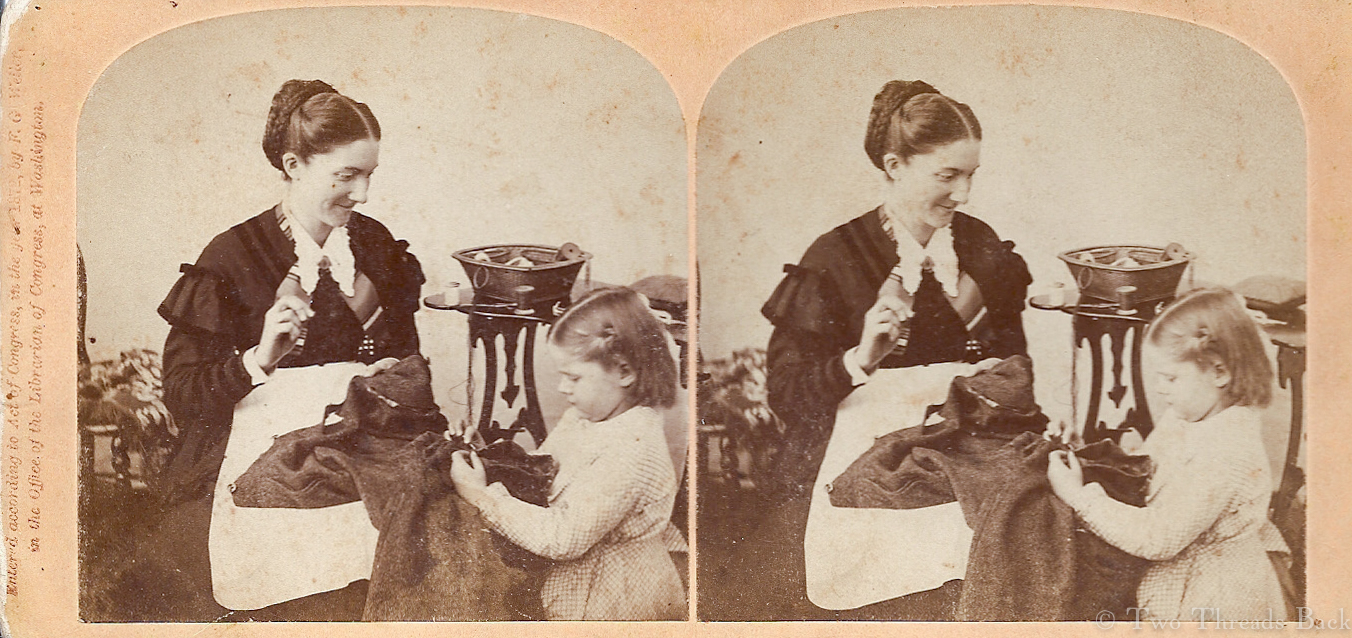
The photo on the right side, because sometimes they’re slightly different.

In this picture, it looks like Mama is mending Papa’s pants. Her daughter seems barely old enough to hold a needle, but is earnestly attempting to help. Is Mama wearing an apron over her silk dress? It certainly looks like she’s sporting a fashionable chignon. (That late ’60s, early ’70s hairstyle was sometime over-the-top and subject to ridicule.)

She may be seated in a woven cane chair, and she definitely has a sewing basket beside her on the table. It looks like the kind with small pockets fixed to the sides. The little girl’s checked dress may be an apron or pinafore, though I can’t quite tell.

This card is dated 1872, but I’ve seen another version dated 1871. Mama sewing, daughter sewing: seeing double indeed!

Helping Mama 3
The stereoview card, full size.